I am beginning to move into the inside of my tiny house, to insulate and to put up the pine paneling. A little bit ago I put up some of the pine paneling on the interior wall for what will become the back of the closet. I had wanted to get back to the tiny house to keep putting up the walls, but some work pulled me away and then it rained, a lot.
The result was the wood paneling swelled up as it absorbed the moisture in the air. Before anyone ask, yes I did have the wood sitting out in the space to normalize, but with so much rain and the house not being climate controlled yet, the moisture did its damage. This also happened before I could seal the panels, so that didn’t help either.
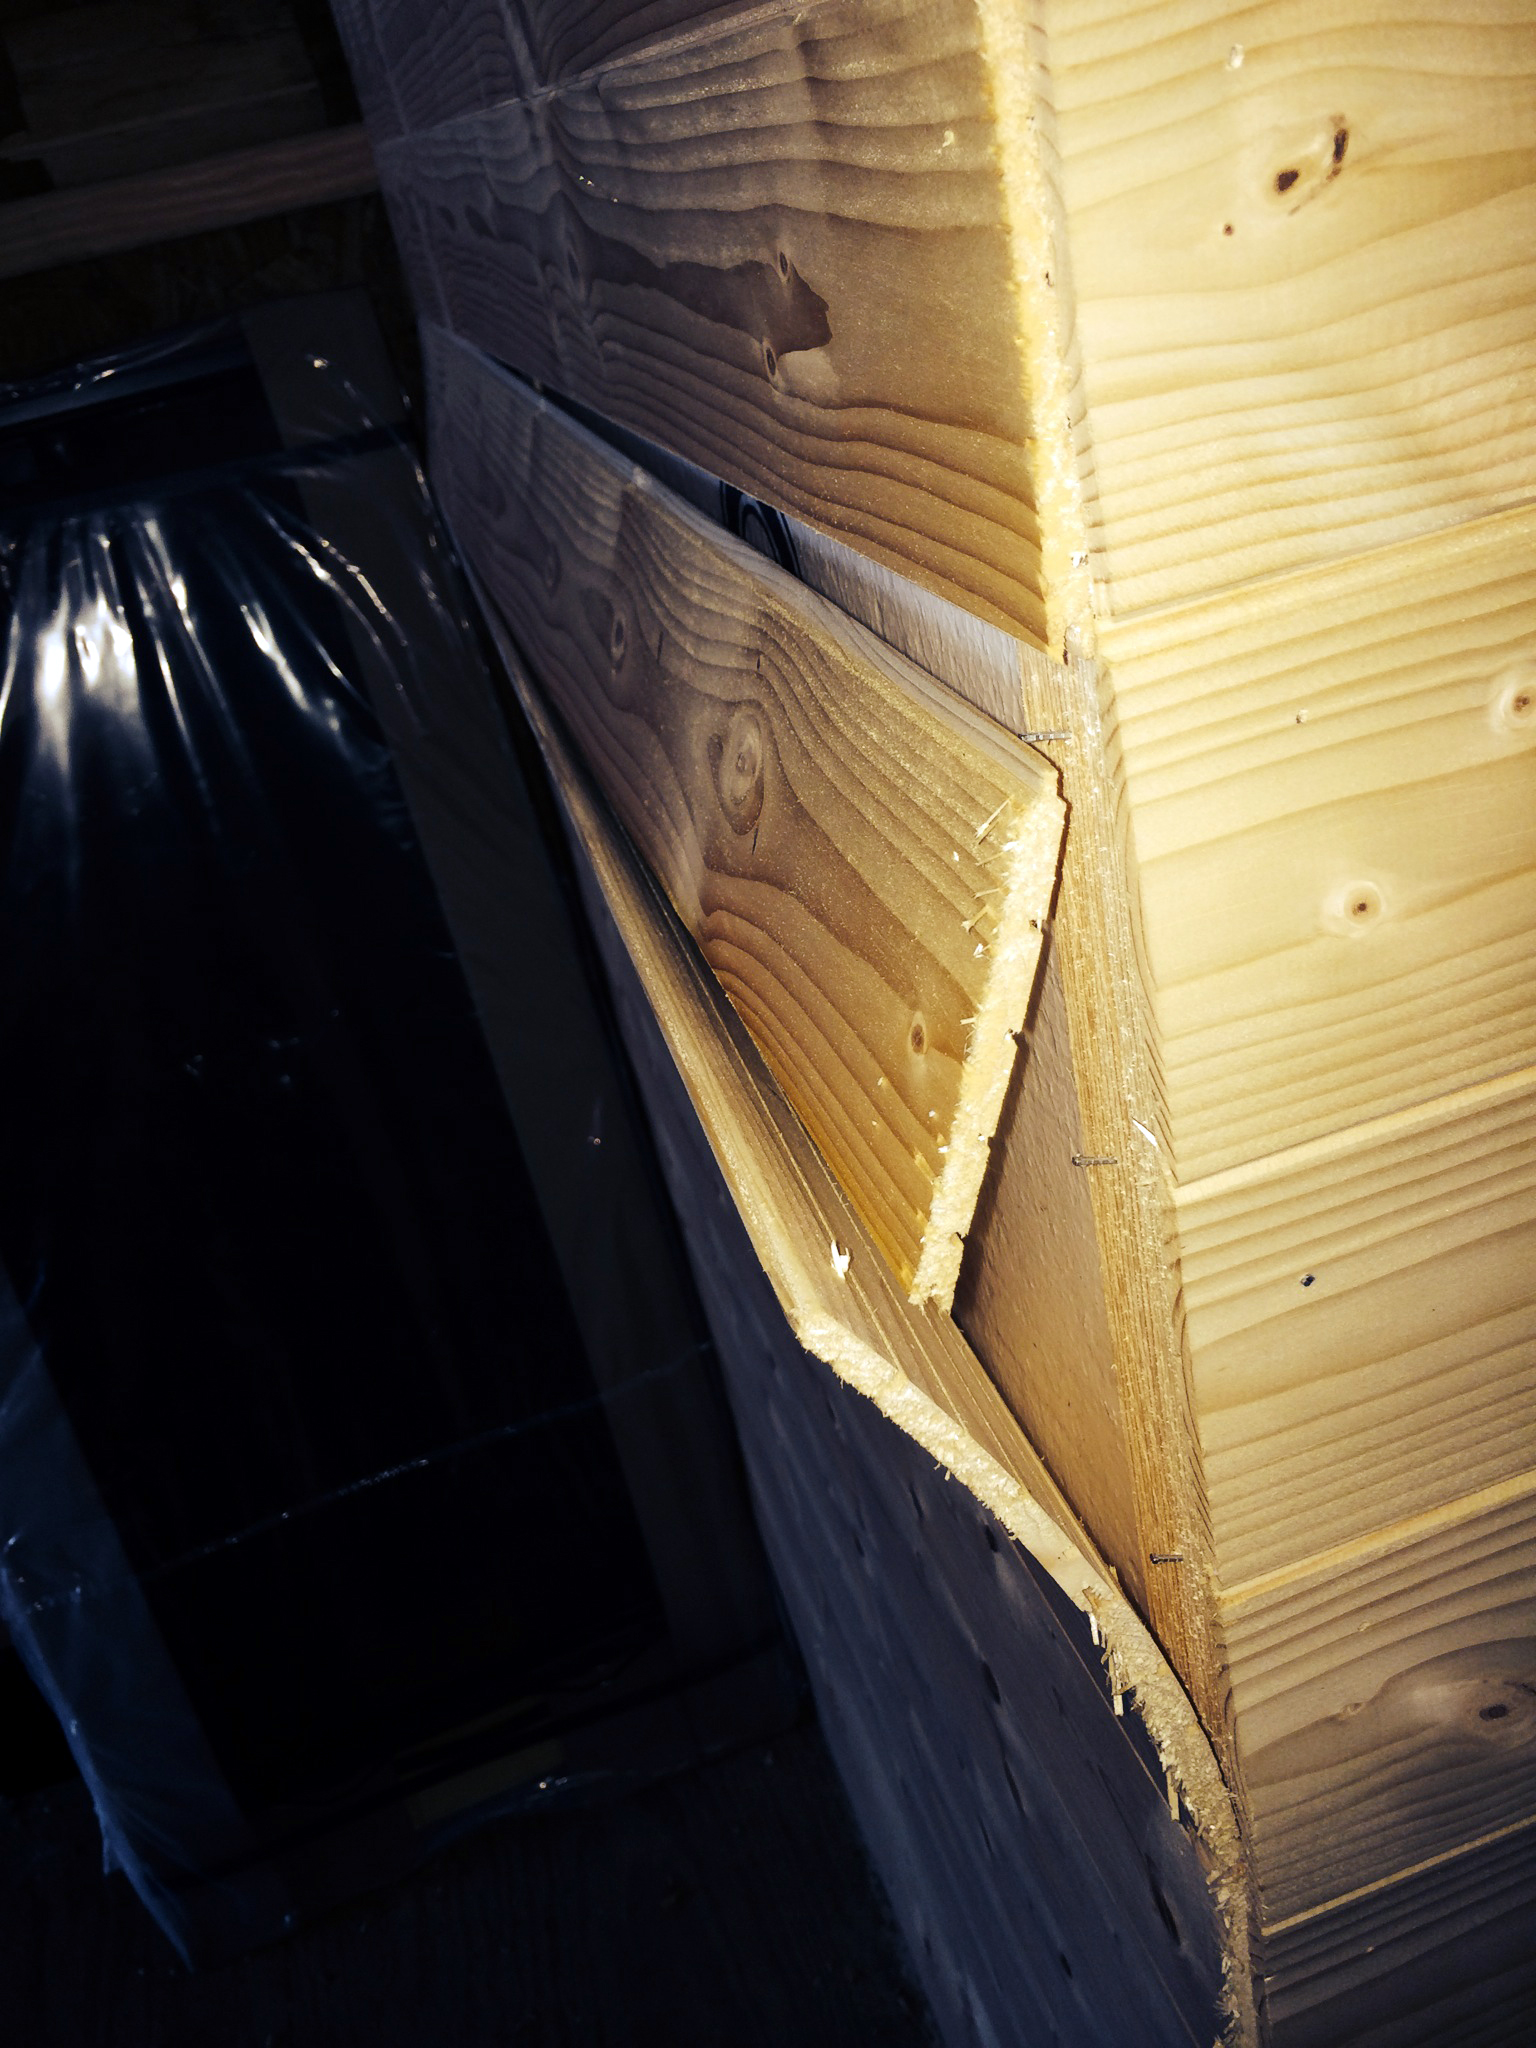
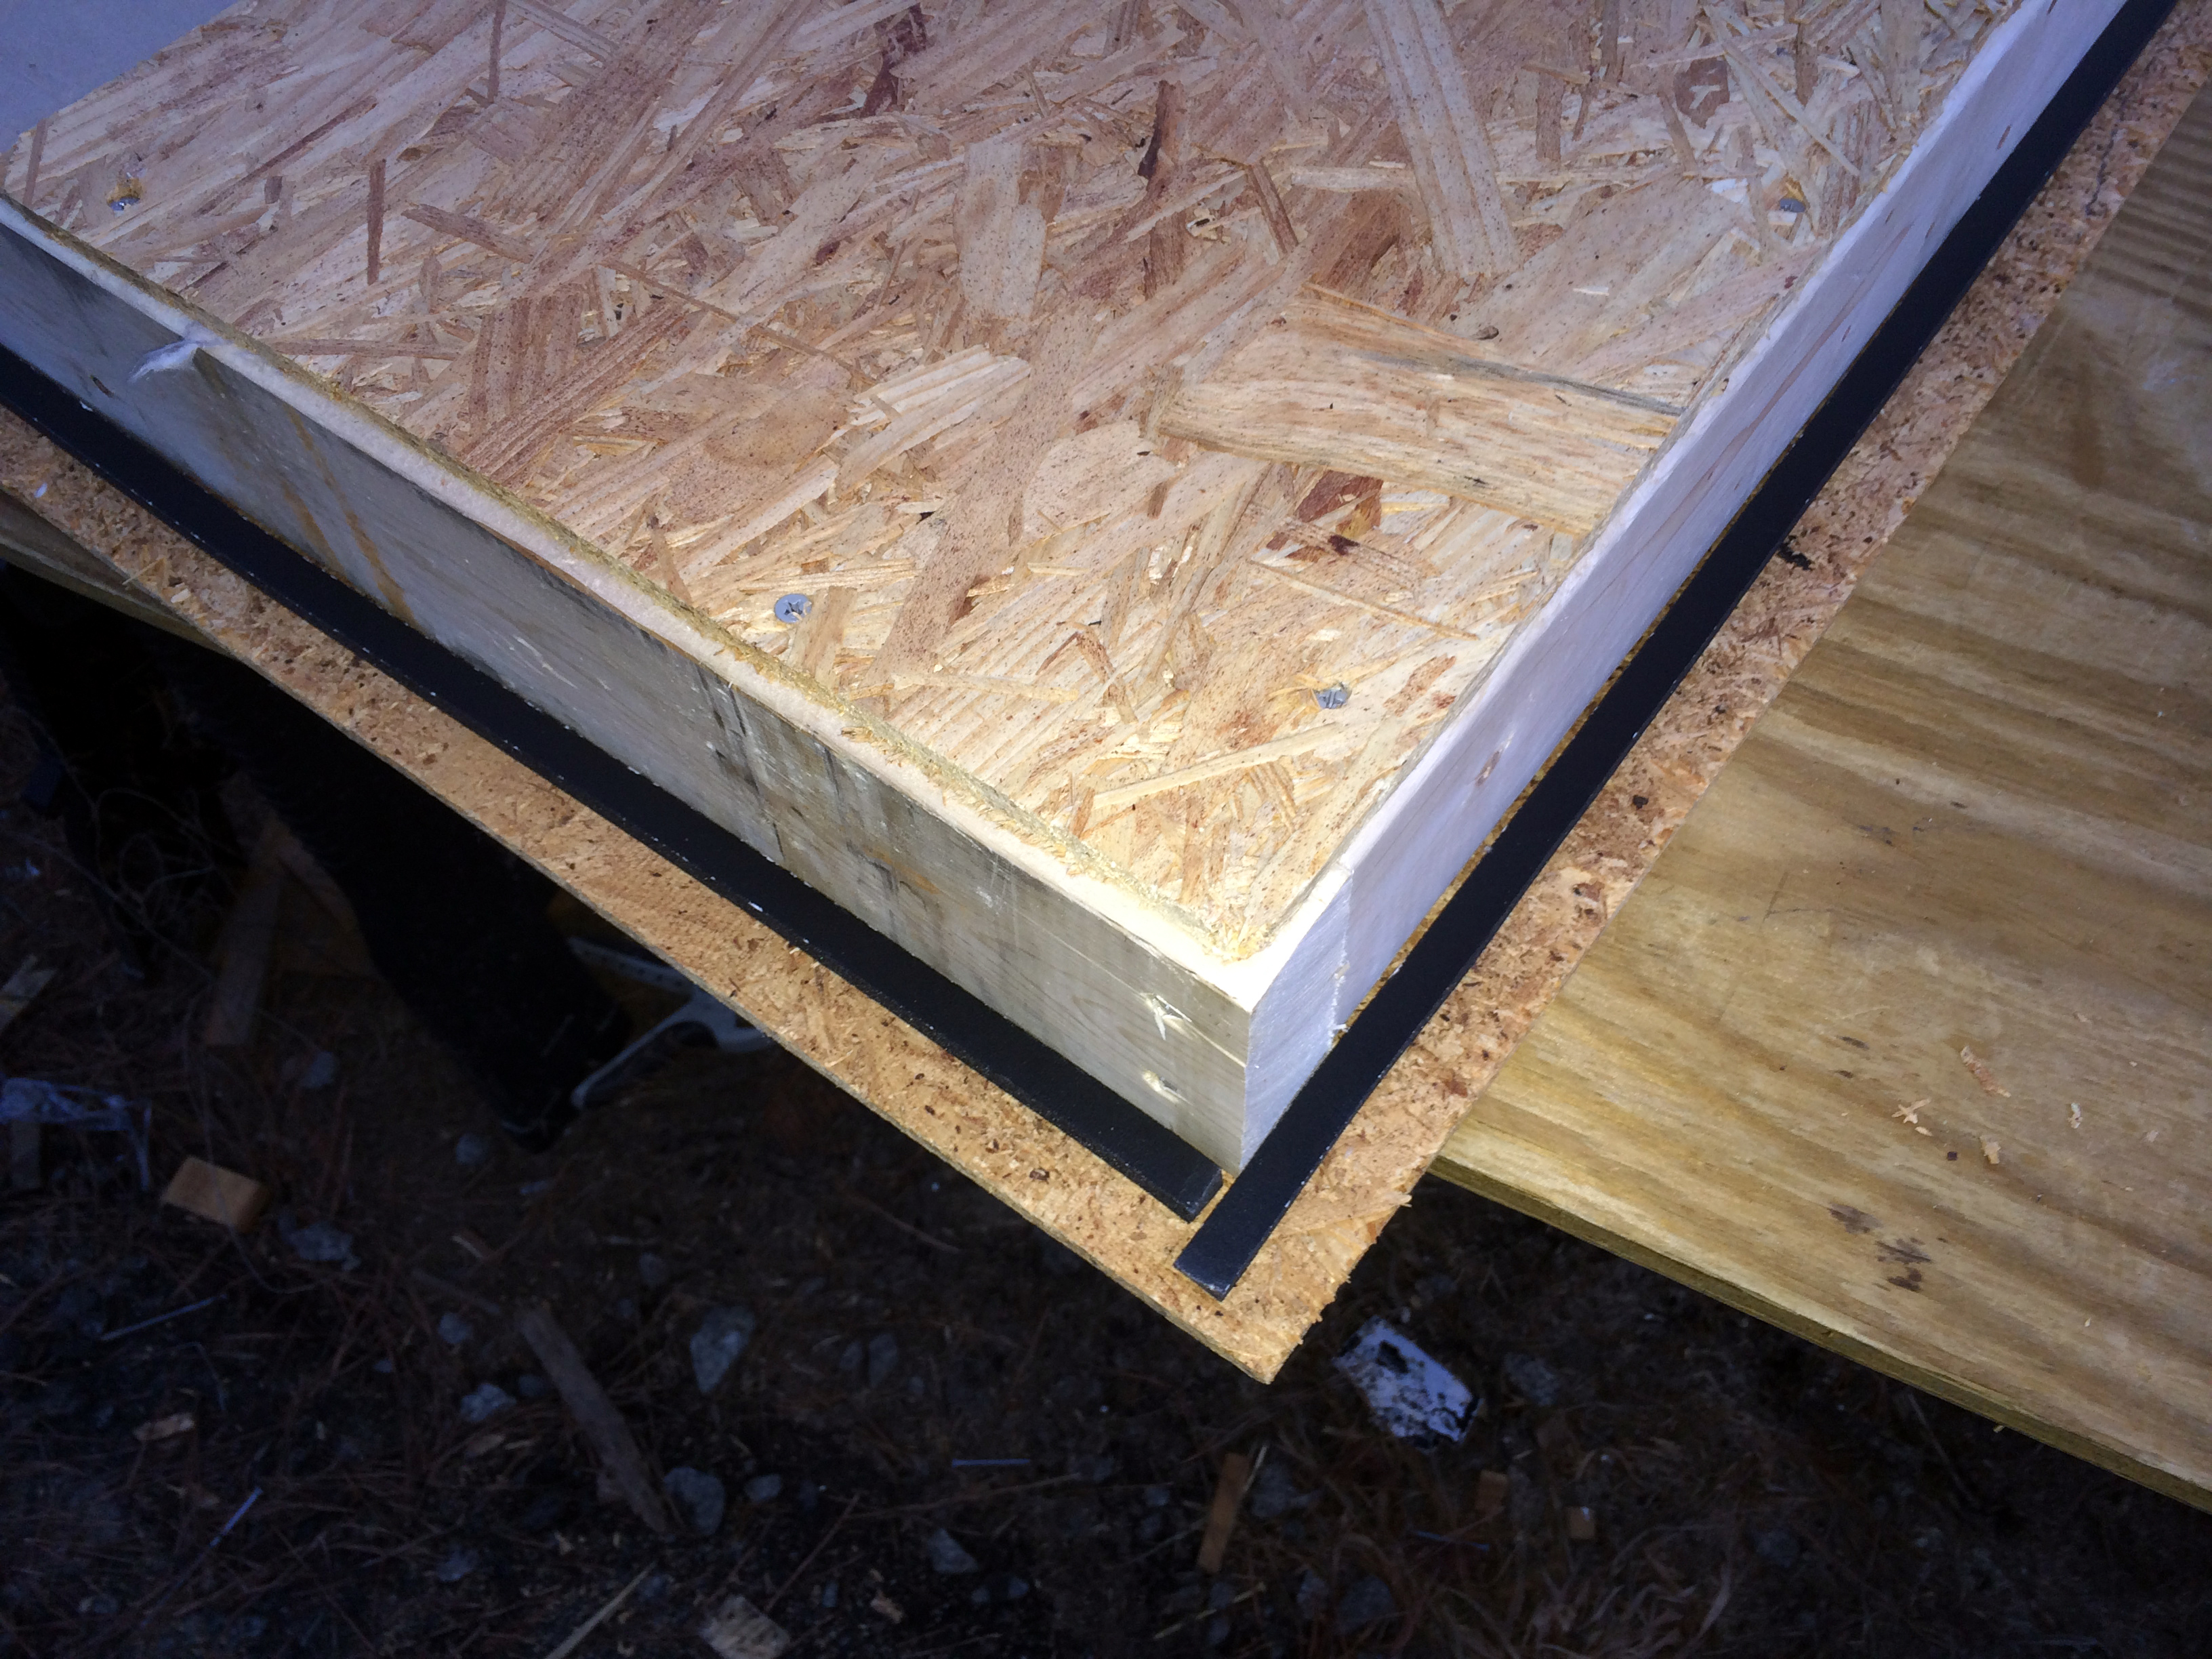
You can see the wood had swelled so much that it tore itself free from the nails and bowed out majorly.
I guess the value of my mistake is to prevent this from happening to others. I just did a little wall when this happened. Imagine if this were to happen when someone just finished the entire inside! So how do I plan to prevent this from happening again?
- I’m going to make a concerted effort once I start to not stop until I’m mostly done with the main wall panelings.
- I’m going to choose a week where the weather should have a pretty even moisture level in the air
- As soon as I get the wall paneling up, I’m going to start sealing it right away. I’ll be trying Tung Oil
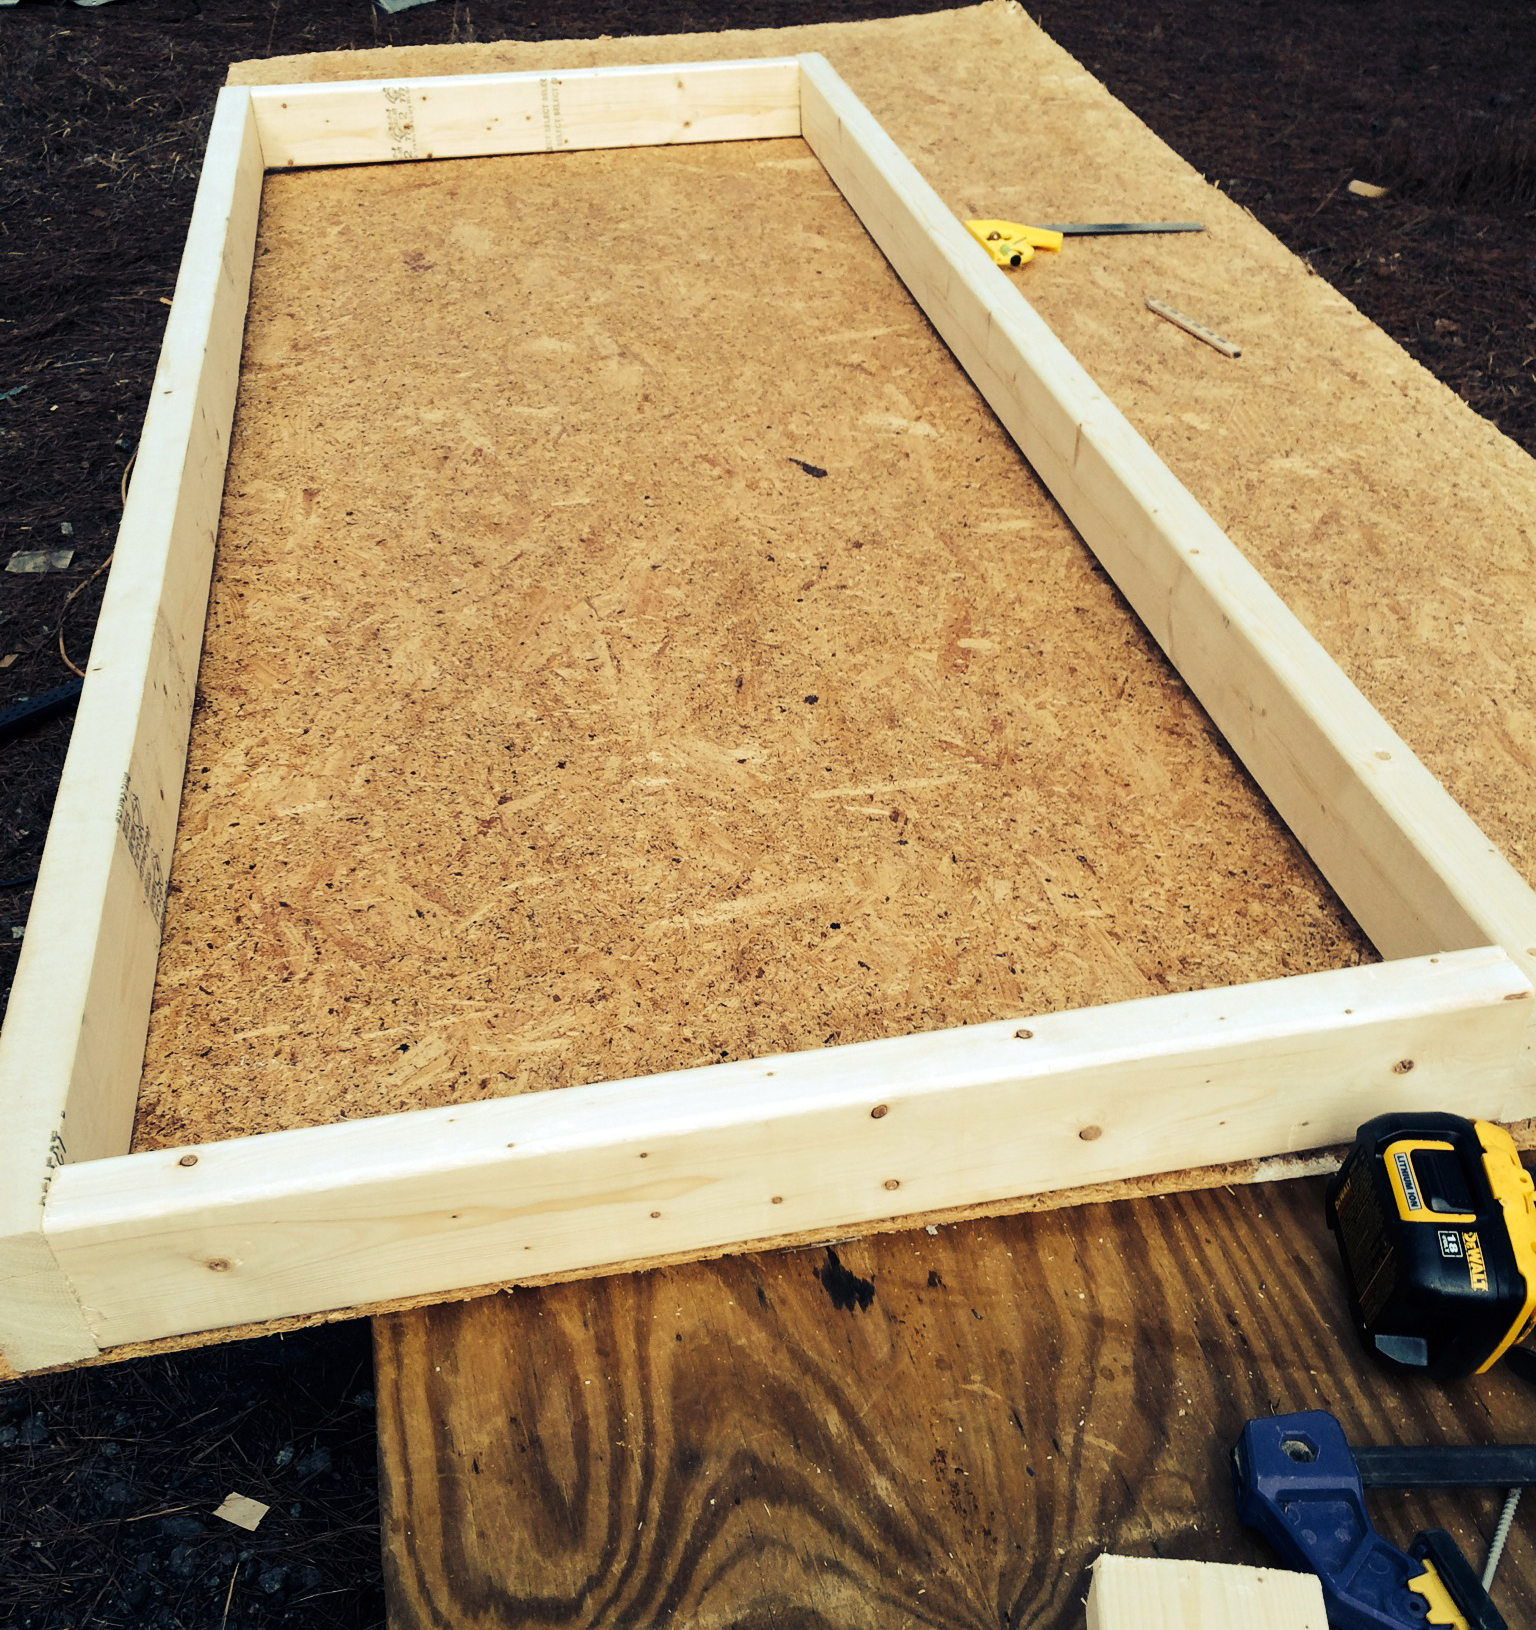
- I built a insulated temporary door which has weather stripping on it
The temporary door I built is pretty overbuilt honestly, but I figured if I was going to have a temporary door, I might as well do it right and honestly it only took me an hour. Now if I was building a tiny house inside or if the weather where I lived was even keeled, then this wouldn’t be an issue. In the past week here in Charlotte it has been dry-ish and 73 degrees and then three days later we had snow where it was 20 degrees. Its a nightmare for this type of stuff.
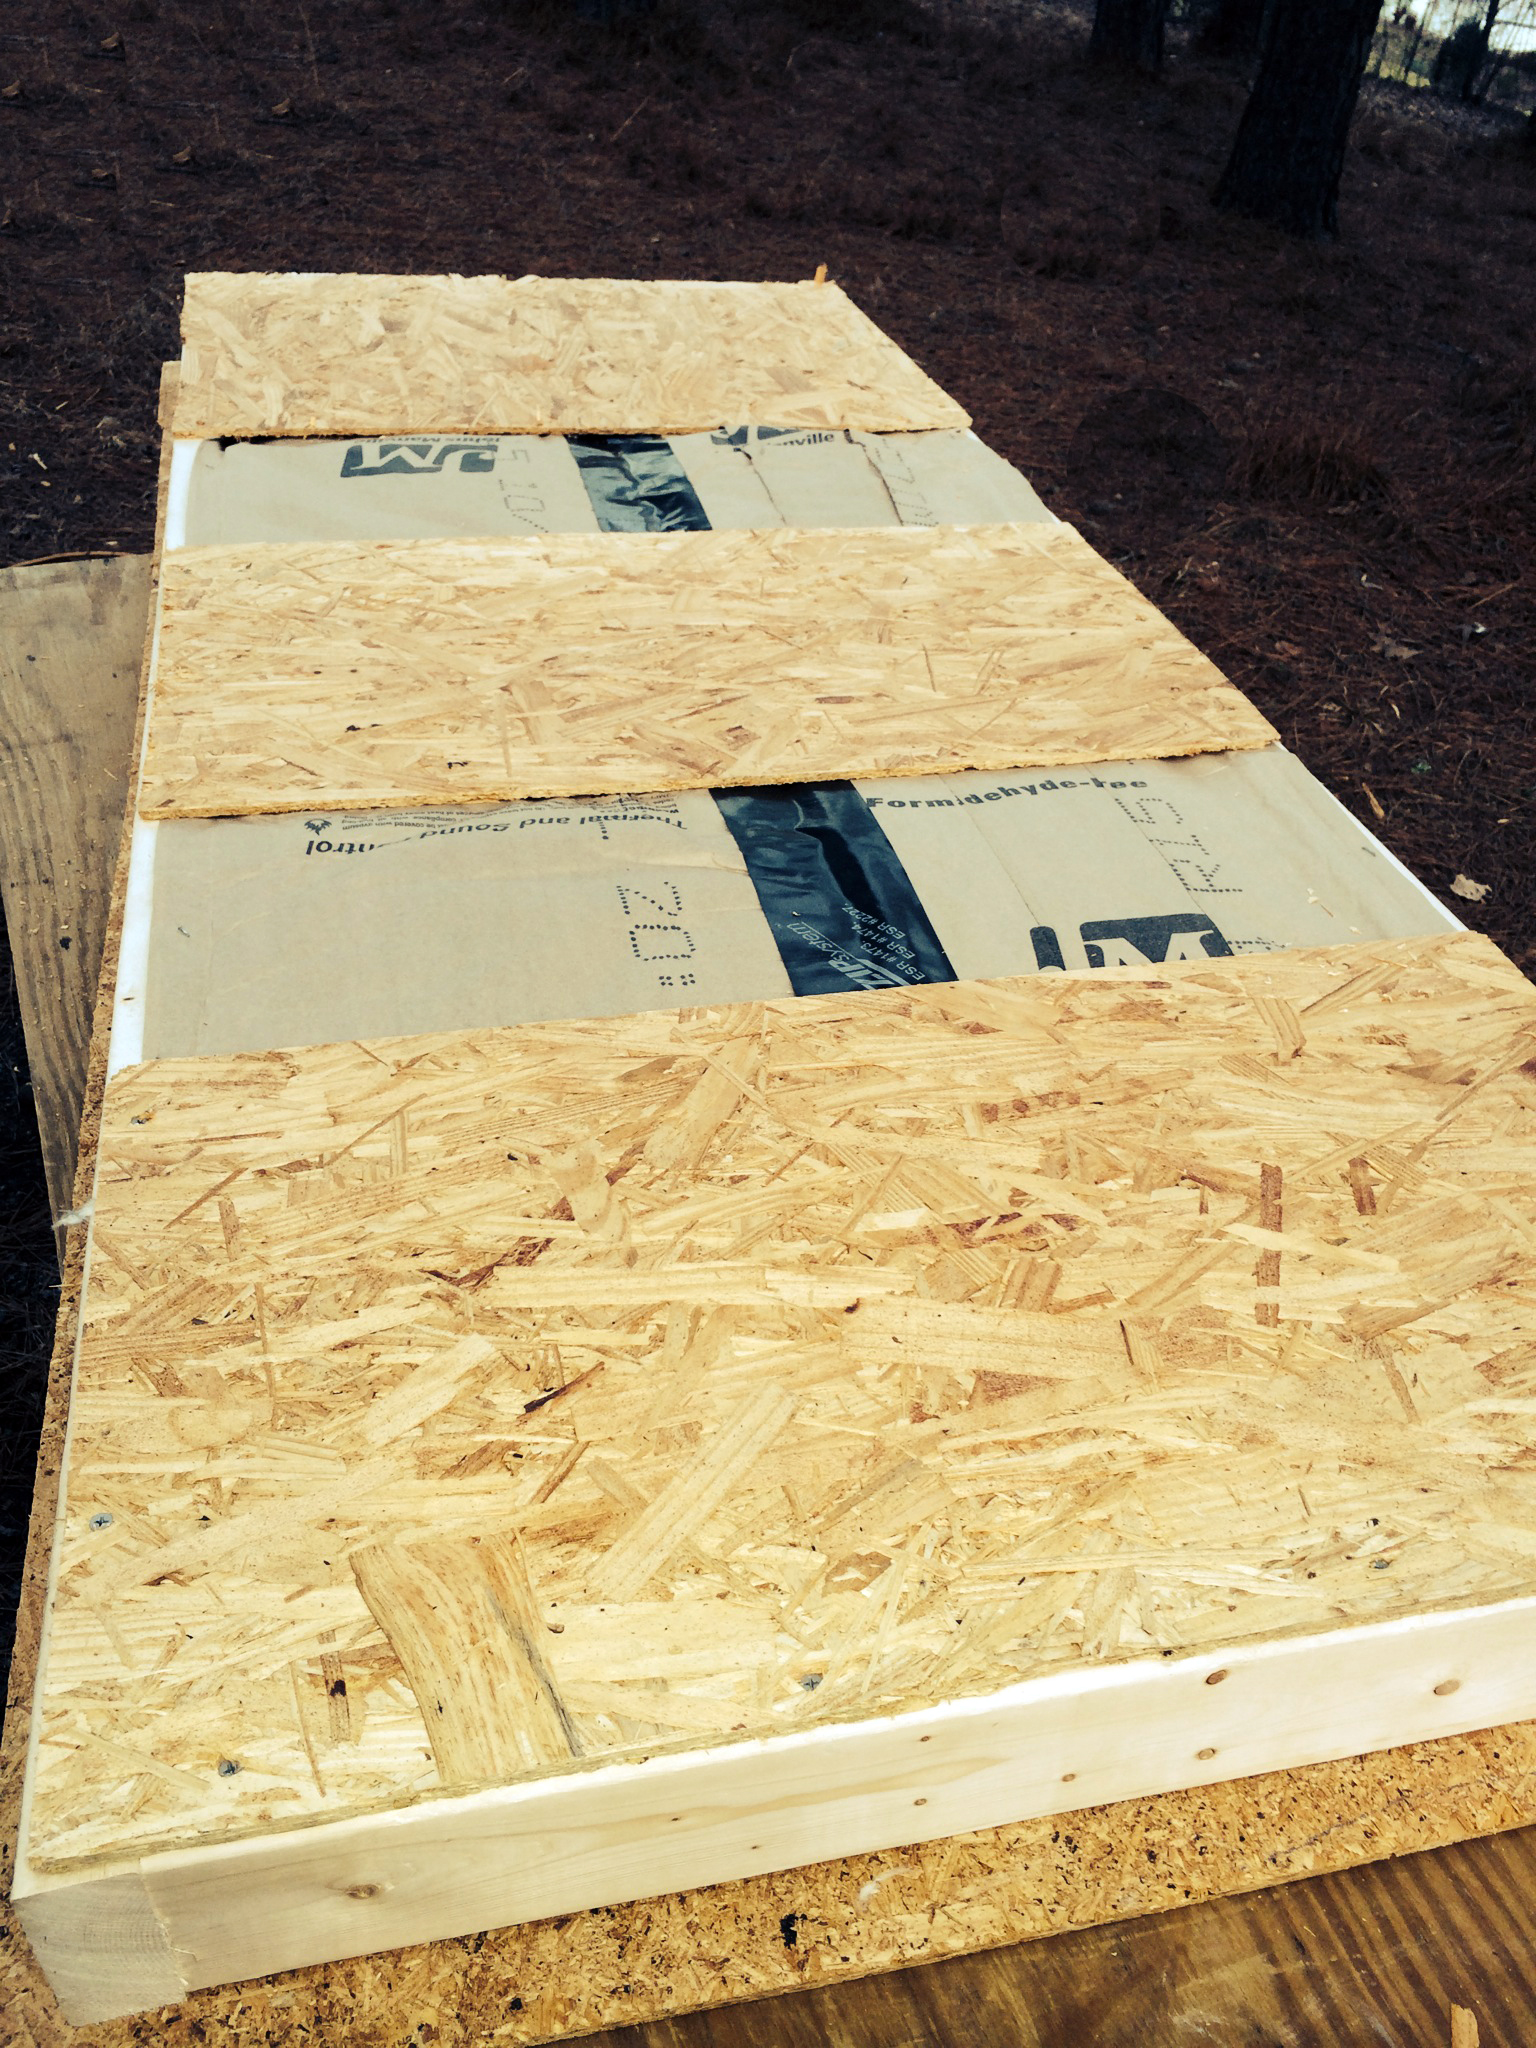
For the door I made a frame that fit inside my door frame and then attached a cheap piece of OSB board. The 2×4’s were $2.30 each (3) the OSB was $7 (1) Insulation was about $7 worth from a larger pack I’ll be using for the walls. So $20.90 for the door total.
Now many of you might be asking why I don’t just put on my regular door right now. The reason for this temporary door is that I decided to put the floor in near the very end of the build so I don’t scratch it. Since I decided that, I’m still feeling out what the actual final height of floor will be, I don’t know exactly know how low the door must hang. The door is made, but I want to put the floor in, add the threshold, then adjust the door height and hang it.
Here is the temporary door I made:
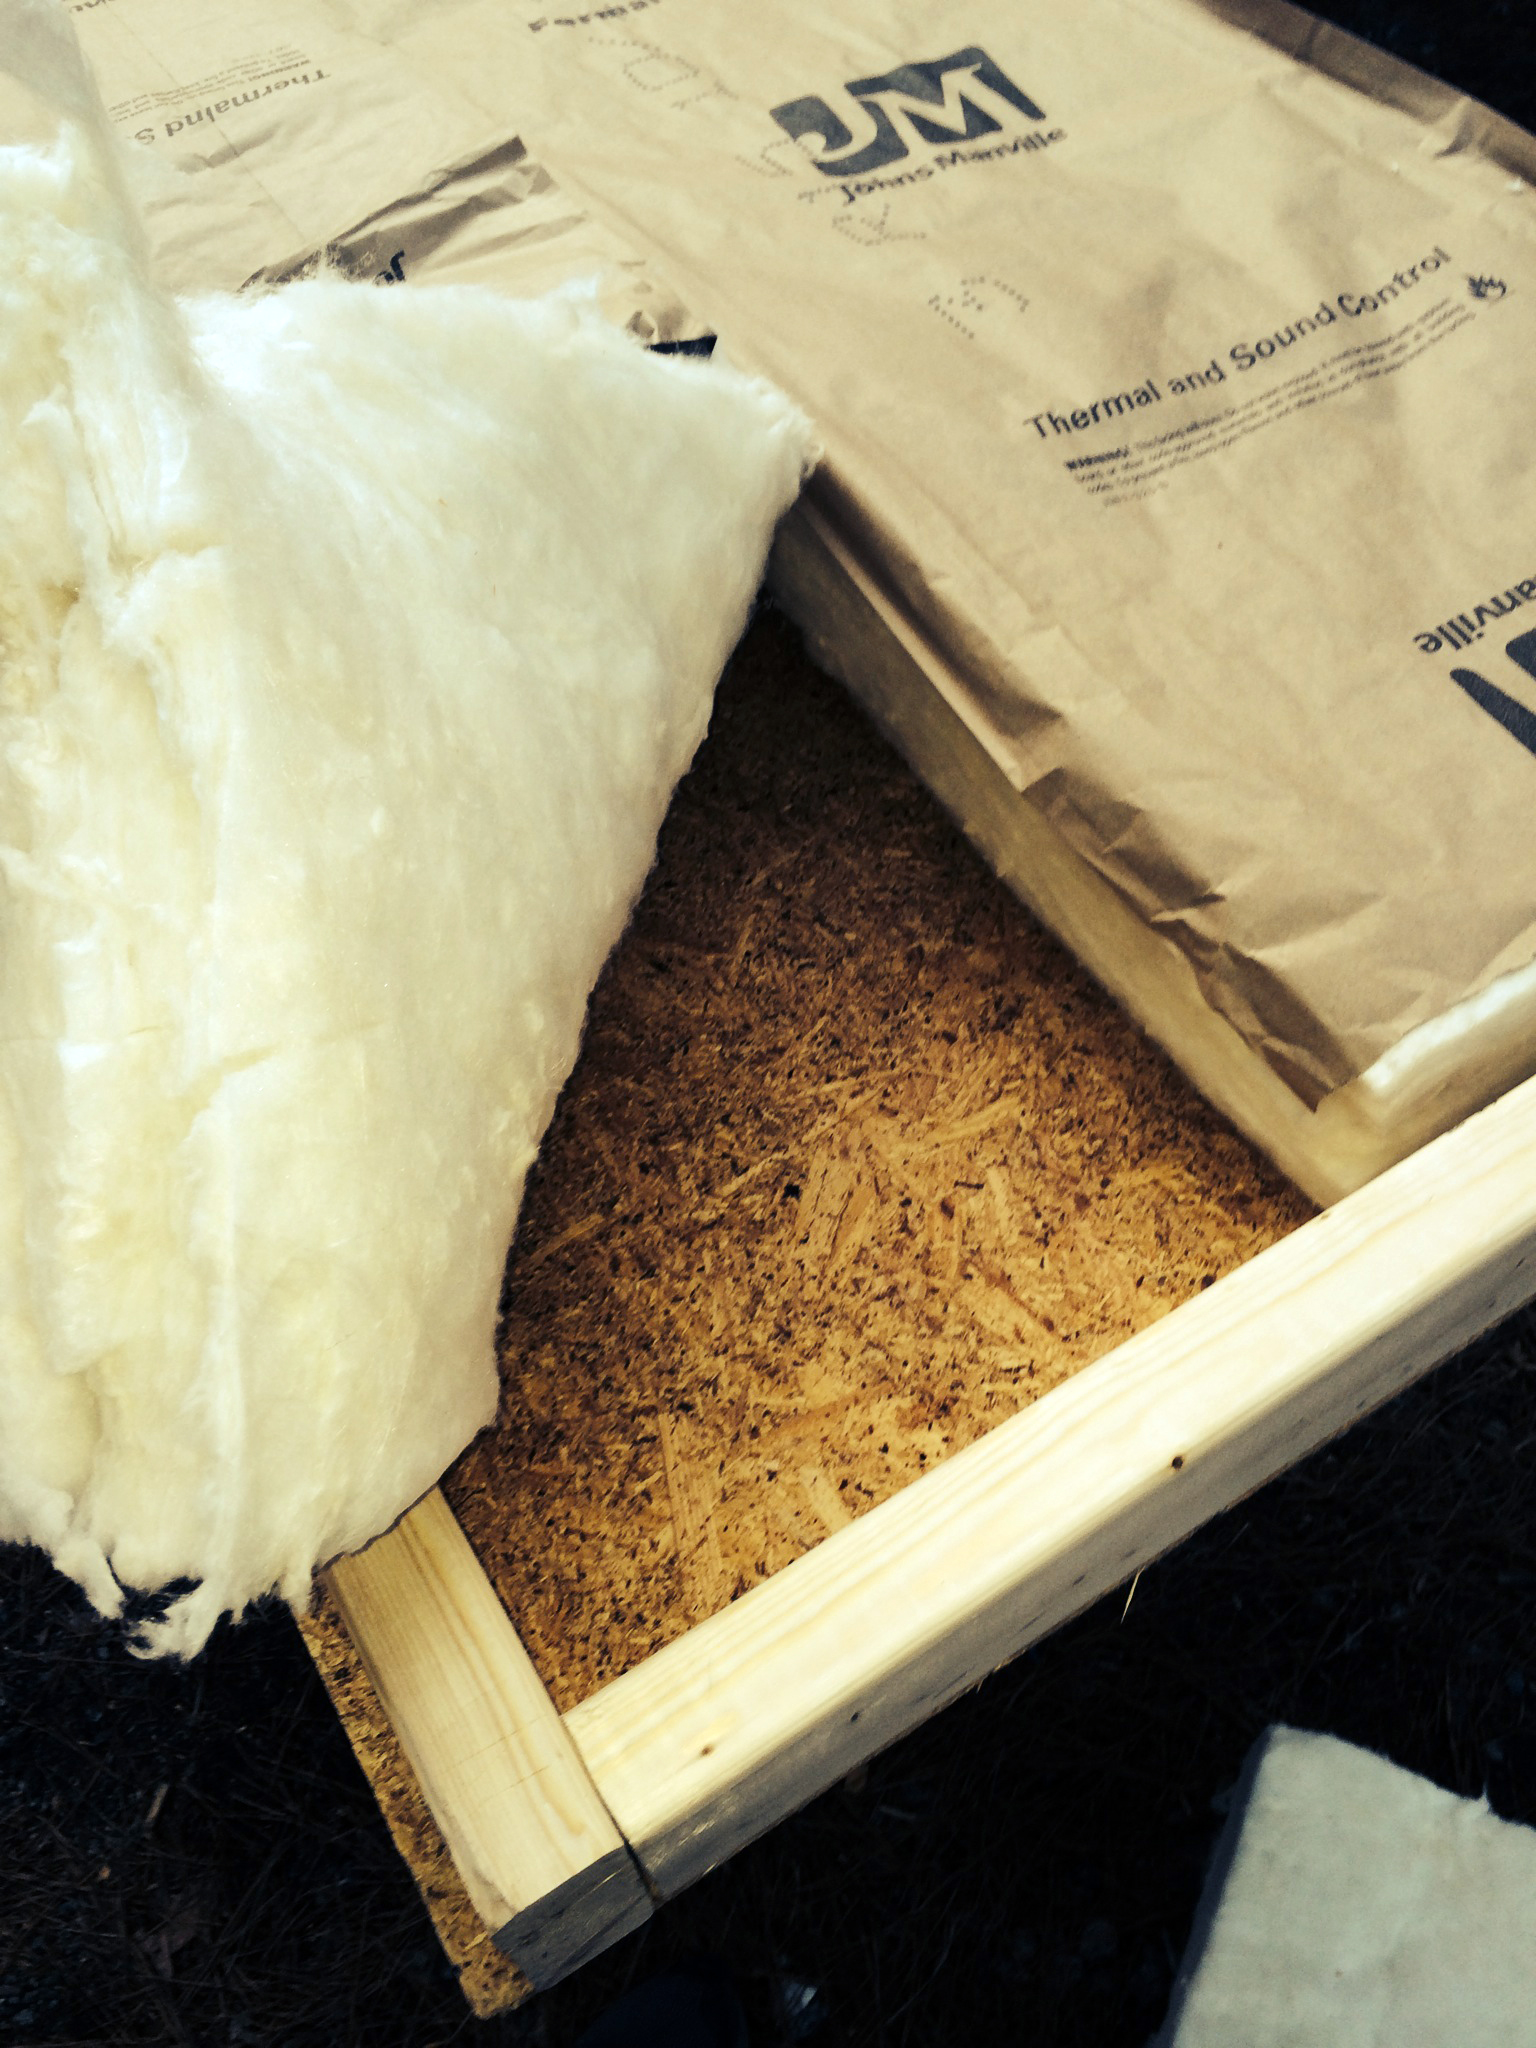
 In the above photo you’ll notice that the OSB actually extends beyond the frame, this was intentional. I push this into the door frame and the extra OSB gives me a lip and something to mount the weather stripping to.

On the bottom of the temporary door I had the OSB go flush so that when I move it around the brunt of the force is on the 2×4’s and not on the OSB. This is because OSB is pretty fragile and it can break down.

NOT RAMBLINGS, ACTUAL INFORMATION BURIED IN THIS TRIPE.
Well, um,…stuff happens, you know..that thing called Life. This though would go in a sub-file I have firmly adopted, as FRESH HELL. Love that term, so fitting sometimes, like your unexpected precipitation.
You are so right though, if this were to happen to anybody else, well, mmmm, again, better that it be YOU. Couldn’t happen to a nicer, better equipped to deal with it, guy. Hate to say it, we are all thinking it, many anyway I am sure, actually really GLAD it happened to you. Reflects the odd human phenomena of being unable to NOT look at the car wreck as you drive by all the police and ambulances, shuddering. WOW, ‘man o man that car was just ahead of me a minute ago…thought he was driving oddly’. Could have been me in that mess.
This way, as the Gate Keeper of Tiny House Knowledge you can so clearly and wonderfully fill us in on what to expect, when you least expect it. That being the definitive brief definition of FRESH HELL.
Love these panels, want to know more about them! So do tell..a separate post: everything you ever wanted to know abut these wood ‘log’ panels, and were afraid to ask not wanting to appear an idiot? Please? Are all the same? Imagine big no on that. Well, I know more than I did 5 minutes ago already. They suck up moisture (which we all would realize, if we THOUGHT of it), more so than I would have expected. Yet, and this is not what majority of us would expect, being under roof and all. Even YOU didn’t expect it.
Sooooo, I am very curious as to what is to happen to remaining panels, up but not obviously damaged, and those that were inside tiny house not hung yet?. Known to be potentially compromised? Me, I would, crying as I did it, remove all of them, up or not. To be stored in climate control conditions (yup haul off the site) for evaluation later for use as…salvaged lumber. Use it in this build someway, later on once material re evaluated. Yet I am so paranoid, rather always, most always, be safe than sorry.
Now, that gruesome pic of the panel peeling back off, itself essentially, should go in a horror film. There is an idea for an enterprising creative and talented techie out there; A Tiny House Horror Show. Guaranteed a U Tube viral pandemic. Dead serious. think..it would be useful if done well and no short supply of info and pics would roll in once asked for on the web.
The panels, what were these made of? Cedar? Type, a choice from alternative (same look) panel? Made otherwise? When I first saw these, and understood they were panels, made of cedar – and different types for commercial Builder to use, inside and out. I had a flash thought right off when I saw them being installed and looked close. Yes, like ALL grooved paneling there is that seemingly innocent groove, that is oh so thin. Soooo thin. Like I said it was a flash like one gets that prompts you to THINK. I didn’t get far, too many questions. Please answer all of them. You are a mind reader I am sure.
That is one mighty fine temporary door! Directions and pics great tutorial. Cost great too, so great I wonder if someone will consider using such as a ‘until I can afford what I really want’ door. Dost thou recommend this? if so, what more would you do to it, if anything, to make it more ‘sound’? If thou does NOT recommend this, please advise.
Tung Oil. Lordy was I glad to see the Texas Guru take this to the max. Tung oil is the ONLY ‘finish’ I use on prepped (sanded, clean surface) wood for furniture I mess around refinishing. Flipper here has just so many swipes in this right arm to use in a 24 hr period. Goes dead fast. THAT is how I came to use tung oil. I wanted a water resistant natural matte finish for a set of tables, at first go around. No anything, wax etc. after application. Not much wait time between coats. As in wait a tad and keep applying until wood is saturated, and need to wipe off excess. Which I never do, wasteful. I just find a spot, always is one, that could use a touch more.
This first piece I used tung oil on, had been covered in original, now peeling, much worn off, shellac. Once saturated with tung oil it is in my opinion, just shy of waterproof! That was, well at least 15 years ago. The pieces were/are a friend’s, tables that were her Mom’s, who had recently passed. This friend is not a ‘handy’person. She was mumbling things like ‘spray paint’. ACTION was required. I am allergic, highly, to those fumes and most all else petro. Can’t be in the room where a Kerosene heater is being used. One in my 3/4 crawl space 1/4 basement, I can tolerate if perfectly maintained while in use. Yes, tung oil stinks to high heaven….getting there.
I knew she would never re apply a coat of tung oil, ever. The coffee table and matching end table would get very hard use and little if any ‘care’. They look as good as they did the day I finished them. Had to clean them, as in damp cloth only, to see how it held up. Gal is upstairs in the top half of my 100 year old Vic farm style house. In her ‘storage area’ an extra bedroom now, recently replaced, put up ‘as is’, not cleaned. She had decided to get ‘smart’, (God help us all when we do that) and bought a too thin piece of non beveled glass for the coffee table. Did NOT place felt circles in corners. That table got slammed often with spilled this or that, left under the glass for awhile, next commercial!
Hard use. Amazing how well tung oil deals with sugared cola pop and such caustic stuff.
Water? Hahaha, that is the tung oil laughing.
TUNG OIL. Well it stinks when you open tin can, Stinks while you use it. Stinks hours after you use it, used liberally or not, stinks the same. For me that is usually a strong, primal urge to: ‘ get out of Dodge, get to ER hope epi pin will get me there alive’ signal. Need to go look at tin I have a bit in, refill coffee en route.
Well all out of tung oil, so I wiki searched it. Suggest ALL who ever buy any, wiki first, fascinating stuff. Original use in China, aprox. 400 BC, Confucius’s time. It is amongst the category of ‘drying agents’. DID FIND OUT A REFERENCE that one can buy something labeled tung oil, and not wholly true. HARDENS by a very interesting oxidation process chemically. Spontaneously COMBUSTS when rags used are left piled atop each other, openly to atmosphere. Was used in ancient times by Chinese to waterPROOF their boats.
Good LORD, I am HIGHLY allergic to NUTS. Many are, we be dead quick, even with epi pin, IV decadron saves us. True tung oil apparently although not derived from a nut tree…apparently MANY WITH NUT ALLERGIES REACT AS IF IT WERE.
A whiff, any mean of absorption into the mucous membrane (capillary beds!) and WOWZA off they go. Mercy. I am sooooo lucky. I know I can eat almonds and pistachios, peanuts are NOT a nut, and a whole separate food allergy grouping, very specific. That is handy in avoiding it.
TUNG OILS VARY REMARKABLY IN THEIR PRODUCTION AND FINAL COMPOSITION, as in what is used en total in the ‘formula’. That really fine print! In this case may not even be indicated fully, as their is a degree of the amount of an ingredient in anything FDA or OSHA monitor, that they require to be listed. I am so all over the issue of reading fine print for so many chemicals I am allergic to. For me with tung oil, unplanned previous exposure to the fumes, and my lack of negative reaction led me to just buy a can and use it. I was LUCKY. Really, really hope I can find the last tin can of it somewhere, so I can read the fine print very carefully re: composition. Bet will not reveal all I want to know, MSDS will. MSDS sheets are a GOOD THING. Start a collection, you will be glad you did.
Ryan can you get one for the specific product/brand tung oil you plan to use? Post it somewhere with your evaluation of it? Will ask The Texas Man next time I land there on one of his sites..you guys keep making them, and that is so good!
Great stuff, yet highly suggest one read about it so you don’t get ripped, or die, or have your ‘in the middle of it Tiny House’ burn down. Perhaps Mighty Ryan can get with the Lean Texas Guy and give us the low down on: where do you get the best price for the best product (tung oil) in let’s say gallon quantities?..and a few POINTERS in how to use it for large applications, after trying suggested method out. Texas guru I believe uses a sprayer, as he tung oils everything now. Curious why he came to that decision after all this time? Yeah we be OLD.
I am outtahere. Finally. To do some truly serious research on Tung oil. Should have known the Chinese came up with it.
Go Ryan Go! Then tell us alll about it! Thanks for all you do for all of us, and the new small house swoon site is great.
I am waiting for a Community geared one to develop, a true forum.
Peace, Love and all that,
Rishia
When installing tongue in groove, don’t but the pieces up tight. Leave some space so the wood can expand. Did you put a moisture barrier up around the outside before putting up siding?
My bad, you are NOT using 4′ x 8 ‘ PANELS as I indicated in my post. Sorry for inaccuracy and request for info on them, although I would like info on them.
T and G better for sure and even ‘feels’ better, surely looks nicer
Honest, I never intend to write novellas when I post a ‘comment’.
It just happens. I bet I typed more words than you did giving a complete tutorial!
only prob with leaving space in the grooves (comment above), mind you, is leaving too much space, and then if the wood happens to contact, you can see through the wall and the insulation or open space behind it- I’ve seen this in some houses. Aside from comments I made on the earlier fb posts, I really thing using a thicker/”normal” 3/4″ stock with better holding power (more “meat” for the screws), would help too.
I have used tongue and groove pine for years, both inside and out. I honestly can’t see any reason this happened other than the wood got wet. Sealing it with tung oil or anthing else isn’t going to keep it from warping. If the wood is green, that could cause it to warp like that. I see a lot of cheap pine down here in the South. Stuff we used in the Northwest was always kiln dried. Whitewood is crap! But it still shouldn’t warp like that. Did you finish the outside of your house, before installing the t&g on the inside? Sorry to ramble, but I’ve been a cabinetmaker and carpenter for thirty years. Never seen that happen! And as you may know, the Great Northwest is jokingly called the Great Northwet. Doubt it can be any damper where you are.
Hey Ken,
I think I just didn’t let it sit long enough in side to acclimate. We also had lot of rain and I didn’t have a door on it yet. It rained for two weeks straight! I found out the wood is actually Douglas Fir and is kiln dried.
OK, I just looked at the pictures again. I was thinking you were using standard tongue and groove planks. It’s difficult to judge by the picture. If you are using wood like this for interior walls it should be 3/4 or 5/8 thick. Looking at the grooves on the grooves on the backside of the wood, I’m gussing it’s waiscot. Which is only quarter inch. This is made to be put up on top of something else like a plaster wall or plywood. The grooves help it bend on curving surfaces. Correct me if I’m wrong. As long as the boards didn’t warp too much, you could still use them, just as someone else said. Leave a little gap, not so much that they don’t shrink when they dry out. But with any wood, you always leave some room for expansion and contraction. Wood is a living thing. It reacts to humidity. Same thing when making panel doors. You never glue the panels in. You leave them loose so the wood can move.
Also, you used chip board for your door. That is very susceptible to moisture damage. I realize you aren’t sure about the size of the door, but you really need to provide a good seal to keep weather out.
Where are you in Charlotte? The weather has been really crazy this year, but I am asking because I want to join the movement and just don’t really know where to start. Can you help?
Geez guys this is a little off topic but I installed MDF paneling and did not read the tiny disclaimer label on the back until I was all most finished… oh it causes cancer and or leukemia. Having to tear it all out. It’s gonna be in pieces but I am going to return it. Just be aware. I am not sure if the OSB board releases any VOC’s but most building materials do. Had an allergy for a few days and noticed when I went into my tiny house I started becoming sick again.