 This is my favorite, no fuss project in terms of interior design! It takes about 20 minutes to do and can be completed with simple tools on a small budget. Until recently most of our books had still been in storage due to limited wall space in our tiny house. We put in so many windows it left little space to put up book shelves. We have installed a few over our windows which work nicely but too many of them create a crowded feeling in such a small space. I’d seen floating bookshelves on a few different design sites and decided to make a couple for the house so we could unpack some of our books. They’re great because they don’t take up much space and it’s a fun way to keep our favorite reads handy.
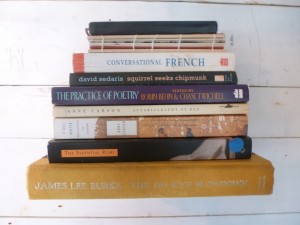
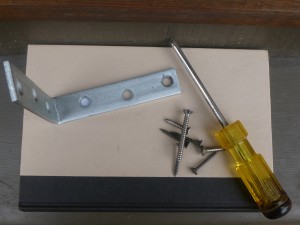
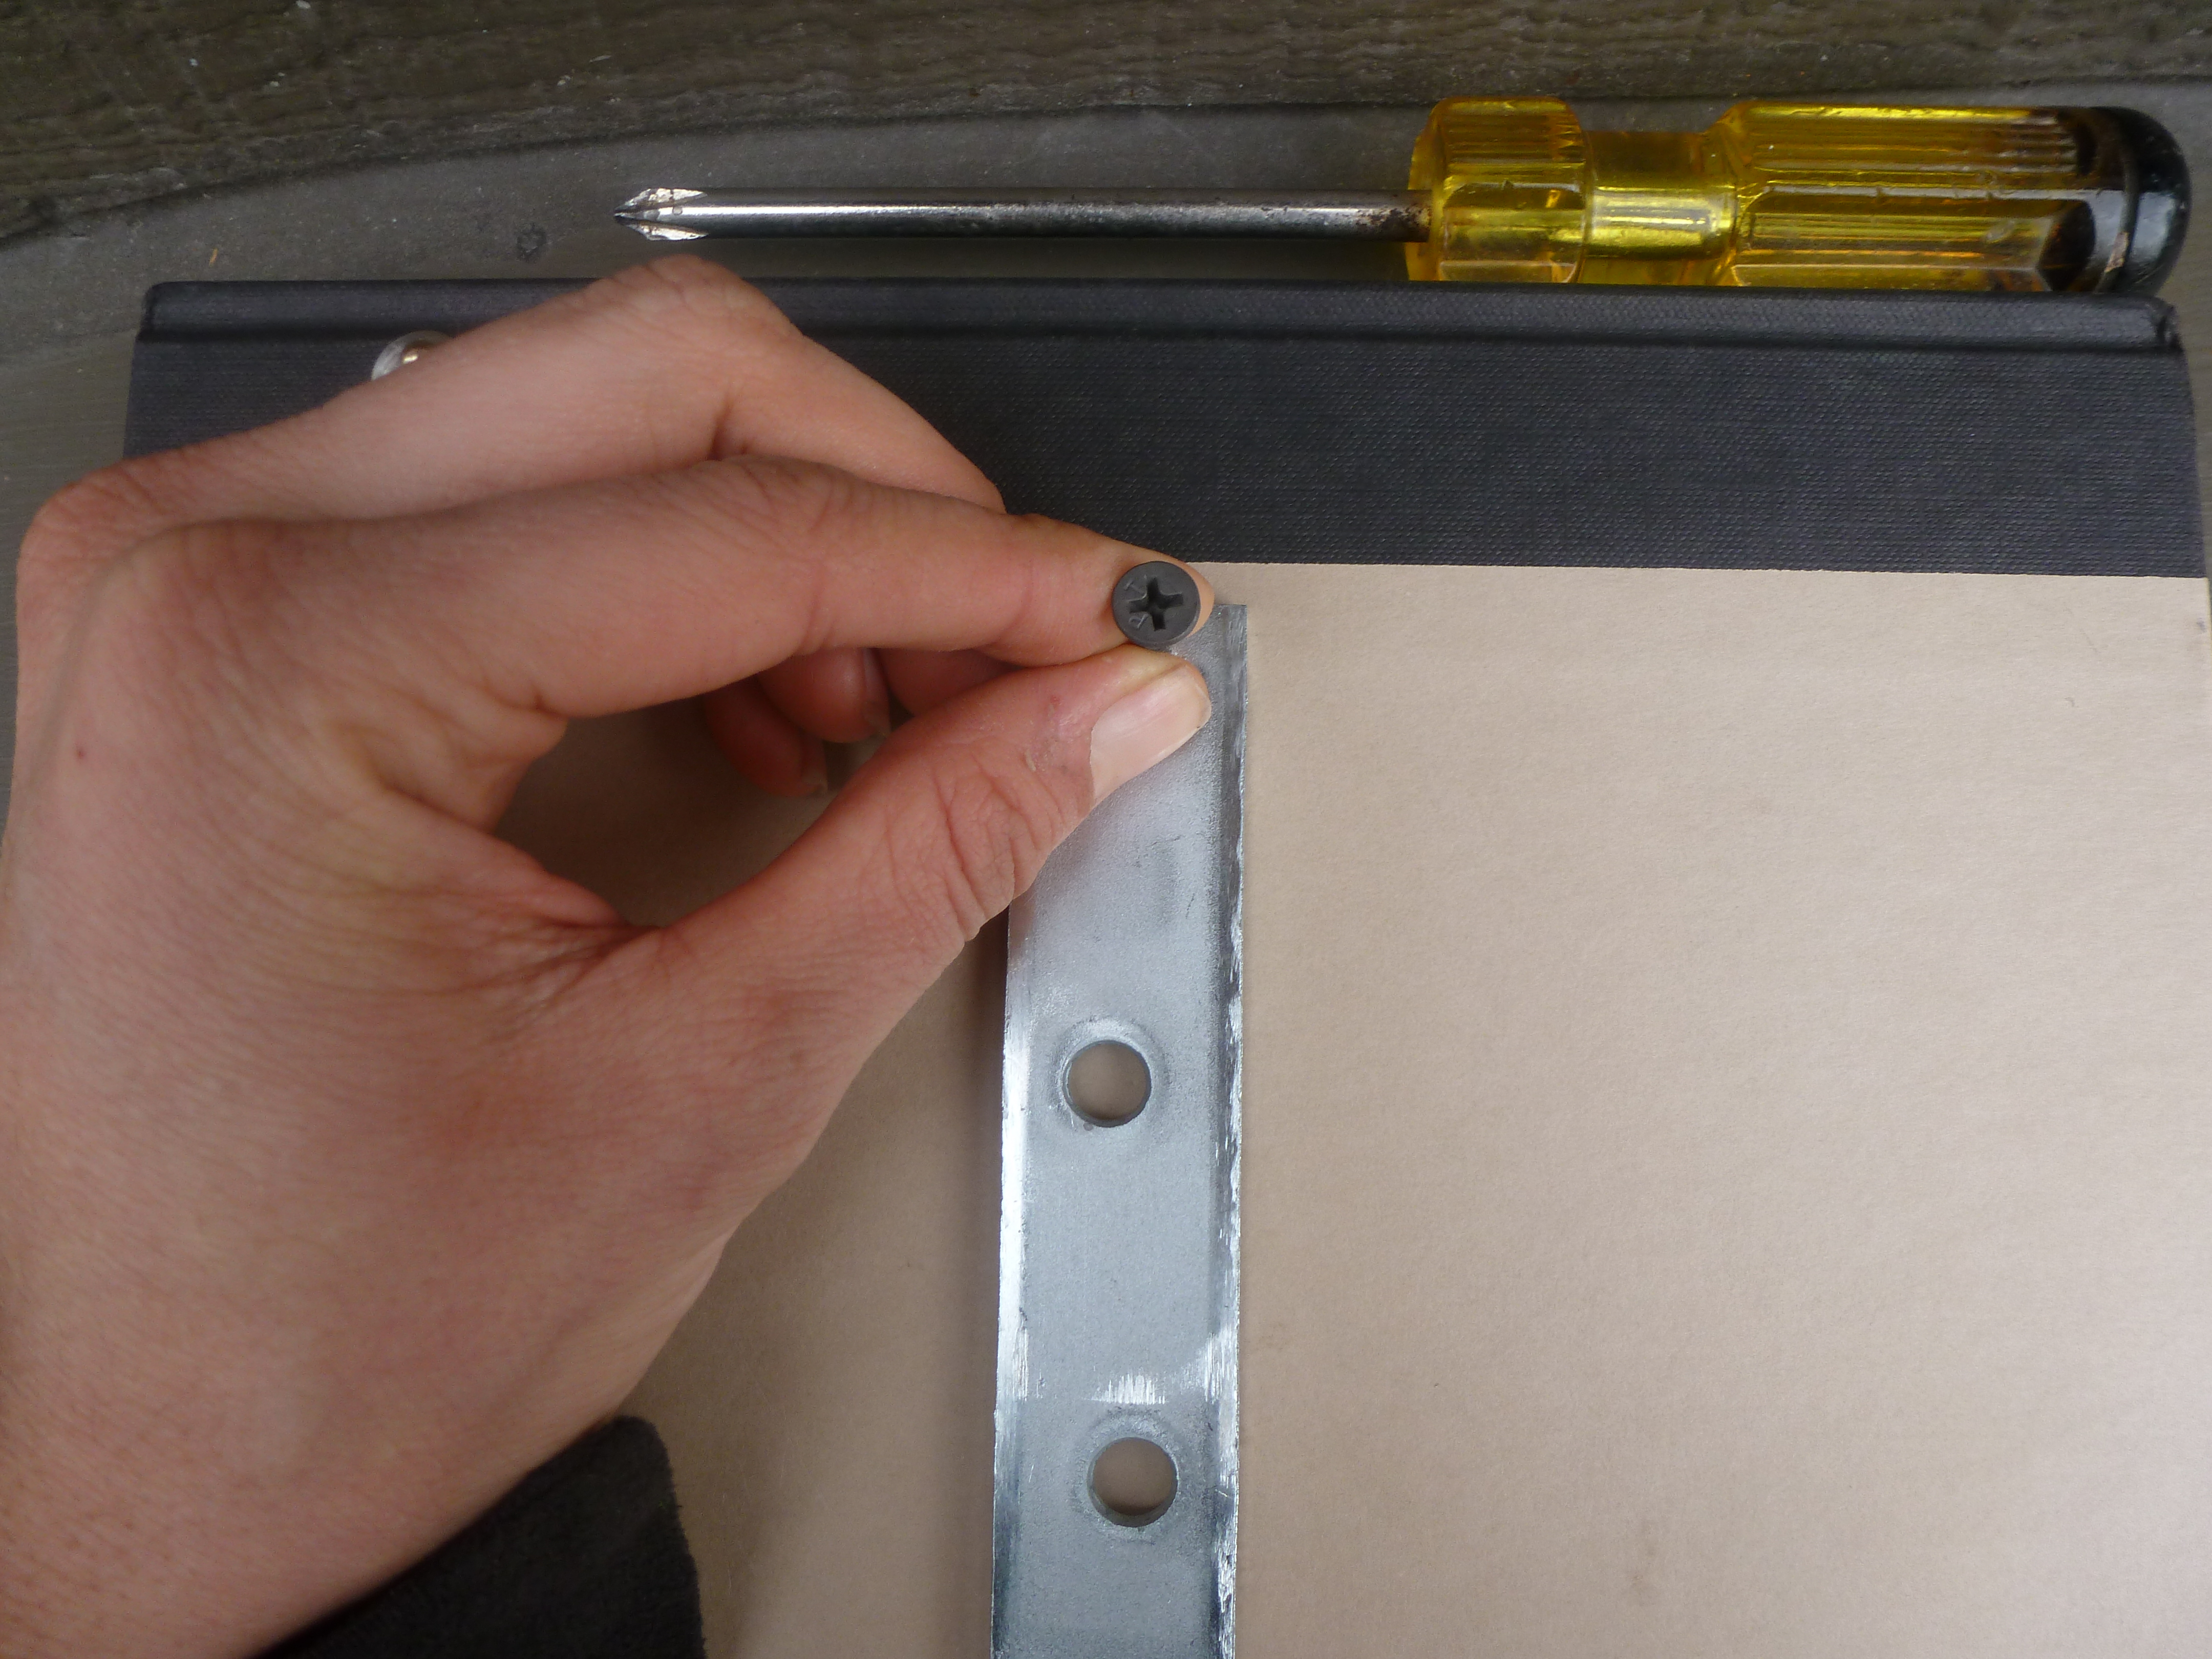 First I headed to my local library and checked out their sale section and bought two hardcover books for a dollar. These are the books that will act as the shelf so best not to spend much money on them. I then went to the hardware store and bought L brackets and a few screws. Some folks use metal bookends instead of L brackets but I didn’t have either and I thought the brackets would be stronger and better able to hold more weight. Next I marked where the wholes would be and started the rather mundane work of getting the screws through all the pages. This
  could be done in 20 seconds with a drill but when I pulled out our trusty Hitachi the battery was dead. I was feeling impatient, so I pulled out a phillips and it took a few minutes longer but was fairly quick and easy.
I tried hiding the bracket in the inside cover of the book but it didn’t look quite right. It doesn’t make much of a difference whether you put the bracket, or bookend, on the inside or outside cover. The way I assembled it I thought you’d be able to see the bracket easily, which would defeat the ‘floating’ purpose, but it didn’t make much of a difference. You can also use two brackets on either end of the book and create a more stable base which I might do for my next set of shelves. I’ve noticed they’re slightly wobbly with only one but it’s held up no problem (so far).
 Once you get all the screws in it gets even easier. Just pick a spot on the wall, mark the holes and screw it in to the wall. Voila! Stack you favorite books on top and you’ve got yourself a stylish and functional storage solution.
Your Turn!
- What are you favorite interior DIY projects for small spaces?
Using an old book as an actual shelf.
Thats cool.
pre-drill first
Two supports would be allot safer, with just one the shelf is likely to see-saw and tip the top books off
Very cool. Thanks for sharing the instructions for installing the shelf.
Wow, very clever. Love the idea. Thanks for sharing.
Namaste
This is so helpful! thanks for the great idea! I am absolutely going to try this with all my books