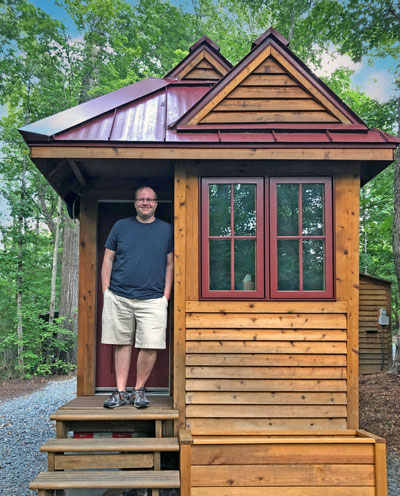
 Hi, I’m Ryan
I’m often asked about what tiny house tools I used to build my tiny home. Having helped build over 3,000 tiny houses, I’ve learned a few things about what tools you really need and what you don’t. There are some places where you can save money on tools and others where you want to buy the best you can afford.
So, what tools do you need to build a tiny house?
Hand Tools
Cordless Tools
Corded Power Tools
Measuring
Pneumatic
Other Tools
Hand Tool Recommendations For Building A Tiny House

It’s funny how some tools greatly benefit from being powered while other hold their own despite being dead simple. There are a few hands tools that do just that — they get the job done.
Hammer: Estwing E3-16S Hammer

The Eastwing E3-16S Hammer sits in the sweet spot of good value and decent quality. For around $25, you can have a good hammer that will serve you well, get the job done, and not cost a whole lot.
Ryan’s Hammer Recommendation:
Vice Grip Pliers: Irwin Locking Grip Vice Grips Set

I’d suggest going with the original brand, which is Irwin, and have at least a large curved jaw and a small curved jaw. These came in handy so many times when building my tiny house, let me tell you.
Ryan’s Vice Grip Recommendation:
Screw Drivers: Craftsman Screwdriver Set

Ryan’s Screwdriver Recommendation:
Box Cutter: Metal Body Box Cutter

My suggestion is to look for something that you can change the blade on, has a retractable blade, and has an all metal body. For $5 you can get a decent one, so I’d suggest whatever looks good to you. You may want to consider having a few of these lying around — they’re often sold in multi-packs.
Make sure to pick up some replacement blades.
Ryan’s Box Cutter Recommendation:
Wire Pliers

These specialized pliers were something that I didn’t initially think I needed, but as soon as I got into wiring my tiny house I realized my regular pliers weren’t going to cut it. I picked up a pair of purpose built electricians pliers and twisting and stripping wires went much faster.
Ryan’s Pliers Recommendation:
Hand Chisel

These were things that I didn’t use often, but the few times I needed them they were super helpful. I’d get a small set of these for the few times you’ll need to notch out a board, clean up a joint etc.
Ryan’s Hand Chisel Recommendation:
Pry Bar: Estwing 21 Inch Nail Puller

There just comes a time when you need to tear something out. You’re most likely a brand new builder, so mistakes happen. This pry bar plus a Sawzall are the solutions to those mistakes more often than not. You really can get any nail puller. It’s just a strong piece of metal that let’s you lever out nails and pull apart boards.
Ryan’s Pry Bar Recommendation:
Pex Water Line Cutters: SharkBite U701 PEX Cutting Tool

Plumbing often comes with some specialty tools, but using quick fit connectors in your PEX will avoid most of that. The cutters are really important to make sure you cut your PEX cleanly so they seat properly into your fittings. For only $13, you can have a great cutter that will make quick work of your PEX lines.
Ryan’s Pex Cutters Recommendation:
Power Tool Recommendations For Tiny Home Construction

Having the right power tools is critical to getting the job done. A good set will let you make more accurate cuts, prevent your arm from getting tired, and make quick work of things when it comes to building your tiny home.
Impact Driver

If you’ve only used a drill before, an impact driver is similar, but with a lot more torque. A normal drill will have around 400 foot pounds of torque while an impact driver will have around 2,000 foot pounds of torque.
 So what does that even mean? It means that you can drive in screws without pre-drilling holes and you can drive in much larger, structural screws that replace the need for large lag bolts. I’ve been able to drive home 10” high shear screws without any fuss, whereas a normal drill wouldn’t be able to get them an inch in.
Why does this matter? Because with this one tool alone, you’ll cut out the need for pre drilling in all your rough carpentry, meaning 50% less operations. When we’re talking about build a whole house, 50% less operations is a big deal!
My suggestion here is to buy brand new, have at least three batteries, and buy a major brand name. This is a place you want to splurge because you’ll be using this all day, every day. These are often sold as a combo pack with a drill, charger, and two batteries which will get you setup nicely. Plan on spending $200 to $400, and instead of getting the cheapest tiers/price points, I’d suggest buying one or two steps up.
You’ll hear people be dogmatic about their brand, but if you buy DeWalt, Milwaukee, or Makita, you really can’t go wrong. It’s often best to stick within one brand for battery-powered tools so you can share your batteries among them.
Ryan’s Driver Recommendation:
Battery Powered Drill

Drills also have a smoother, more consistent spin to them, making drilling holes with a bit much easier. Think of a drill as the tool for drilling holes into wood, while impact drivers are used exclusively for driving screws into wood.
Having two tools — a drill and an impact driver — means you can pre-drill a hole when needed and then without changing bits, drive the screw in. This will speed your work up a lot and is just plain convenient.
My suggestion is to figure out what impact driver you want, then look for a combo kit that includes both the impact driver and drill. The drill included will be pretty evenly matched in quality and the kit should include both tools, a bag/case, a charger, and often two batteries.
Ryan’s Drill Recommendation:
Power Tool Batteries and Chargers

The cheapest way to get batteries is when you buy them as part of a kit. I will often figure out what tool I want, then go find it in a combo. Tools sold as a “bare tool” or in these combos typically include a case and extra batteries.
My suggestion is to have three batteries between your drill and impact driver. This allows you to have a battery in each tool and a third on the charger at all times. Again, this just helps you be efficient in your work. You’ll also make your life easier if all your tools can fit any of your batteries (e.g. the same brand).
For my tiny house build I found that the charger included with the drill and impact driver was enough for my needs. They do sell multi chargers, but I found that if I had one in my drill and the other on the charger I never ran out.
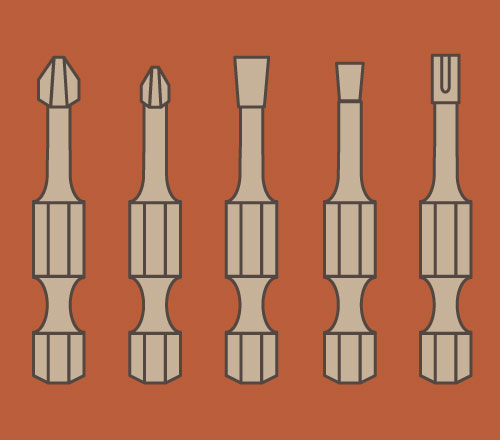
Driver Bits

The last thing to know is that branded bit sets come in boxes that will neatly store in the tool’s case, so I bought this driver bit set and it fits perfectly.
Ryan’s Driver Bits Recommendation:
Drill Bits

Any brand of drill bits will fit in any drill, but one think to consider is the boxes they come in. If you buy the same brand as your drill, some of them are designed to fit in their own hard cases. For example, this DeWalt bit set fits perfectly in their hard drill cases. It’s a little thing, but it makes it very convenient to fit two tools with batteries, a charger, and a bit set and driver set all in one box.
Ryan’s Drill Bits Recommendation:
Spade Bits

That said, they are super useful when it comes to running wires or other smaller hole needs where precision isn’t necessarily the goal. For these, I’d get something with good reviews, but you don’t have to spend a lot for your needs.
This budget spade bit set will cost you about $16 that should suit your needs. For myself, I decided to spend a little bit more for a spade bit set that came in nice hard plastic box. I just find that a storage box keeps things organized a bit better as it jostles around in my toolbox.
Ryan’s Spade Bits Recommendation:
Hole Saws

They sell some budget versions that come with a lot of different sizes. I just waited until I had a need for one andbought the size I needed. Lenox is the main name brand, but you don’t need to spend a lot here because you’ll only need to cut a few larger holes during your entire build.
Ryan’s Hole Saw Recommendation:

Corded Power Tools You’ll Need To Build A Tiny House

There are some power tools that I prefer to have in a corded option. While I often like the convenience of cordless, sometimes a corded version gives you more power, although this has been changed a lot in recent years as battery powered tools can actually be more powerful in some cases.
One area I usually opt for the corded version is with any tool I buy for a very specific, one-time use job. For example, my Sawzall, or reciprocating saw, is corded because I rarely use it and the corded version is about 1/3 the price of its equivalent in power and quality cordless cousin.
Miter Saw

You’re going to want to stick with a name brand in a size that can easily cut both a 2×10 board and a 4×4 post in a single cut each. If your saw can cover those two things, you’ll be able to do most cuts easily on the saw. Plan to spend $200 to $500 here on a brand new, high-quality miter saw.
These saws come in three main sizes, is the difference being the size in diameters of the blades they use: 7.5”, 10”, and 12”. The smaller 7.5” is fine for weekend warriors or hobbyist, but is too small for the size of the project that is building a whole house. The 10” saws are ideal for 95% of your cuts, especially if the saw is specified to cut the above size lumber. While it can be tempting to get a 12” miter saw, I think it’s mostly unnecessary.
The area I might consider really splurging is on a sliding miter saw. A miter saw built on a slide allows you to cut wider boards. If I were to buy a sliding saw today, I’d opt for a Bosch glide arm miter saw because it gives you the advantages of a sliding saw without needing a lot of depth. This saves space if you’re building in a shop, and I believe we’ll see more brands come up with their own version in the coming years.
Ryan’s Miter Saw Recommendation:
Table Saw

A table saw will provide you with the ability to make the most accurate cuts on your sheet goods. You can do a lot with a circular saw, but I think you can still rely on a table saw being more accurate. I wouldn’t spend a lot of money here, but entry level saws start at around $300 and go up to around $600.
If I were to build a tiny house again, I think I’d skip a table saw and opt for the next item.
Ryan’s Table Saw Recommendation:
Track Saw

Track saws have recently really come into their own. There are several brands that made good quality saws, and prices have also come down recently. The top three saws right now are the Makita SP6000J, the DEWALT DWS520K, and the more expensive Festool TS 55 REQ-F-Plus.
If I were to buy one today, I’d go with the Makita. This saw seems to be a very popular choice that a lot of my woodworking friends have recommended to me. At around $450 with the track, it’s not cheap, but track saws in general are pretty pricey.
The biggest reason I’d suggest this over a table saw is that I find it gives you more control when it comes to cutting sheet goods. I’ve used table saws on and off for 20 years as a hobbyist woodworker, but I still don’t feel 100% comfortable with them, especially with boards being able to get kicked back at me.
A track saw lets you set your track exactly where you need it and stays put. Working on the ground on top of foam makes the wood easy to cut and, because you can stand or kneel on top of the sheet itself, your wood doesn’t move. All this adds up to being able to make very accurate cuts while supporting the piece firmly and mitigating risks like table saw kick back. It does all of this well and is much easier than I find cutting with a table saw.
Ryan’s Track Saw Recommendation:
Circular Saw

The saw I recommend is very popular and pretty affordable: the Dewalt DWE575SB is a great saw that you can’t really go wrong with — and for $139, it’s a great choice. I don’t usually recommend one brand over another, but this one has seemed to attract a lot of high praise even from builders who are usually loyal to other brands.
Ryan’s Circular Saw Recommendation:
Orbital Palm Sander

The orbital sander essentially makes a random circular-ish sanding motion. This means you won’t have a sanding pattern show up in the pieces you sand, which is what you want. I’ve used a lot of them, but this Bosch Orbital Sander seems to strike the balance of high quality for a pretty affordable price. I actually have two of these and have used them a lot.
When you buy a sander, pick up a large pack of 80 grit, 120 grit, and 220 grit paper discs with a hole pattern that matches your sander. I’d also recommend corded tools here.
Ryan’s Sander Recommendation:
Router

Ryan’s Router Recommendation:
Jig Saw

Ryan’s Jigsaw Recommendation:
Oscillating Saw

These tools are great for making square plunge cuts into a face of wood. Outlets are a great example of this. Oscillating saws are one of those tools that can do a few things well, but they aren’t going to replace any other tool in your toolbox. This is very nice to have, but not required.
Ryan’s Recommendation:
Sawzall / Reciprocating Saw

Ryan’s Sawzall Recommendation:
Measuring Tools For A Tiny House

Being able to measure and cut accurately is something that seems easy, but to do it consistently is easier said than done. Here are the measuring tools you’ll need for building your tiny house.
Speed Square

Speed Square Recommendation:
Combination Square

Its main use is for more complicated joinery in your finish work, but I found myself using it throughout my build process.
Combo Square Recommendation:
Spirit Level

Carpenter’s Square

Carpenter’s Pencil

Ryan’s Pencil Recommendation:
Pneumatic Tools That Will Make Building A Tiny House Easier

This class of tools was intimidating when I first started, but after teaching myself the ins and outs, I’ve come to love them. If there is one set of tools that will make building a tiny house easier, it’s these. The labor they save you is huge and means you can get more done quickly and easily.
The other thing that these help you with is wear and tear on your body. If you talk to some old timer framers, you’ll quickly learn that building a house is hard on the body. Most of you reading aren’t builders or contractors and that means you’re not used to this kind of work. Do yourself a favor and get these tools — you’ll thank me for it later.
Air Tool Combo Kits

These kits are great and I’d suggest one to anyone wanting to build a tiny home. The only additional things I’d suggest are a palm nailer, an extra hose, and a framing nailer; more on that next.
Ryan’s Recommendation:
6-Gallon Air Compressor

Ryan’s Recommendation:
Finishing Nail Gun

Ryan’s Finish Nailer Recommendation:
Framing Nailer

Ryan’s Recommendation:
Palm Nailer

Ryan’s Palm Nailer Recommendation:
Air Hose

At the start of my day, I’d set up my work station and tools, then would run one hose to my house for my nail gun and a second hose to my cut station with a blow gun to blow off dust as I made my cuts. Not necessary, but definitely helped make things go a little faster.
Ryan’s Air Hose Recommendation:
Other Tools You’ll Need To Build A Tiny House

There are a few other items you’ll need to build your tiny home. Most of these fall into the safety category, so they should be considered carefully. Make sure your safety equipment works for you andis comfortable and easy, that way you’ll be more apt to use them and stay safe.
Ear Protection

Ear Protection Recommendation:
Eye Protection

Eye Protection Recommendation:
Work Gloves

Gloves save you a lot of wear and tear until you can toughen up your hands. I kept a few pairs of these Mechanix brand gloves on hand and I love them.
Ryan’s Work Gloves Recommendation:
Mask

Clamps

Ryan’s Clamps Recommendation:
Tool Belt

Ladders

Ryan’s Ladder Recommendation:
Final Thoughts On Tools For Building A Tiny House

As you can see, you’re going to need a lot of tools to make your tiny home happen. I think all told, I spent about $2,000 on new tools to build my tiny home, but you might be able to get away with less. Buying used tools can be a great way to save some money, but I’d steer clear of used battery power tools and measuring tools.
There are a few things that you might only need once during your build, so borrowing a tool here and there is the way to go in those instances. I didn’t know anyone with tools outside of your basics, so I had to buy a few extras. There are also some tools that it makes sense to rent — a flooring nail gun was one I rented.
The other thing to budget for is all the fasteners, plates, adhesives, paints, and sealants you’ll need to use with these. I spent about $1,500 on just these and was shocked how much that all added up to.
I hope this was helpful in figuring out what tools you’ll need to build your tiny house.
Your Turn!
- What tool for a tiny house build did I miss? What would you add?
Many of the corded tools you used are available in cordless versions. I’d recommend at least considering cordless versions – as long as they share the same batteries as your cordless drill and impact driver!
Other tools:
– a time machine (so you can go back to just before you made that cut)
– a bottle of scotch (when you can’t find the time machine)
– earmuffs (for the family, to block out the swearing)
Hi Ryan, Having a good read through. Thanks for this info. Want to let you know that your speed square link leads to some impact bits, and not a speed sq.
If you want to keep people interestd on your webpage…make valuable info fast and easy….you have a very annoying webpage, time waster.
Trust me, I don’t fuck around or like to have my time wasted,….because I don’t know how much time I have left.
Regards,
Earl