NAVIGATION
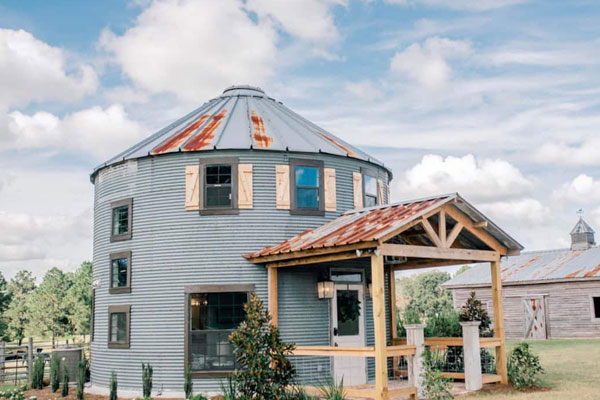
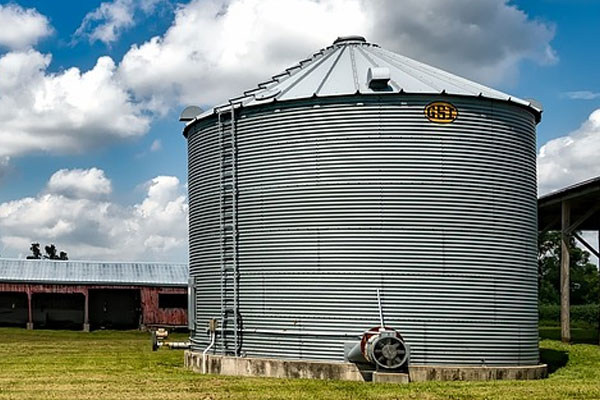
When you think about a grain bin, I doubt the first image that comes to mind is a luxury house. You’ve likely seen grain silos all across the countryside storing grain on farms, but have you ever considered living in a silo? All across the world, builders are repurposing these farm structures to create fully functional houses.
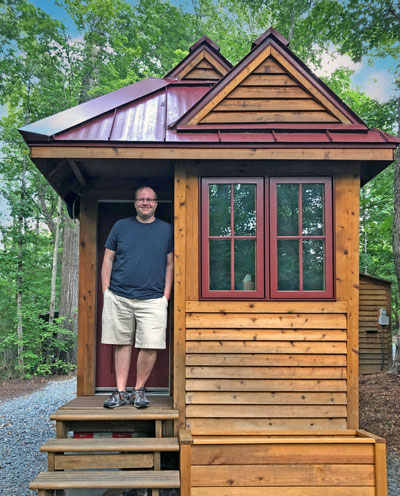
Hi, I’m Ryan
For me, it’s important to live in a way that challenges the status quo. I’ve been living in my own tiny house for years but often wonder what it would be like to live in a grain bin home.

Should You Live In A Silo House? The Pros And Cons

Hearing about grain bin homes, or silo houses, may leave you wondering how a grain silo could become a dreamy, luxurious home. While there are many benefits to silo house living, there are also several downsides.
Pro: Silo Homes Require Less Upkeep Than Traditional Homes
Grain bins only require a few regular check-ins on the three main elements of the structure: the roof, the walls, and the foundation. Checking in on these facets of the home periodically is really all you have to do to maintain the grain bin itself.
Pro: Grain Bin Homes Are Eco-Friendly
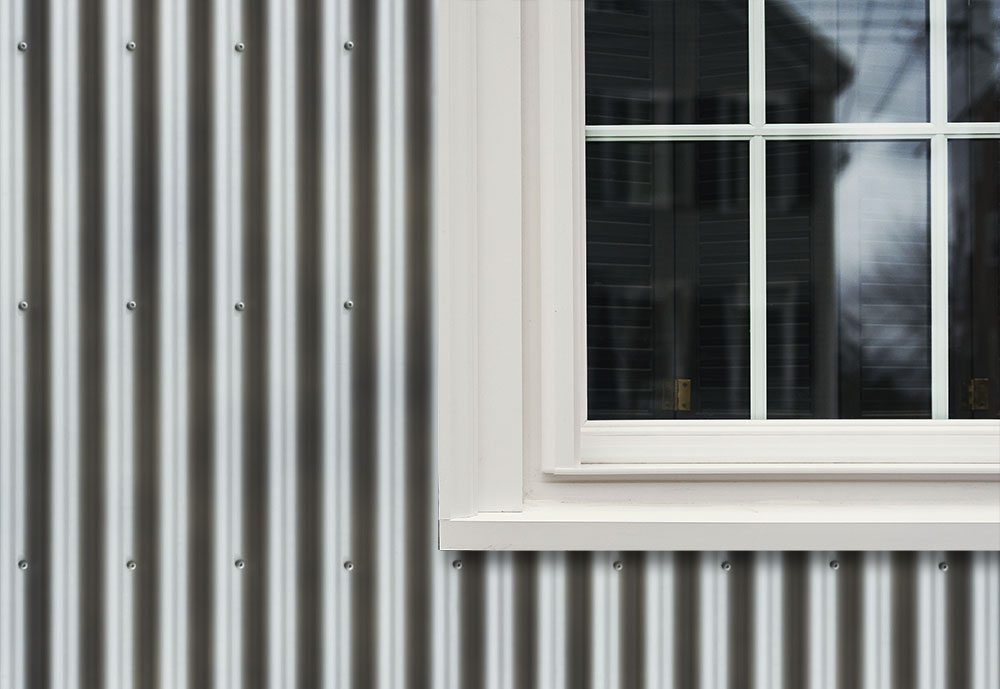
Silo homes are highly conducive to alternative energy methods like solar, making them an eco-friendly option. Grain bin homes are also fully insulated. Therefore, the structures naturally heat the interior of the space and can save you thousands on annual HVAC costs.
Pro: Living In A Grain Bin Is Cost Conscious
As a long-term minimalist, I try to be wise with my budgeting habits. A major pull of silo home living is how little grain bin homes cost to buy, build, and maintain. In a nutshell, silo homes average around $30 per square foot.
I want to caution you here and say that, as with any building project, you don’t want to cut the cost so significantly that you reduce the quality of the building. Invest in a high-quality metal, don’t skimp on the grade of concrete mix you use, and be sure to use extra reinforcement when building.

Con: It’s Harder To Find Silo House Builders And Contractors
Grain bin homes might not take quite as long to build as traditional homes, but it’s harder to find a builder or contractor that works on these kinds of structures. What this means is that, if you choose to live in a grain silo house, it’s likely that a lot of the minor building decisions and responsibilities will fall back onto you.
Con: Silo Homes Don’t Last Forever
Since grain bin houses are built with more malleable materials than most traditional homes, they don’t last as long. Typically, grain houses last between 30 and 50 years. This makes silo homes a wise choice when looking for something to live in now, but they might not be the best property investment for years down the line.
Con: Grain Bins Homes Won’t Be Legal Everywhere
Due to specific housing codes, grain bin homes won’t be legal everywhere. It’s imperative that you make sure it’s legal to build on the land plot that you choose. The best way to become aware of the building codes in your state, city, or county is to contact your local representatives for clarity, or read the building codes yourself online.
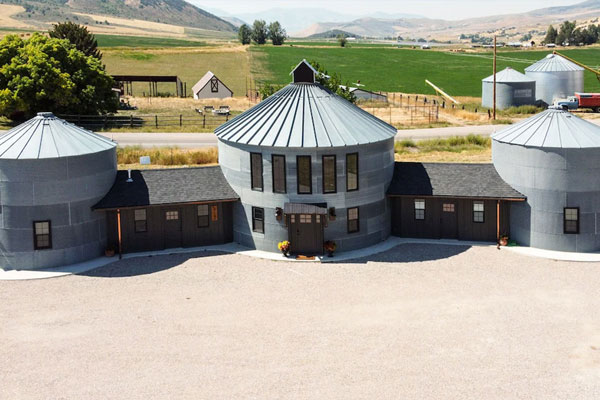
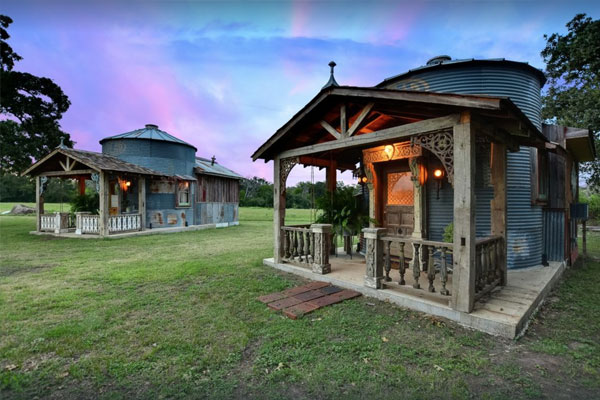
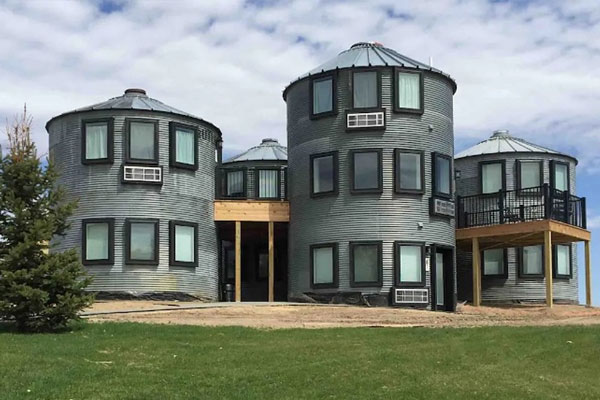
Grain Silo House Design Inspiration

One of my favorite aspects of any building process is the design stage. This is the point in the process where you’re faced with no limits and have space to dream. Many builders and designers choose to attach or connect multiple grain bins to build their house the way they want to.
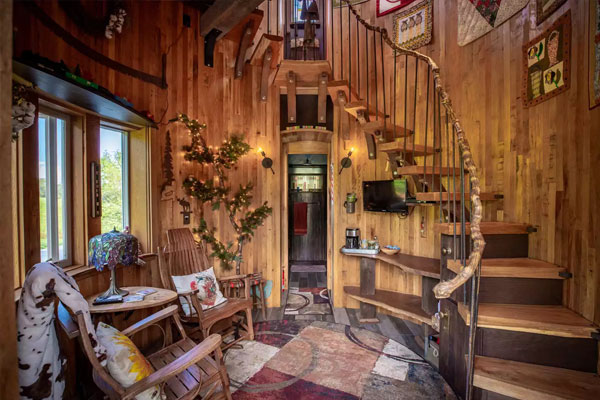
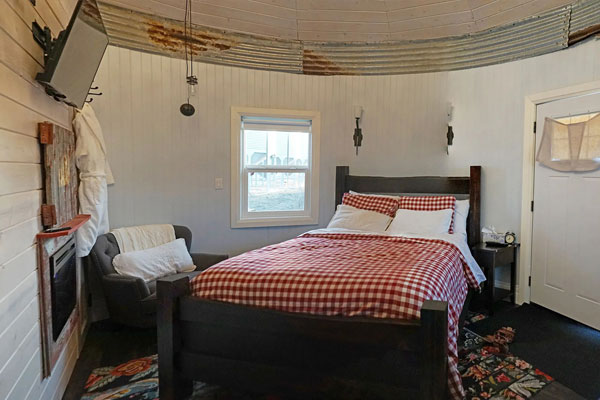
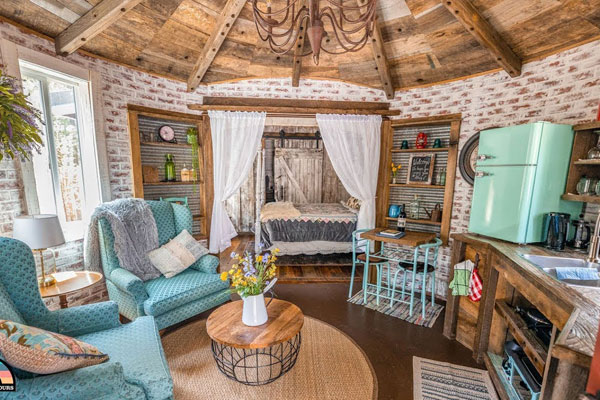
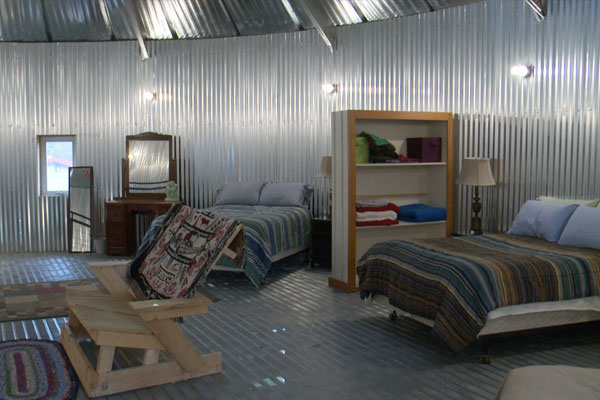
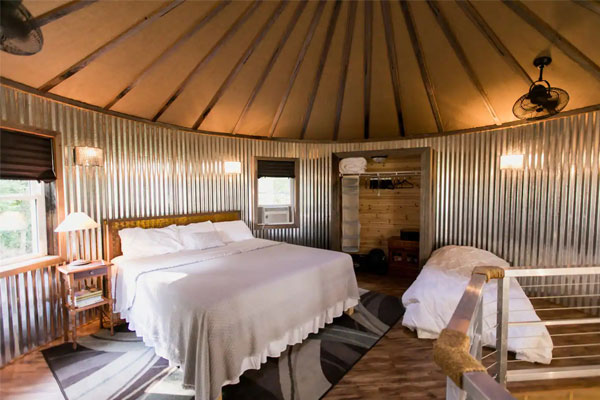
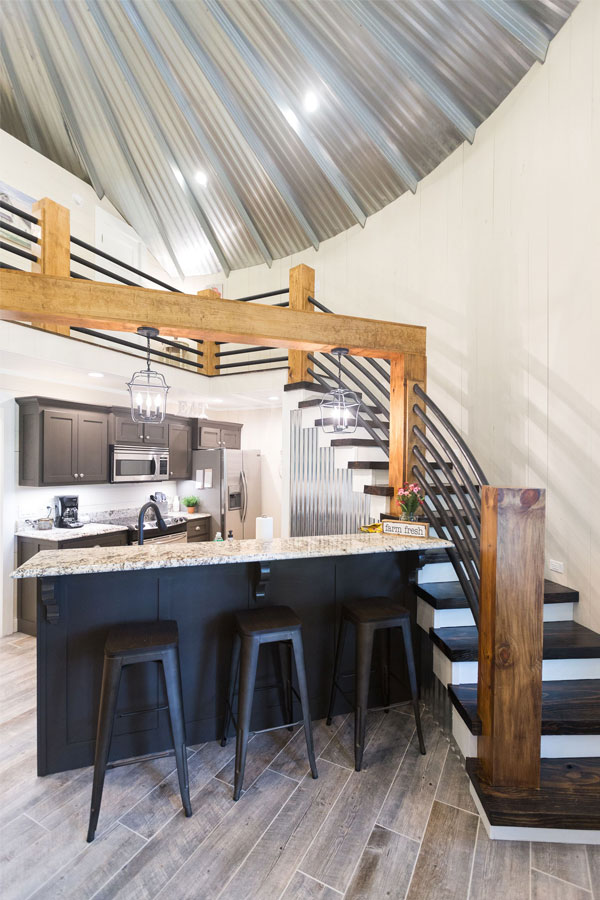
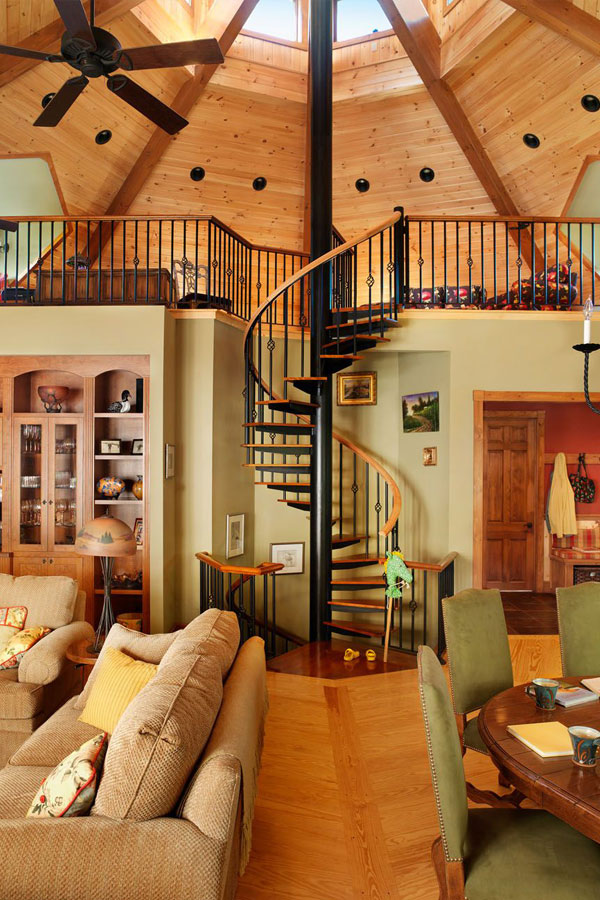
Silo House Interior Examples
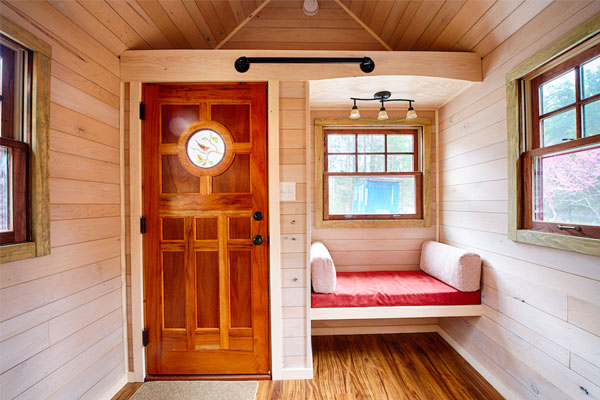
Feel free to include a kitchen nook, spiral stairs, large windows, and personalized lighting throughout the interior of your silo home. The inside of the grain bin house will always be circular, so you may have to get creative with the interior design.
You won’t necessarily be able to build separate rooms the way that you would in a squared house, but you can certainly experiment with room dividers, bookshelves as walls, lofts, or even curved walls.


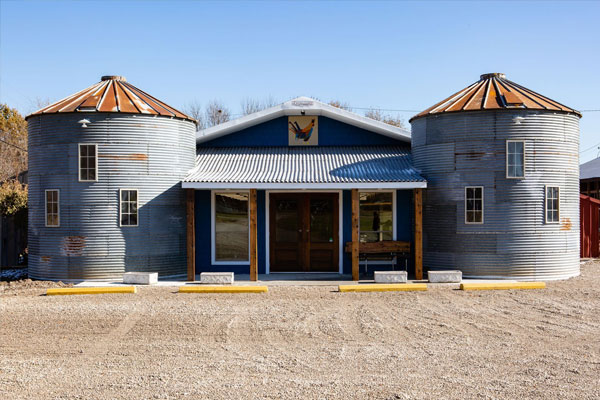
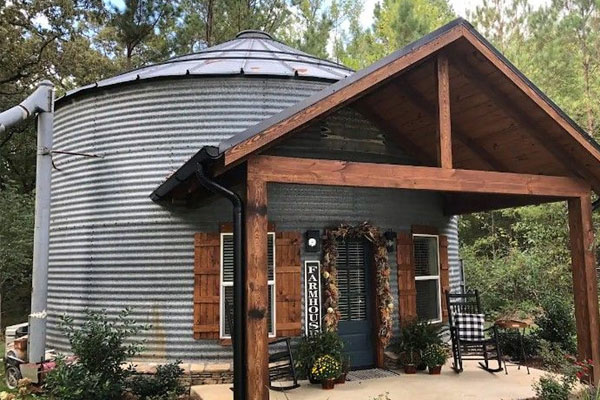
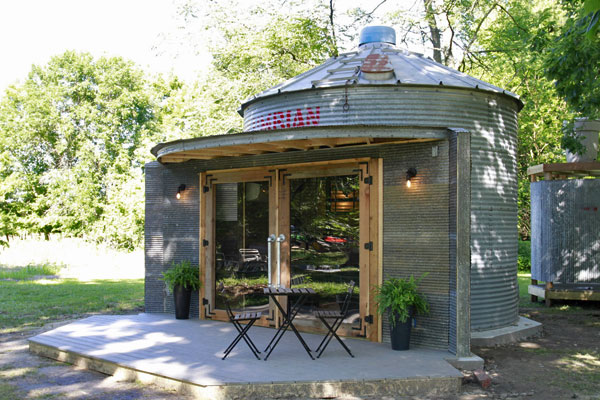
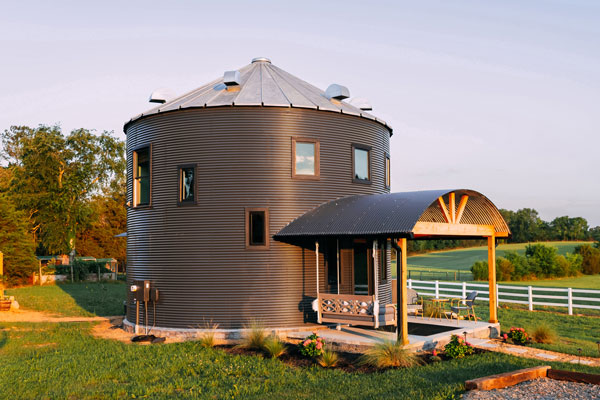
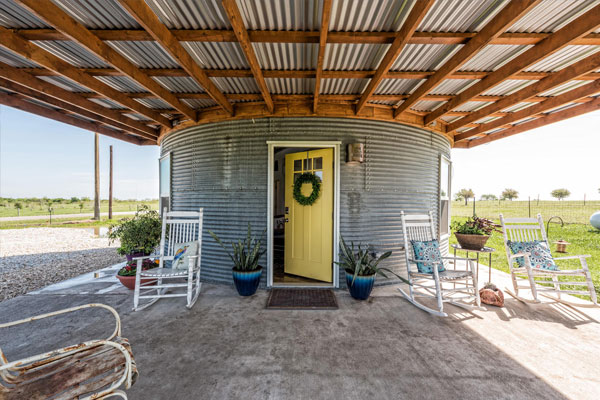
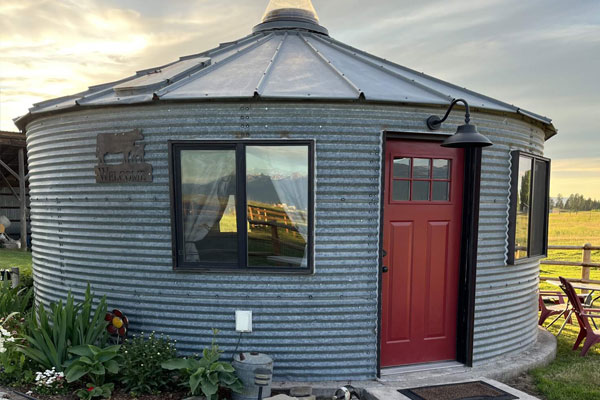
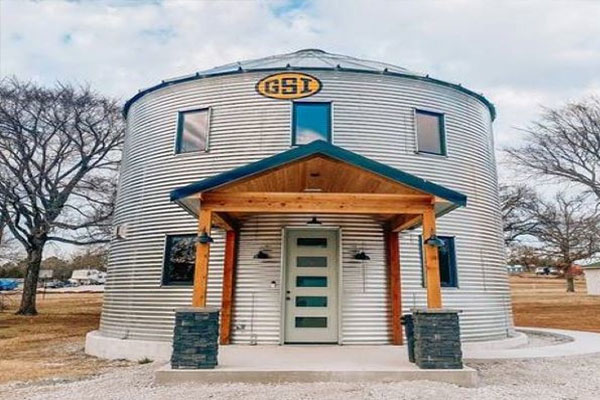
Grain Bin Exterior Examples
The exterior of your grain bin house also leaves lots of room for creativity! Many luxury silo homeowners add balconies, an extended rooftop deck, a covered patio, or a cobbled pathway to the exterior of their home design.
Silo House Plans

Once you have design ideas, it’s time to solidify your floorplan. Calculating your building dimensions on the front-end matters a lot. To calculate the area of the silo you plan to buy or build, you’ll need to do a little bit of math.
Formula For Silo Area = 3.14 x (radius x radius)
Once you’ve calculated the exact area of your silo, make informed decisions about the specifics of your silo house plans and which elements you can fit in your home.
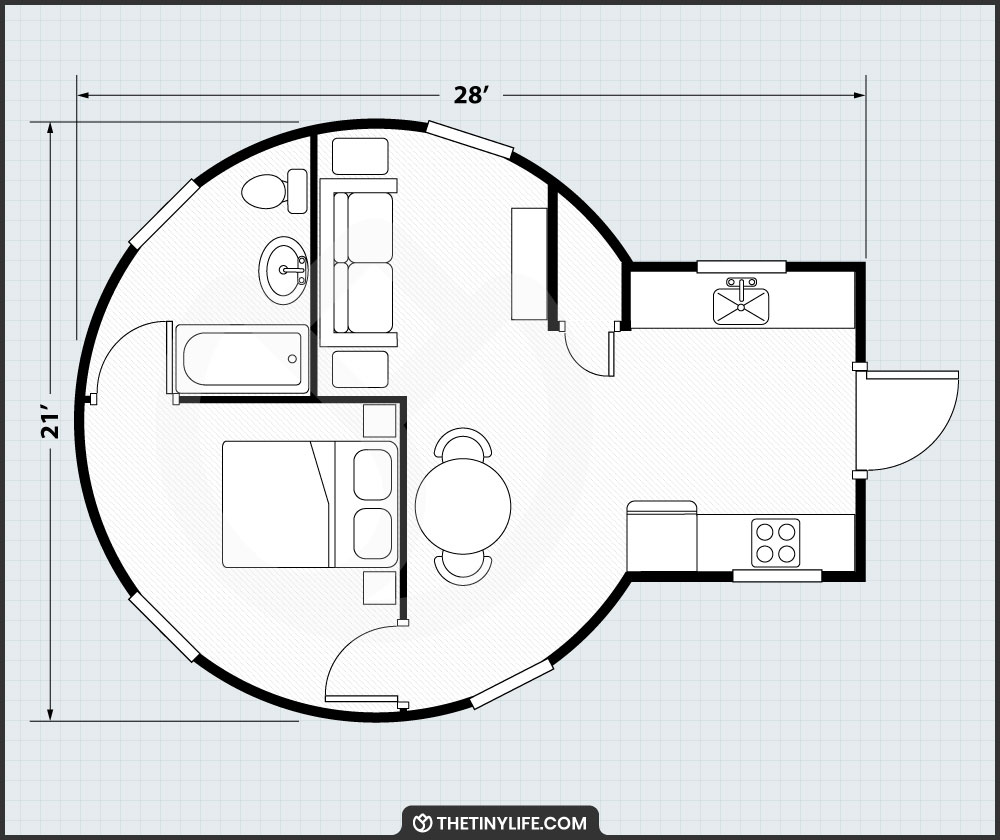
21-Foot Silo Home Floorplan
This 21-foot silo house floorplan is complete with a bedroom, bathroom, connected living room and kitchen, and is 430 square feet in total. The silo’s entry is through a galley kitchen and even includes a small closet between the kitchen and living room.
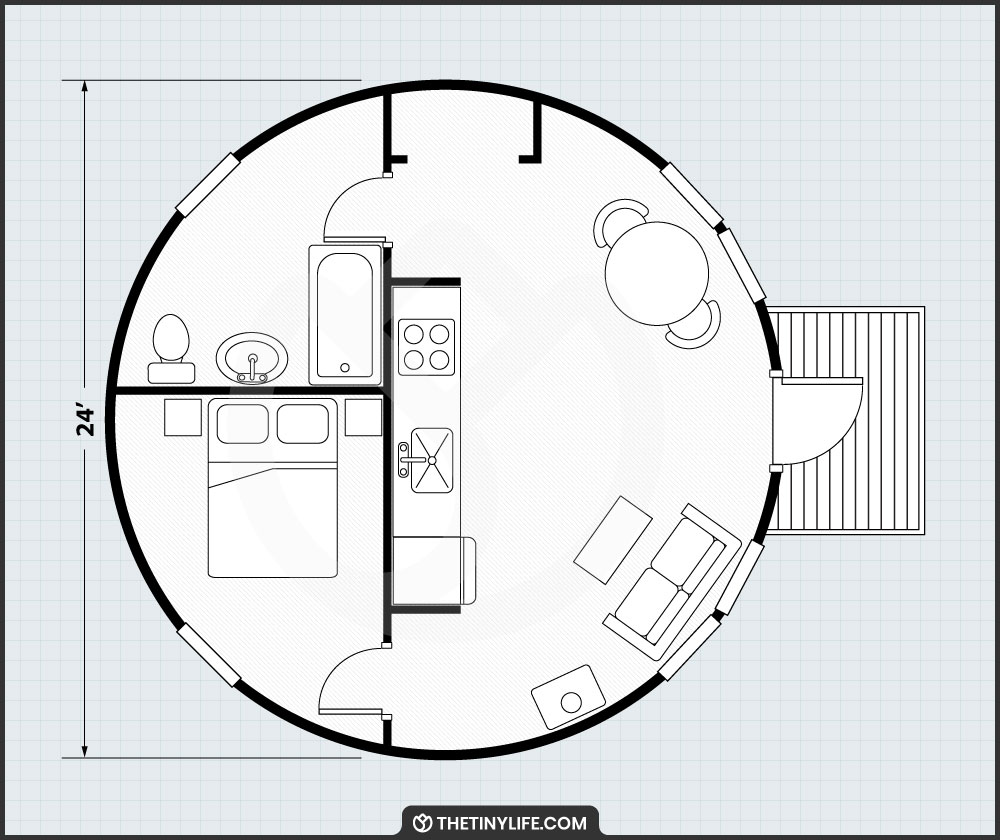
24-Foot Silo Home Floorplan
One aspect I love about this 24-foot floorplan is its simplicity. This grain bin home is 452 square feet, ideal for one or two people, and includes a woodstove with a small deck.
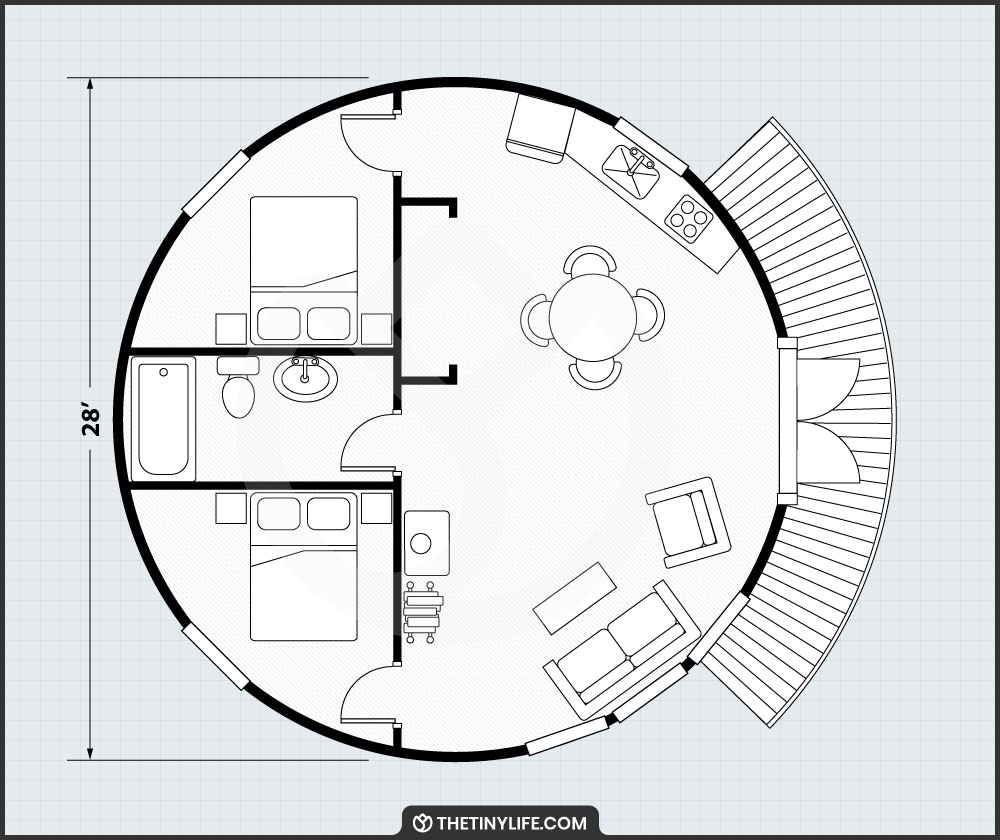
28-Foot Silo Home Floorplan
Families of three or more will want to choose a floorplan that’s 28 feet or larger. This floorplan is 616 square feet and includes a wraparound deck, wooden stove, large closet, pantry opposite the kitchen, and room for two bedrooms.
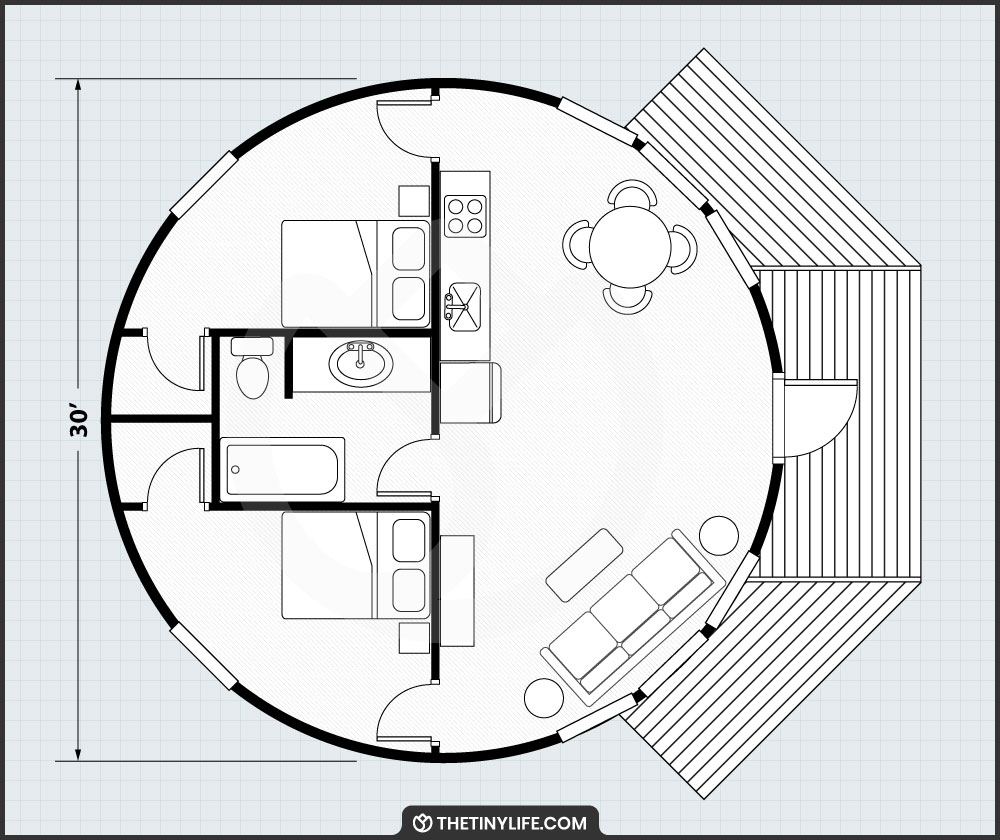
30-Foot Silo Home Floorplan
This 30-foot silo house floorplan is highly intricate and has room for two bedrooms, a full bathroom, and an open concept kitchen and living room. The large wraparound deck covers about half of the structure.
DIY Silo Home: How To Build A Silo House In 10 Steps

As a guy who built his own tiny house from scratch, I know that building anything new is a commitment. Building a DIY silo house is no exception. Even for an experienced builder, the project will likely take several months, if not longer.
However, I’m a believer that anyone with the time, funds, and dedication can work hard and learn to build their dream home and reap the rewards once the project is complete!
How To Build A Silo House: Tools And Materials
Make sure you have all the right tools and materials before you break ground on your grain bin home. This will ensure that you’re prepared to build the highest-quality, safest, and sturdiest silo home possible.
Materials Needed To Build A Silo Home
- Galvanized grain bin sheets (9 to 20 gauge)
- Steel rebar
- Quality scrap lumber (for interior framing)
- 6 sack concrete mix (or higher quality)
- Mastic (metal sheet sealant)
- Metal roof and wall stiffeners
- Loam soil
- Granular fill material
- Silicone for hopper seams
- Tar pad

Required Tools To Build A Grain Bin Home
- Grain bin jacks
- Method to lift the grain bin (crane, boom truck, or forklift)
- Drift punches, medium length (10 inches at least)
- 9/16-inch box-end wrenches (at least 2)
- Quality impact wrench
- Power drill
- Metal drill bits
- Quality vice grips
- Slip joint pliers
- Hammer and nails
- Nuts and bolts
- Anchor bolts
- Wrench
- Chisel
- Tape measure
- Concrete screed board
- Concrete hand float
- Ladders, 6-foot and 8-foot tall minimum
- Ropes or straps for guiding the bin or sheets
- T-posts for holding your partially built bin in place
I’d suggest checking out this Grain Supply store. The group has a warehouse in Litchfield, Minnesota, but ships grain bin supplies anywhere in the continental United States.
1 Claim The Land For Your Silo Home
When you’re ready to break ground on your grain bin home, find or purchase a quality patch of land to build on and start marking off your plot. If you plan to install underground utilities in your silo home, it’s best to choose a flat plot of land as opposed to curved or hilly land to support any underground wiring or pipes.
Build your grain bin home on a plot with high-quality soil. Doing this will provide better support and increase the longevity of the building structure. If you plan to add additional soil underneath the foundation of your grain bin house, I recommend loam soil, which can easily be picked up at your local hardware store or garden center.
Overall, loam soil is ideal for construction due to its ratio of silt, sand, and clay that makes it less likely to sift, expand, or shrink. This makes loam soil ideal for protecting your grain bin house from water damage or severe weather.
2 Lay Concrete Foundation For Your Grain Bin House
Laying the foundation is by far the most important construction step in the process. A weak or improperly installed foundation will lead to cracks and other issues down the line, so you want to put in the work on the front end to make it sturdy.
There are several ways to lay the foundation of your grain silo home. Support the structure adding a concrete slab on top of a dug-out soil pit, lifting the silo off the ground with metal beams, or using a granular mattress. The most popular method used to set the foundation of a grain silo home is to build a granular mattress with a concrete slab on top.
 When building your foundation, lay down your granular pad or “granular mattress” at the ground level. The concrete slab will then sit on top of your granular bed. It’s important to note that the minimum thickness of the granular pad should be 12 inches when building 18- and 19-foot diameter bins, or 18 inches for 21- and 24-foot diameters. Ensuring the thickness of the granular bed is correct will help ensure that your silo home is built atop a sturdy base.
After laying the granular slab, build out your circular wooden base and fill it in with the highest-quality 6 sack concrete mix you can get your hands on.
Scrape and level the cement pad so it’s flat and smooth across the entire slab. It helps if you have two people working on this part of the build, with one person smoothing the entire slab with the screen board while the other uses the hand float to sift out imperfections.
If you think your concrete base will need more reinforcement, steel rebar can be a huge help. I’d recommend drilling rebar into the center of the granular bed to reinforce the entire foundation most effectively.
3 Attach The Roof And First Metal Sheet Of Your Silo House
Build out your roof and attach the first metal strip to your grain bin. It may seem counterintuitive to start building at the top of the silo bin, but the most effective method to build a grain silo is to start with the metal roof and work your way downward. It may help to have a visual representation of this process.
Basically, the way this works is you’ll build the top rim of your grain bin, attach the roof to the top of that piece, and then add to the structure from underneath. Once the roof is assembled on top of your grain bin, attach roof and wall stiffeners for additional support.

“During the building process, the roof is the most malleable part of the silo, so it’s important not to move it too much or too quickly when attaching it to the rest of the bin.”
4 Attach The Rest Of Your Galvanized Metal Sheets
Now it’s time to add on your metal sheets and start lifting the exterior of your grain bin up into the air layer by layer. To do this, use your grain bin jacks to lift each section of your structure so you can build underneath.
 There are several different types of grain bin jacks out there, but I recommend hydraulic grain jacks as opposed to the classic easel shaped grain bin jacks. The hydraulic jacks use oil flow to create pressure and hold the large pieces of metal more firmly in place, lifting heavier loads with less strain.
Next, install another metal strip to the bottom, putting bolts through the seams from the top to bottom. Don’t tighten the nuts all the way, so you have room to attach the reinforcing stiffeners later on. Repeat this process until your silo reaches its full height, using mastic sealant in all of the seams between metal strips as you attach them.
5 Anchor The Grain Bin To Your Foundation
Then, tighten the anchor bolt as much as you possibly can with your wrench so that the grain bin is securely attached to the base. This will ensure that the grain bin walls and foundation are stable and resistant to damage or detachment due to weather and general wear and tear.

6 Add Interior Wooden Framing To Secure The Walls
Add wooden framing to the interior of the silo. If you plan to add a loft, balcony, or any other type of raised element into your silo house, frame the base of those structures with your lumber. However, if you only plan to have one story in your silo without any raised elements, frame directly against your metal wall sheets.
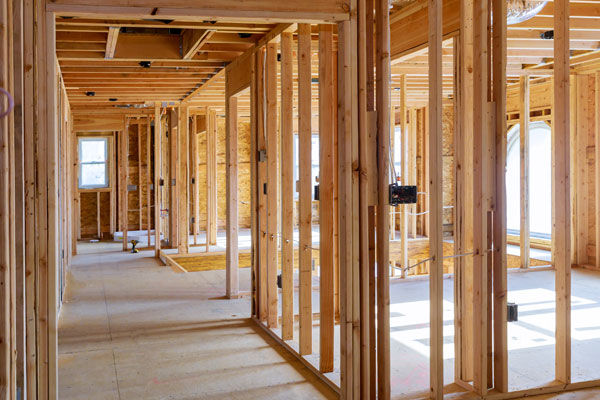 Make sure that your studs are all positioned in the same direction so that you don’t run the risk of structural instability. I usually mark the crown of my stud boards so that I can easily identify which way is “up.” Look down the top of each wooden stud and mark the crown side, so that every stud is facing upwards when you build your frame. If you don’t, your studs will be forced to curve in and out, and your wall will be built in a less stable manner.
Once you’ve marked your studs, start lining them up across your metal sheets with identical distance between each strip of lumber. I typically stagger my studs about three-quarters of an inch apart and set them about 12 inches from the center to support the curvature of the grain bin.
I’d also make sure to use steel clips to reinforce your studs to the metal sheets. With any kind of circular structure, it is also wise to place an extra support post in the middle of the curve just as an additional precaution.
7 Cut Out Door And Window Openings In The Silo
After you’ve framed the interior of the silo, cut out holes where your windows and doors will eventually go. This part in the building process can be a little tricky, so you want to make sure you do it well.
“When you start cutting openings into the steel, the gaps will immediately release the tension of the grain bin and it may start to wobble. Don’t panic, this is normal.”
Right now, your entire metal silo is tightly bound together between each layer of metal — making cuts will naturally cause the metal curves to give a little bit as that bond is severed. When I build with metal, I use a Sawzall tool to make all my cuts, which works a lot better than a welder or a nibbler tool.
Remember earlier when I said to leave your bolts screwed in loosely? Take out all of the bolts that you didn’t tighten entirely and place the steel reinforcements behind that opening between the metal sheets and the wooden frame.
Then, screw your bolts back into the holes in your metal tightly. Adding in your steel reinforcements as you cut into the silo will keep it from being too wobbly between the time that the holes are cut and the doors and windows are actually installed.
8 Build Your Grain Bin House Flooring
Once the entire exterior of the silo home has been built, lay out your flooring. Before building the floor itself, check for any tar buildup on the bottom layer of the silo itself, as it’s highly probable that tar and debris has caked onto the silo rim in the construction process. If there are tar remnants on the bottom of the silo, scrape it off with a chisel before you lay your flooring.
 Then, it’s time to rim your flooring space with caulk before actually laying down your wood or tile. When I’m working on a home, I try to use caulk that matches or pairs best with the color of the flooring that I choose, whether that’s tan, brown, white, or gray.
After using caulk to rim the silo floor, it’s time to lay out the floor itself. In a circular structure, it’s vital to choose a floor type that allows you to evenly distribute the weight of the house all the way around the radius of the silo base.
There are lots of different flooring types that you can make work in your grain bin home. I personally lean towards luxury vinyl plank (LVP) flooring when building anything new because it’s highly resistant to water damage and scrapes. In my own tiny home, I have maple hardwood, which is also a great option. However, I think I’d go with LVP if I were to build a new structure like a silo home.
| Type | Description | Source | Materials Cost | Installed COst |
|---|---|---|---|---|
| Hardwood | 100% natural wood: Oak, Maple, Hickory, Cherry, Walnut |
All natural | $5-$15 sq/ft, | $7-$23 sq/ft installed |
| Engineered | Top layer of hardwood adhered to plywood base |
All natural except for adhesive |
$3-$5 sq/ft | $6-$15 sq/ft installed |
| Bamboo | Bamboo strips adhered together into planks |
All natural except for adhesive |
$3-$8 sq/ft | $7-$12 sq/ft installed |
| Cork | Top wear layer adhered to cork (tree bark) back |
All natural except for adhesive |
$3-$8 sq/ft | $5-$11 sq/ft installed |
| Laminate | Photographic & wear layer over dense fiber board |
All natural except for adhesive |
$1-$7 sq/ft | $2-$12 sq/ft installed |
| LVP | Same as vinyl but thicker with added film protective layer |
All synthetic |
$2-$7 sq/ft | $5-$15 sq/ft installed |
| Ceramic Tile | Baked clay & shale, natural stone |
All natural |
$2-$27 sq/ft | 11-$25 sq/ft installed |
| Carpet | Wool, nylon, acrylic, polyester, polypropylene |
Wool; all natural others; synthetic |
$2-$7 sq/ft | $2.50-$14 sq/ft installed |
9 Add Doors And Windows To Your Silo Home
Building the doors and windows of your silo home can be a tricky endeavor because there is so much precision required to get them straight and sized correctly. Drill on the exterior wooden frames that match the measurements of each of your specific doors and windows. After the frames are finished, install windowpanes in the frames.
 While you can use real glass to build your windows, I recommend using acrylic plastic sheets. These sheets are less likely to break during a storm than traditional glass might be. If you’re still concerned about your grain bin house windows breaking, you might consider installing extra window security film as additional support.
Installing the door of your grain silo will likely be even trickier than your windows because you have to do a lot of work to keep the pieces of wood from twisting and warping. Additionally, the wood needs to seal well against the door frame.

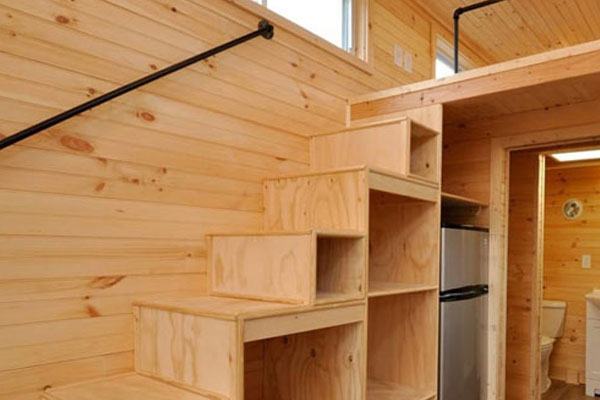
10 Add Stairs To Your Silo Home (Optional)
Stairs are a fairly common addition to silo homes. With all that natural height, adding a second story to your house just makes sense. Make sure that the wooden beam that attaches the staircase to the loft is thicker than the other beams to provide extra support to your second story. When you put hammer to nail and start building your stairs, you’ll need to calculate the dimensions for your rise, run, and width.
 The rise is how much your stairs will gain vertically over the run of the stairs. The total stair run is the longest dimension of the stairs, from the first step to the top of your loft. Lastly, the width of the stairs is the dimension across the stair tread.
I’d suggest taking the total for your stair run and divide it by the dimensions of each of your individual steps. Play with the numbers a bit here because you want something large enough to fit your foot comfortably as you walk up, but small enough to be practical for your space. When I built my tiny house, I made my own stair boxes about 12 inches wide.
Building A Grain Bin House: Common Questions

The trend of living in a grain silo house is fairly new and therefore comes with a lot of questions. It’s important to think through some of the potential concerns you may have regarding your grain silo house to iron out the kinks before you break ground!
How Do I Properly Insulate A Silo Home?
One particular aspect of a grain silo house that’s unique is their natural insulation and ability to be naturally heated. While you do still need to install an HVAC system, the insulation provides quite a bit of heat in the silo. I recommend insulating with pourable foam, as it’s commonly the easiest and most durable option.
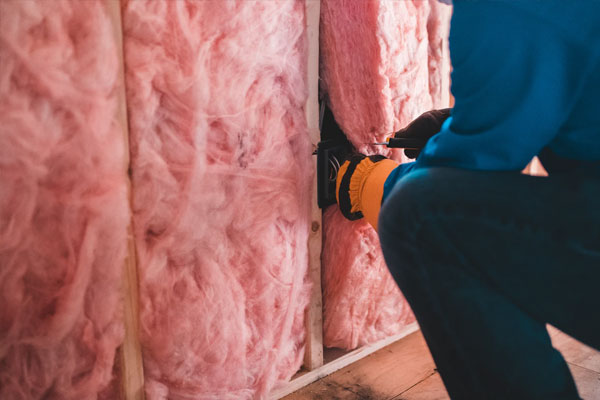 Try to use a closed-cell foam that is at least three inches thick all along the inside of the silo. The goal here is to completely insulate the entirety of the space between the inner and outer grain bins with slow-cure, pourable foam.
Using an even three inches of two-pound foam gives an R-value of about 15 and also acts as a vapor barrier. The International Energy Conservation Code recommends R-13 to R-21 for insulation in walls.
Alternate Insulation Options Include
- Straw bale insulation
- Natural plaster
- Hempcrete
- Wood wool boards
- Fiber cement boards
- Timber
- Clay

Can I Repurpose An Old Grain Bin Instead Of Building A New Bin?
If you aren’t feeling inspired to build your own grain bin from scratch or you’re looking to save a building from the landfill, you can always try a grain bin conversion instead of building your bin from scratch.
 The major plus side to choosing a grain bin conversion is there’s a lot less building work required on the front-end.
The biggest downside to choosing a grain bin conversion is that you have to somehow acquire a used grain bin legally. You can reach out to a local bin dealer or bin erector, or subscribe to a framing magazine to look for a used grain bin to convert. The process of a grain bin conversion will be virtually very similar to the grain bin building process, but you won’t have to go through all of the preliminary steps to assemble the actual silo.
If you go this route, you should always have the structural integrity of the building checked out by a pro, especially since silos degrade relatively quickly.
How Much Does A Grain Bin House Cost To Build?
On average, building a silo home from scratch will likely cost you somewhere between $30 and $200 per square foot, depending on how expensive your tools and chosen materials are. Depending on the size of your home by the end of the build, you’re looking at needing anywhere from $9,000 on the low end to about $200,000 on the extreme side.
 A wise way to reduce the overall cost of your silo home is to actually register your house for green building insurance coverage. Green building insurance is a specific type of insurance for energy-efficient properties that can save you thousands and help you make back what you invest in a property like this.
I learned this trick from one of my old friends who works in construction when I was building my tiny home, and I’ve never regretted it.
Your Turn!
- What elements will you work into the design of your silo home?
- What building tools or materials will you need for your grain bin house?
I have always wanted a “silo” home and now with this great website info. it is finally possible. GREAT INFORMATION.
I want to do this, and fortunately have a number of bins available in NE Washington.
I am not too sure how the spray foam process is accomplished, or how the straw bales (which we also have a lot if locally) is supposed to fit in.
Finally, are all plumbing and electrical lines run up the side of the bin, or laterally along the floor?
Instead of bugging everyone is the a book resource I can read?
Thank you so much.
I live in Vale, NC. I have two grain bins that are empty and haven’t been used in years. I want to convert one to live in and make the other one into a garage and storage. How can i go about finding a contractor that knows what he is doing when it comes to grain bin homes?
Dear Sir,
What about a larger bin, say 36 feet in diameter. How tall would it have to be to include a lofted area? Is there a way to strengthen the silo walls that’s even “sturdier”? and where is likely the easiest place to build one?
Regards,
Lawrence Kopp
I would like your option on silo bin home in northern North Dakota. Very cold and high winds. Negative 20 to 30 degrees plus winds of 60 mph.
Do you have a resource or listing for Builders of Grain Silo Homes?
extremely informative !! I’m glad I took the time to check out your site. Thanks for the inspiration.
How many sq. Ft. Is in a 30 ft.dia grain bin
I will be converting 4 – 18ft diameters grain bins into tiny homes in the next two years. My major concerns are with how to get sewer and water into the bins, so they do not freeze. (We live in Northern Minnesota.)
You answered my question about insulation. I would like to spray foam the structure but do not think that will be cost effective. Will probably spray the bottom foot and use batting the rest of the way up and roof.
I’m wanting to turn old silo bin into a poolside bar, any suggestions?
This was well put together in language that a layman can understand. Thanks for being thorough without being to technical. I am just starting to build my own grain bin home in North Florida and it has been a challenge. I will make sure to have the expertise required to move forward. Thanks again.
We have land. We have post frame shed with a studio. Studio area has full kitchen, full bathroom and area for King size bed.
How do I start looking into a silo build that would have a living room and master bedroom on the 1st floor and two bedrooms on the 2nd floor?
How do I find a contractor in my area to perform the build? Do you travel this far?
How do I attach a photo(s) to illustrate my desired results?
We are in Tomahawk WI.