
NAVIGATION
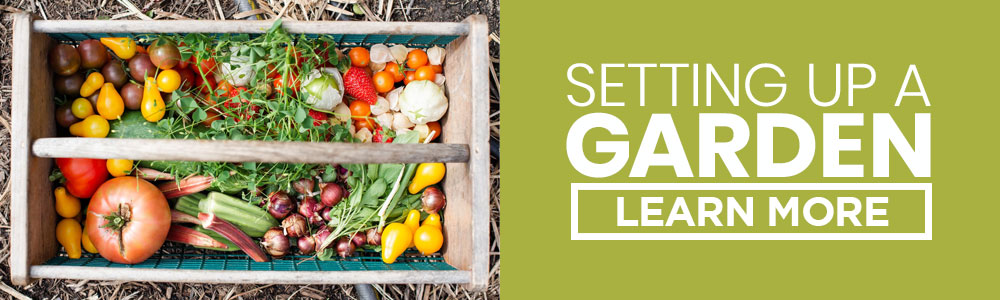
During my years on my North Carolina homestead, I’ve found that DIY cheap garden beds are a budget-friendly choice that has significantly lightened my daily gardening tasks, all while keeping my garden more orderly and enjoyable. All gardening comes with some startup costs, but I have a plethora of ideas for keeping your building and upkeep costs as low as possible — ideas that have already worked for me on my homestead.
Hi, I’m Ryan
I love a good DIY project just as much as I love saving money. Having built and maintained over 20 DIY cheap garden beds on my homestead, I often tell others how to put together cost-effective garden beds of their own so they can reap the benefits and start gardening quickly.

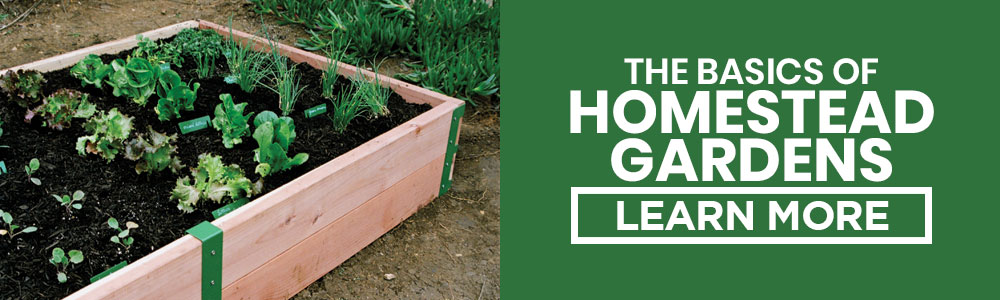
How To Build A Raised Garden Bed On The Cheap
Not only can I build one of these beds in less than an hour for under $40, but building cheap raised garden beds cuts my weeding time almost in half.
If that sounds like a good deal to you, let’s first consider all the benefits of raised beds versus in-ground garden plots. Then, we’ll dive into the specific steps for my favorite cheap way to build a raised garden bed.
Why Raised Garden Beds?
I use raised beds instead of in-ground gardens because even the cheapest raised bed garden will cut back on my weeding time, improve the overall neatness, economize space, and give my vegetables their best chance at thriving. Here are more reasons why these garden beds might be the best option.
Benefits Of Raised Beds
- Easier on your back with less kneeling and bending required to access your vegetables
- Warmer soil earlier and for longer every growing season
- Fewer weeds and rocks, which also means more nutrients are going to your vegetables
- No more trampled, compacted soil from stepping into your garden
- Added growing space, as you can build these in areas unsuitable for in-ground gardens
- For clay soils, raised beds provide better water drainage than in-ground gardens
- For sandy soils, raised beds provide better water retention than in-ground gardens
- They look neater and tidier than an average in-ground garden
- No digging is necessary, and they’re also better at keeping animals and pests out
DIY Cheap Garden Beds Tailored To Your Budget
I’ll give you a few easy steps to follow if you want to learn how to build a cheap raised garden bed the same way I do, but the whole point of DIY cheap garden beds is to create your own out of the materials you have on hand or can obtain cheaply, so feel free to tailor this to fit your homestead. With that in mind, here are some of the most cost-effective and creative raised garden bed ideas I’ve come across in my homesteading community.
Choosing Materials: Cheap Raised Garden Bed Ideas
- Reclaimed wood such as pallets, logs, or discarded lumber
- Galvanized alloy steel made into oval-shaped beds
- Corrugated metal garden edging
- Stack Recycled tires and fill with soil (for non-edible plants only)
- Concrete blocks either purchased or upcycled from other projects
- Repurposed plastic crates
- Large stones gathered from your property

Make sure any wood or metal you might use isn’t treated with chemicals that could negatively affect your garden plants and soil.
While you’re upcycling reusable materials, consider involving your whole family (and maybe even your friend group) in creating and maintaining your DIY raised beds. Lots of hands make light work and might even save you some money in the long run. You can always volunteer a portion of your first harvests to those who pitch in and help do the work. Plus, this is not just for the building stage; this is a trade you can keep up if you think you’ll have more work than you can comfortably handle on your own and more vegetables than you are likely to consume.
Where To Find Materials For Your DIY Elevated Garden Beds
When you’re looking for how to build raised garden beds as cheaply as possible, the first place to look for materials is in your own backyard, garage, or shed. Can you upcycle any of the materials I mentioned above from other projects? Or do you have a friend or family member who has extra scrap materials on their land that they would be happy to unload?
I know not everyone has extra materials lying around, so if you need another source, here are some places that might have money-saving materials.
Tips For Finding The Right Materials For The Cheapest Raised Bed Garden
- Look for stores in your area that recycle home goods (like Habitat for Humanity)
- Visit local lumber mills or lumber yards and see if they have free scrap wood
- Pick up some corrugated metal or galvanized steel from Amazon or a hardware store
- Save your own worn-out tires or ask for others to give you theirs (for non-edible plants)
- Choose a wood that’s resistant to rot and decay, like cedar, redwood, or hemlock

How To Build A Cheap Raised Garden Bed In 4 Easy Steps
While I’ve created several DIY raised beds from upcycled materials, I learned early on in my homesteading journey how to build garden beds cheaply and easily from three 2x8x8 boards purchased at my local hardware store. I like the ease of throwing together another 4×8 raised bed whenever I want to expand my garden, and though the cost of lumber tends to fluctuate, I’ve never had three boards cost me over $40.
Having the same system for building each of my beds also makes it easier to plan and add on in the future.
If you’re purchasing boards from a hardware store, have the store cut them for you to save you time, work, and even the money of purchasing a saw.

Step One: Gather Materials
Besides these three boards, I use a power drill and some construction screws.

Step Two: Build The Frame
First, I cut one of my boards in half. Then, I build the frame by screwing the two 4 foot lengths to the ends of the 8-footer boards to create an 8 foot rectangle. If you’d like to have a deeper bed than 8 feet, you can double the height by doubling the number of boards and building two identical frames, one screwed on top of the other, but I personally find the 4×8 space to be ideal.
When placing your raised bed frames, allow a comfortable space between them for walking, crouching, and bending down while you work.
Step Three: Fill Your Raised Bed
I begin filling my raised beds by laying cardboard down to keep the weeds at bay. On top of the cardboard, I then add a layer of natural materials that will break down over time and enrich the soil of the garden. These materials include grass clippings, straw, sticks, and leaves. After these layers are in place, I add soil.

Step Four: Get Planting
Now the fun part begins. I love working in my garden, growing my favorite veggies like asparagus, broccoli, brussels sprouts, and peas. The vegetables you choose will need to correlate with the depth of your raised garden beds, as larger plants tend to thrive in deeper soil.
Growing your flower and vegetable plants from seed is another great way to cut gardening costs.
Ideas For Filling And Planting Your DIY Raised Beds
Filling your DIY elevated garden beds is an additional cost to creating your raised bed garden. The cardboard and the layer of biodegradable materials can easily be free, but the soil itself is an unavoidable expense. Here are some ideas for cutting costs.
Tips For Filling DIY Raised Garden Beds
- Make an extra-thick layer of natural materials to lessen the amount of soil needed
- Utilize compost to add both richness and depth to your soil
- Use free wood chips from local tree services to pad the bottom of your beds
- Ask local farmers to see if you can get free, aged manure to add to your soil
A raised garden bed should be a minimum of 8 to 12 inches deep to allow for proper drainage, but deeper is almost always better. You can go up to 36 inches for easier maintenance (think less bending over) and the ability to grow larger plants with deeper roots.
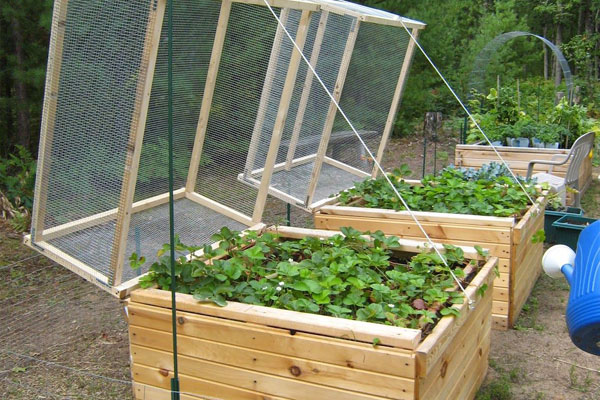
Creative Ways To Design Your DIY Cheap Garden Beds
In your quest to keep costs low while brainstorming inexpensive raised garden bed ideas, don’t forget that gardening is also a beautiful, nature-filled pastime. This hobby can save you money on produce and dramatically improve your health, happiness, and well-being by getting you outdoors, keeping you active, and teaching you how to nurture life.
It’s a beautiful experience all around, and it deserves to be kept personal, creative, and attractive. Here are a few ideas to get you thinking about adding personality, creativity, and beauty to your gardening space.
Ways To Add Beauty To Your Garden
- Build a keyhole garden
- Repurpose stock tanks as garden beds
- Create DIY tomato cages out of repurposed trellises
- Repurpose livestock panels into vertical gardens
- Terrace a sloping lawn by stair-stepping raised beds
- Add an arched trellis to your garden for cucumbers, tomatoes, etc.
- Vary the heights and sizes of your various garden beds
- Keep everything as natural as possible for a “wild” aesthetic
- Make an herb garden coffee table
- Upcycle an old wine barrel into a small raised bed
Now that you know how I create my own DIY cheap garden beds and how countless other homesteaders have come up with creative ways to grow vegetables and flowers in their backyards, I hope you’re excited to get started on your own garden. If you’re interested in combining your gardening skills with your chickens, check out my tips on how to start a chicken garden combo!

Build A Raised Garden Bed
DIY Cheap Garden Bed

Build a simple raised garden bed for less than $50 in only 1 hour.
- Tape Measure
- Carpenter's Pencil
- Carpenter's Square
- Circular Saw
- Cordless Drill or Driver
- 3 pieces of 2" x 8" x 8' lumber
- 1 box of 3" long exterior decking screws
- Enough cardboard to cover 32 sq/ft.
- About 100 pounds of garden soil and compost mix
-
Start by cutting one of the three 2" x 8" x 8' boards in half length-wise. Measure to the 48" mark and use your square to draw a straight line where you're going to cut the board in half. The final size of those two cut pieces should be 2" x 8" x 48" each.
-
Set up the boards into a rectangle shape roughly where you want your garden to be located. Don't worry about being precise, you can move the final structure around easily once it's assembled.
-
Attach the 48" length boards to the 8' long pieces by driving three 3" screws through the sides of the 48" boards and into the ends of the longer 8' boards. Make sure the tops of the boards are reasonably flush with each other before driving the first screw all the way in.
-
Once all of the boards are screwed together you can position the final 4' x 8' rectangle-shaped assembly around on the ground until you get it exactly where you want it.
-
Lay out cardboard on the bottom of your new garden bed. This should block most weeds and bugs from getting through to your plants. Cardboard is eco-friendly and will decompose naturally.
-
Add your soil and compost mix so that it covers the entire inside of the garden bed frame and it's about 1" below the top of the wood frame itself.
-
Now you can plant your favorite vegetable seeds in the soil and count the days to harvest the fruits of your labor!
- What types of garden beds have you built on your homestead?
- What pros and cons have you discovered between in-ground gardens and raised beds?
Leave a Reply