NAVIGATION
Hi, I’m Ryan
When I first started composting on my own, I had tons of questions. I got hung up on what I was doing wrong instead of what I was doing right. Composting is a science and an art, so you’re not going to nail it on your first try. There is a lot to learn and it’s okay to fail when you first start.

In a society obsessed with instant gratification, it’s hard for us to let good things take time. Composting is a slow process that takes diligence, patience, and keen attention, but the process brings abundant rewards. Composting reminds us that we aren’t meant to be blind consumers of what the earth has to offer, and that our ecological footprint is important.
What Is Composting? Compost Defined

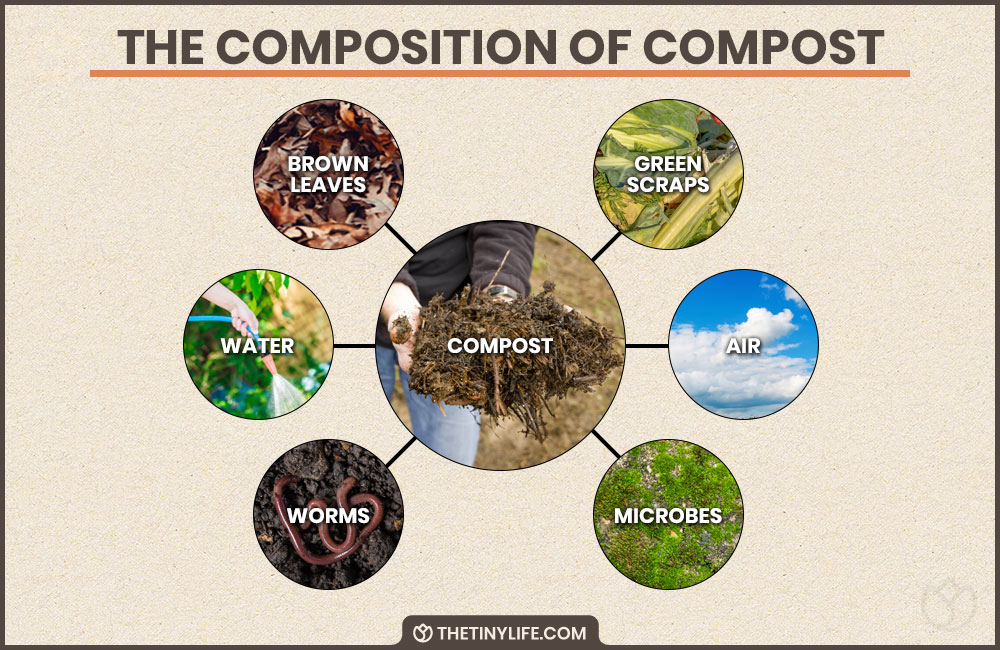
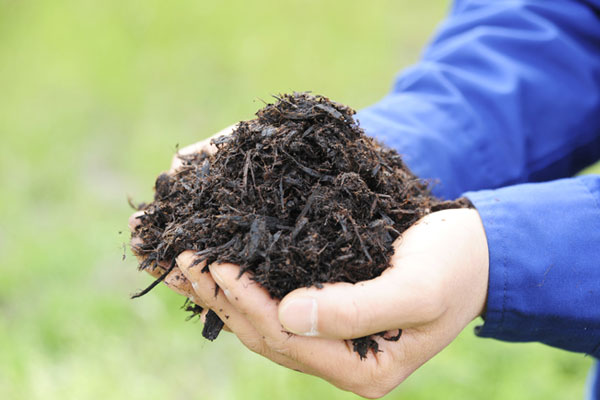 In the simplest terms, composting is the decomposition process of organic matter to create a smooth, dirt-like material that can be used to nourish plants and trees as well as fertilize soil.
There are several different types of composting which I’ll outline later, but all types serve the same purpose: turning organic waste into nutrient-rich soil.
How Does Composting Work?

As your carbon-filled kitchen scraps begin to rot, microorganisms from the soil will break it down. This leaves you with humus, a thick black and brown substance full of a fiber, carbon, nitrogen, phosphorus, and potassium that can nourish plants and trees.
The microorganisms are able to break the material down by taking in water and oxygen and giving off carbon dioxide and heat. And then, like magic, last week’s banana peel has decomposed to become fibrous soil!
Benefits Of Composting

Composting has many benefits, but here are just a few to convince you to start composting on your own:
Composting Gives Your Waste Purpose.
Organics make up 1/3 of the garbage that is sitting in our landfills. Throwing organic material away adds waste to landfills that could have been used for greener purposes.
Compost Prevents Plant Diseases.
Using compost causes your plants and trees to be more resistant to diseases and harmful insects because of the healthy nutrients in the compost.
Compost helps to conserve and clean water.
Adding compost to soil can reduce the amount of water needed for crops. Additionally, compost’s ability to filter water as it penetrates the ground actually cleans the water flowing into the ocean.
Compost improves air quality.
The composting process sucks carbon out of the atmosphere and puts it back into the ground.
Composting helps the economy.
Composting plants have been proven to create more jobs than other disposal facilities, such as landfill sites.
Composting lowers your personal carbon footprint.
Composting minimizes greenhouse gas emissions and reduces the amount of carbon your personally put out into the atmosphere.

Types Of Composting: Which One Is Best?

Different types of composting require slightly different environments and processes, and they each produce a diverse outcome. There are three main types of composting, and it’s important to know how they each work and what they require when deciding which method you want to try your hand at.
Aerobic Composting

 Typically, when people talk about composting, they are referring to the aerobic composting method. With this method, microorganisms rely on oxygen to break down waste. When you hear composters discuss turning their compost pile, it means they’re using the aerobic method.
The act of “turning” or “spinning” a compost pile is crucial because it is in the rotation of scraps that the pile is able to aerate, and the organisms can take in the oxygen they need to get the decomposing show on the road.
When going this route, you’re going to want to add lots of nitrogen-heavy scraps like leaves, grass, and vegetables. This will raise the temperature of your pile and speed up the overall process.
Benefits of the aerobic composting method:
- Relatively odorless
- Does not take as long as anaerobic composting to see results
Anaerobic Composting

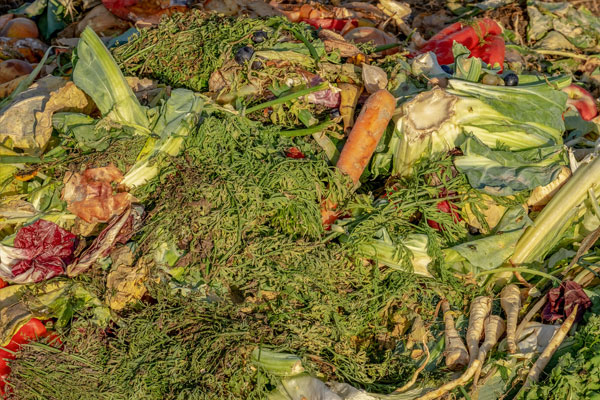
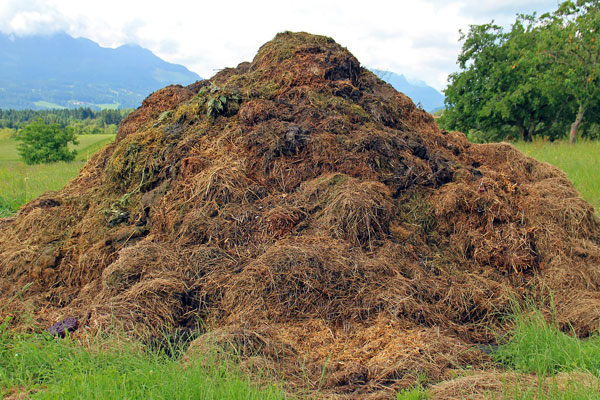 Anaerobic composting is the exact opposite of aerobic composting: There is no oxygen used in the decomposition process. Anaerobic composting is what happens in landfills — waste breaks down over a long amount of time, completely on its own, just by sitting in a pile.
However, without oxygen to help the organisms break down matter, bacteria can take over and causes the pile to emit a highly pungent smell.
Benefits of the anaerobic composting method:
- Takes very little effort to maintain — throw scraps into a compost pile and don’t touch it for a year or more to see results
- Produces more usable nutrient rich humus per volume of organic waste put into the compost pile
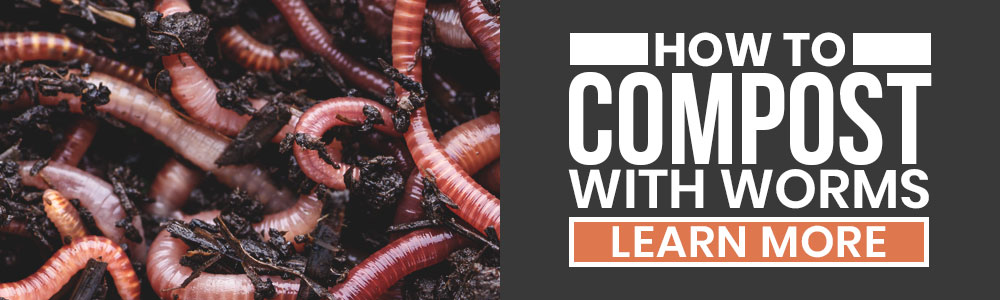
Vermicomposting

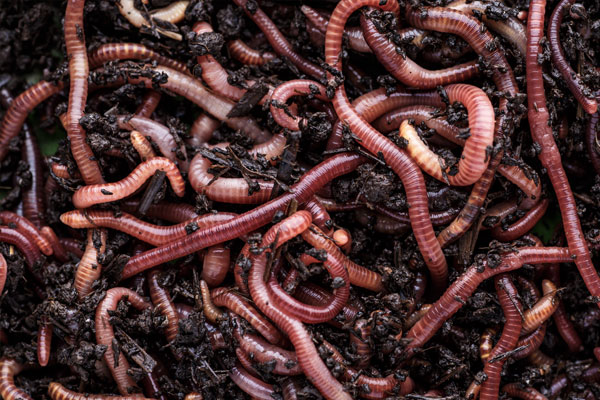 This third type pf composting is in a category of its own. Vermicomposting is a method that uses worms (usually red wrigglers) to do the bulk of the hard work. The worms use oxygen and moisture to safely break down organic material, just like in aerobic composting.
With this method, the worms do most of the heavy lifting with a little help from other microorganisms and bacteria. Vermicomposting is regarded by experts as the easiest and most successful composting method for a few reasons:
Benefits of vermicomposting:
- Very easy to maintain — no need to turn your worm compost as frequently because the worms are working overtime for you
- Closest to being completely odor free
- The fastest method as worms speed up the composting process
Composting Advice From Experts

I was able to chat with several composting aficionados, including master gardeners, horticulturists, rot riders, and several others. These ‘posters gave us real-world insight and advice they wish they had when they were first starting to compost, as well as where beginner composters usually go wrong.
Advice For Composting Beginners

Our experts thought back to the very early years in their own composting journey and considered the advice they wish they had known when they first started out.


– Nick Shaw, Apex Organix
Where Beginner Composters Usually Go Wrong

We also asked our experts where they see new composters usually run into problems, and they gave some advice on what not to do when making your first compost pile.


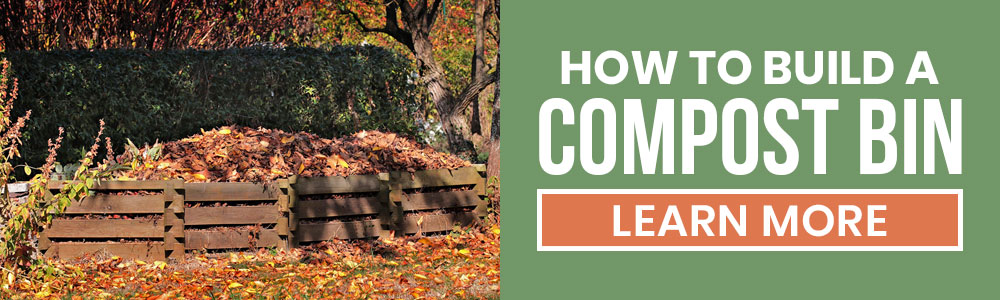
How To Make Compost At Home In Five Easy Steps

If you’re ready to get started, we’ve laid out five easy steps to make your very own compost pile! Just follow these instructions and your kitchen scraps will be magically transforming into humus in no time.
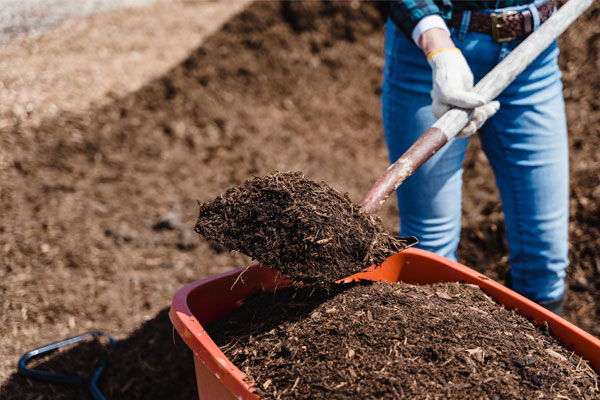
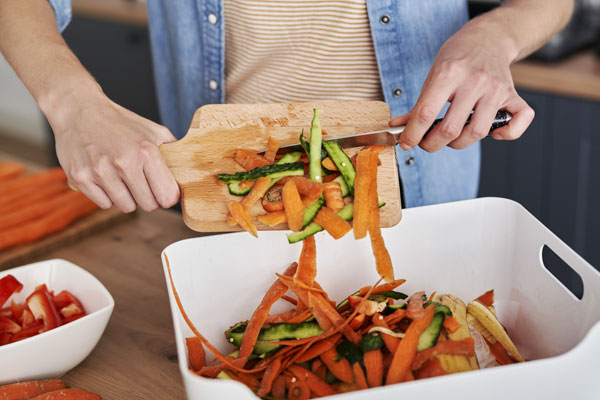
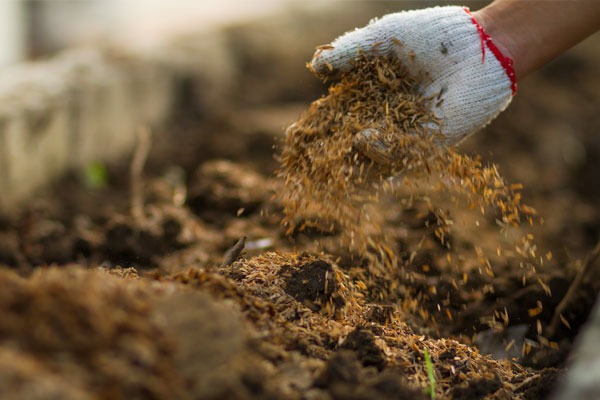
Step One: Gather Composting Kitchen Scraps

 Separate your brown scraps (carbon heavy) from green scraps (nitrogen heavy), making sure you have a fair amount of each type represented.
As a general rule, when gathering your scraps, be sure to stock up on more brown matter than green matter — things like newspaper, cardboard, chipped wood, or dry leaves.
Step Two: Chop Compost Material To Size

 Experts recommend chopping your materials into ½- to 1½-inch pieces. Of course, composting isn’t an exact science, and the size of your scraps will depend on the type of scrap it is. You aren’t going to be able to cut up coffee grounds the way you cut up newspaper, but try to chop the scraps you can into even sized bits.
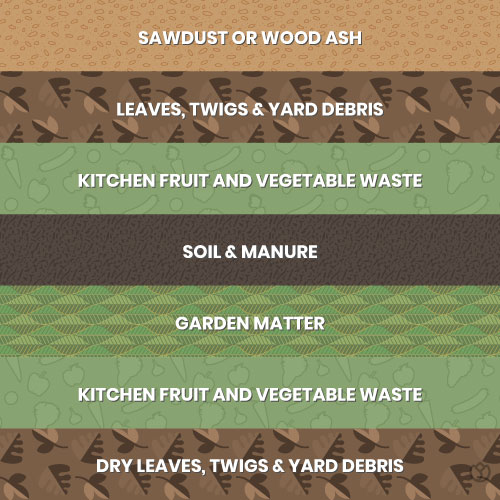
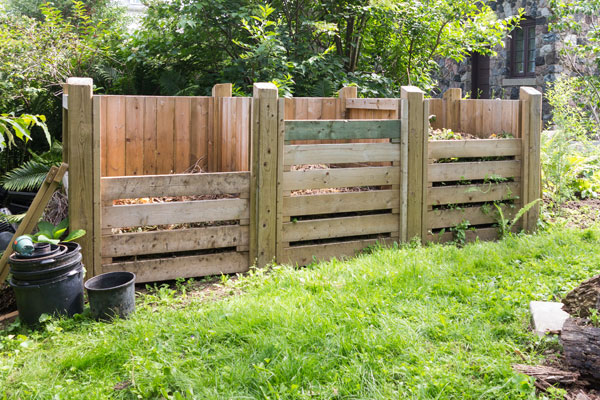
Step Three: Layer Your Composting Material

Now you’re going to layer your brown and green matter strategically throughout your pile. When layering a compost pile, you want to alternate your brown and green scraps layer by layer.
Composting experts from the Texas A&M Agricultural Extension Agency recommend this setup for layering your pile to get the most nutrient-packed humus when the process is complete.
- Layer 7: Sawdust or wood ash
- Layer 6, BROWN: more carbon-rich scraps
- Layer 5, GREEN: more fruits and vegetables
- Layer 4, BROWN: 1 inch of soil
- Layers 2 & 3, GREEN: flowers, leaves, fruits, & vegetables
- Layer 1, BROWN: leaves and branches
 I leave a silver bowl sitting on my countertop and fill it with food scraps as I go. I like to dump it in on the top where that first layer of leaves is and mix it around so the brown matter can touch everything new going in. – Oz Kupoglu, at Down To Earth Composting
Step Four: Add Water And Soil To Your Compost

Now it’s time to add water to your layers. Add a little bit of water to the very top of your compost pile with a watering can or a soaker hose, but be careful not to add too much. Too much or too little moisture can hurt the composting process, causing your waste to decompose too fast or not fast enough.
You want to add just enough water to get your scraps wet without submerging them in standing water. Your goal is for the texture at the top of the pile to remain similar to that of a recently wrung out sponge — moist to the touch but not dripping or drenched.
A great trick that I’ve learned from my partner’s aunt: I soak my leaves in a four- or five-gallon bucket for about 24 hours so they can absorb moisture. Then, when I put them in my pile, it’s a slow moisture rather than water that’s going to run through the pile. A soaked leaf is the best way to give your pile water. – Oz Kupoglu, at Down To Earth Composting
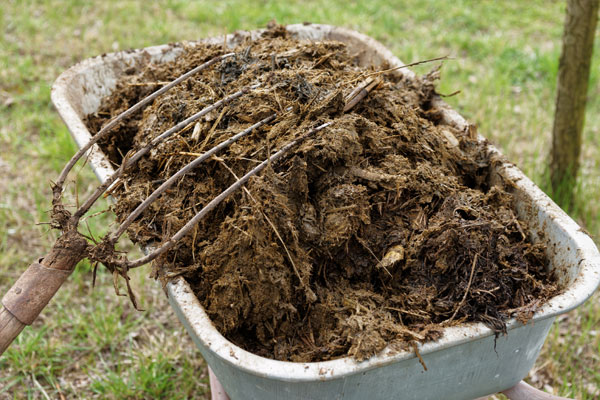
Step Five: Turn Your Compost Pile

 Now that your pile is ready to rumble, all you need to do is turn it often enough to keep those microorganisms happy and exposed to oxygen. You don’t need to turn the pile right away. Waiting at least two weeks allows the center of the pile to heat up and reach peak bacterial activity.
The average composter turns their pile every four to five weeks, but some like to turn it even more frequently than that depending on the stage of decomposition they find when they check their pile.
One method for turning compost can be performed using a long stick or the end of a broom. Take your stick and poke small holes in multiple places around the pile, then turn the stick around and around in the holes to help create airflow.
A second common method for turning compost is using a pitchfork to completely turn the pile. This method is harder on the muscles but even better for the microbes! With this process, your goal is to bring the materials from the outer edge of the pile to the center, and to bring the materials from the center of the pile back to the outer edges. Take your pitchfork, dig in, and start flipping that compost.
What Can You Compost?

This is the million-dollar question: What can you compost? The internet is overflowing with lists of materials that you can compost, but sometimes these lists are unreliable.
What To Compost

The good thing about composting is that it’s a process that already occurs in the natural world and tends to take care of itself.
Giving your scraps the ideal environment to break down will help the process, but a few mistakes won’t destroy your pile. Mother Nature is smarter than we are. Still, you should try to be wise about what materials you use in the process.
For Brown Layers
(Carbon-rich scraps)
- Dry leaves
- Cardboard
- Chopped wood
- Shredded newspaper
- Straw and hay
- Pinecones
- Nutshells (no walnuts)
- Untreated sawdust
- Untreated wood shavings
- Eggshells
- Paper and wood ash
- Twigs and branches
For Green Layers
(Nitrogen-rich scraps)
- Grass clippings
- Fruit/vegetable scraps
- Cooked rice or pasta
- Corn husks/stalks
- Fresh leaves
- Coffee grounds
- Coffee filters
- Tea leaves/bags
- Flower petals
- Melon rinds
- Seaweed and kelp
- Dried herbs
“People are very focused on composting food scraps, fruits, and vegetables. Try thinking outside the box. We’re getting into the holidays — a lot of the wreaths and Christmas greenery can be composted.” – Nick Shaw, owner of Apex Organix
What NOT To Compost

Keep these items out of your compost bin to keep your pile healthy:
- Treated wood
- Plants with pesticides
- Diseased plants
- Acidic fruit
- Garlic and onions
- Walnuts
- Oils and fats
- Bread and pastries
- Magazine covers
- Glossy paper
- Leather products
- Metal products
- Stickers and stamps
- Glass
- Diapers
- Feces
Can I Compost Meat and Dairy Products?

Whether or not it’s a wise idea to compost meat and dairy products is something composting pros still argue about. The technical answer is yes, but the more popular answer is no.
You can compost meat, dairy, and cheese. These food stuffs will break down and turn to soil just like any of your other kitchen scraps. However, composting meat and dairy products can cause a whole host of problems that organic scraps don’t cause.
For example, composting meat and cheese is the leading culprit of disgusting odors in compost. These items are also more likely to attract rats, mice, and bugs to your pile.
The simple answer: Compost meat and dairy at your own risk. While they are compostable, be smart. I personally don’t have a ton of experience composting meat and dairy, but if you’re set on composting these items, more power to you. Do some additional research on ways you can reduce odor and vermin when adding these scraps.
Troubleshooting Your Compost Pile

Composting is a natural process that works for itself, but that doesn’t mean there won’t be some missteps along the way. If things go awry with your compost pile, don’t freak out. It’s normal for beginners to make mistakes when composting for the first time. I’ve rounded up some simple tips, tricks, and solutions for common problems with compost.
My Compost Bin Smells Bad

One of the biggest concerns for beginner composters is whether or not their pile is going to smell, and what to do if it starts to. No one wants to deal with the gross stench of wet garbage. While compost piles should emit a slight earthy aroma, they shouldn’t stink. If your compost pile smells gross, something is up. Try these troubleshooting tips to address an extra smelly pile:
Turn the compost pile
Turning your compost pile adds more oxygen to your bin and helps aerate the scraps, which will likely minimize the odor. You can turn your pile by using a broomstick to make small holes in your compost, or using a pitchfork to completely flip the inner and outer layers of your compost.
Look for rotting compost scraps
Sometimes, a smelly compost pile is an indicator that you have a rotting food item in your compost mix. Sift around in the pile to see if you can track down a single source of the smell, then remove that scrap. As mentioned above, it’s likely that meats and cheeses are responsible for the stench, so check for those scraps first when investigating and remove them.
Add a cover to your compost pile
Another reason your compost might smell sour is excess moisture. If there is standing water in your pile, remove it from your mix. Then cover your pile with a tarp or cloth to prevent excess moisture from seeping into the pile and creating a moldy mess.
“It’s really good to cover your compost pile if it’s smelling. The way I do that is with black square toppers. Then directly underneath, I add a layer or leaves or another type of brown carbon.” – Oz Kupoglu from Down To Earth Composting
Add more carbon
If you’re composting a bunch of kitchen scraps like fruit and veggie waste, it’s likely that you have too much nitrogen. Your nitrogen-rich green matter is probably outweighing your carbon-rich brown matter, causing your pile to smell.
There Are Flies And Gnats In My Compost Pile

Bugs are another unwanted problem when composting, especially if you’re composting inside. No one wants fruit flies, ants, or mites crawling around in their kitchen. Here are a few strategies to get rid of these guys if you see them around your pile.
Add a bread slice to your compost bin
If you see little mites or gnats in your compost, try adding a slice of bread to the very top of your compost pile. Breads and cakes are a bad idea when it comes to scraps you can compost, but bugs love them.
Set the bread slice on top of the bin and wait for bugs to cover the slice. Then, discard of the bread and the bugs at the same time.
Increase heat to kill bugs in your compost
To get bugs out of your compost, raise the heap’s temperature to well above 120°F (49°C) and smoke the bugs out.
You can heat up your pile by adding a lid or tarp to trap heat, or adding more straw or hay to the top of the pile to serve as insulation. You can also turn the pile more frequently to increase heat.
Build a moat around your compost to trap pests
You can keep smaller bugs like ants or mites out of your compost bin by surrounding it with a moat of water to drown the bugs trying to get into your compost. Be careful with this trick though, as you don’t want the moat to leak over into your bin and completely soak your compost.
Animals Are Eating The Scraps In My Compost Pile

Building a compost pile outdoors has its pros and cons, but a huge con is that animals love compost. Think of it like the Over the Hedge movie — a giant pile of food waste just lying around is a magnet for rats, mice, cats, skunks, opossum, foxes, racoons, and other critters. Here are some tips to protect your compost from vermin.
Layer your composting scraps wisely from the start
When animals try to get into compost piles, they’re going for your kitchen waste. Try strategically intermixing your food scraps with wood ash, sawdust, or soil into one layer when you create your pile to hide food from critters. This might keep the night animals from messing with your pile in the first place.
Add a lid or wall to keep animals out of compost
Once these pesky animals have found your compost pile and start to rummage, they will definitely come back. If this is your situation, I would suggest adding a lid or covering, or a fence or barrier to the top of your compost bin to keep creatures out. You can also try lining your pile with chicken wire or another kind of mesh fencing material.
“Living in Reno, we have a lot of critters. Keeping raccoons and squirrels out of my pile is a challenge! Covering your compost pile can really help you out. Tupperware works well because it’s totally covered. You can also add a wooden lid or find a corner tucked away in your yard that would be best to have your pile in so that critters can’t get to it.” – Oz Kupoglu from Down To Earth Composting
My Compost Bin Isn’t Heating Up

With traditional hot composting, keeping your microbes and bacteria happy and healthy means keeping your compost pile hot. Hot compost bins work best at temperatures between 40° and 77° Celsius, or 104° and 170° Fahrenheit. So, what can you do if your pile is too cold?
Turn your compost pile more often
The best frequency for turning your compost pile is something that takes trial and error to get right. If your pile isn’t heating up, it’s likely that you need to turn your pile a little more often to give the microbes access to the oxygen they need to get the pile burning.
Trap the heat in your compost pile
Heat rises. This is one of the downsides of having an open face pile — it makes it super easy for the heat to escape, which is damaging to the pile. There are two basic ways to trap heat in your compost.
First, you can cover your compost with a lid or a tarp to keep the heat from exiting the pile. You can also try to insulate your pile by putting carbon-rich materials like cardboard, paper shreds, sawdust, wood shavings, cloth, or straw near the top of the bin to pack in the heat.
My Compost Pile Is Too Wet

As mentioned before, the top of the perfect compost pile should feel like a wrung-out sponge to the touch. It should feel damp, but when you press down, no water should squeeze out.
If any area of your pile is soaking, dripping, or covered in standing water, that will cause problems for the microorganisms and the health or your pile. Here are some ways to dry up a soggy compost pile:
Soak up water from the top of your compost pile
If you’re trying to get rid of standing water from the top layer of your pile, you can always scoop up water with a cup or bowl, or try covering the top of the bin with cloth to soak up standing water and keep out moisture in the future.
Soak up water inside your compost pile
If your bin is soaking from inside, try this trick. First, make tiny holes in the inner layers of your pile. Next, cut small pieces of newspaper or cloth and roll them up, then slide the rolls in the holes throughout the bin. This can help soak up extra water.
Common Questions About Composting From Beginners

When I made my very first compost pile, I was full of questions. I am no expert and can’t answer everything, but I do want you to feel as confident as you can when getting started.
Chances are, the questions you have, someone else has already asked and had answered. Here are some of those popular questions for new composters and answers from the experts.
How Long Does Compost Take?

 The most basic question is how long does compost take to break down? And this question has hundreds of answers. The time your scraps take to turn to soil depends on a plethora of factors: the type of composting you’re doing, the type of bin you have, how often you turn your compost pile, the size of your scraps, the climate where you live, etc.
In short, there’s no magic number for how long it takes organic waste to become compost. Some brands of countertop cyclers break down your scraps in as little as 24 hours, while a cold compost pile can take over a year to fully degrade. These are the extreme cases, though. Most traditional, hot composting piles take a few months to break down, depending on how you manage your pile and where you live.
What Is The Ideal Carbon To Nitrogen Ratio For Compost?

“Golden ratios” for carbon to nitrogen in composting are all over the internet: 3 to 1, 5 to 1, 10 to 1, 30 to 1, 50/50 — But the perfect ratio of scraps is going to depend on much more than the scraps themselves.
It’s hard to say that one ideal carbon/nitrogen ratio exists, but I would suggest generally aiming for more carbon-rich brown matter than nitrogen-rich green matter.
“I always see those golden composting ratios everywhere, and it’s so hard to say which one will work. Go heavy on the carbon and see how your pile reacts to it. Most times, the pile loves having more and more and more carbon — as much as it can get.” – OOz Kupoglu from Down To Earth Composting
How Often Should I Turn My Compost Pile?

 This one is also not an exact science and depends on many additional factors like the type of scraps you’re using and how quickly your compost pile is heating up. There is much about the process of composting that takes guess and check, trial and error.
A good rule of thumb for turning your compost pile is to wait for the bacteria and microbes to have a chance to start their work before flipping your scraps. Some enthusiastic composters want to turn their pile immediately after building it, but that’s too early. Wait until some hot microbial action has taken place before turning your compost.
It usually takes about two weeks for things to get started in a pile. After that, you want to turn your pile as it starts to cool. Don’t disturb your microbes when they’re hot.
Lack of heat is a tell-tale sign your bacteria needs more oxygen. The best time to turn it is when the pile starts cooling down to below 100°F (38°C), which usually means turning your pile every two to five weeks.
As I’ve said, composting isn’t an exact science, so it might take a few piles to hone in on your rhythm. Remember that not turning your pile enough won’t ruin your compost, it will just turn it anaerobic. This is how it functions in the natural world, without any people there to manage its decomposition.
Can I Compost In The Winter?

Yes! Composting is a habit that can be exercised in every season of the year, even in colder months. However, there are some things to consider when composting in the middle of winter to keep bacteria in your compost bin happy.
If your pile seems to be getting cold too quickly, try adding a layer of cardboard, paper, leaves, straw, or another source of insulation on top. You can also cover your pile with plastic and cloth to trap the heat.
If winter where you live is dry and frigid, you may need to give your pile more water or cover your pile to trap in the moisture it already has.
Can I Compost Indoors?

Absolutely! There are several methods for building a compost bin that are conducive to composting inside.
Indoor composting can bring its own set of challenges, like bugs or extra mess inside your home. However, a lot of composters have come to love the kitchen composting method, because you can toss your organic waste into your pile without even having to leave the house.
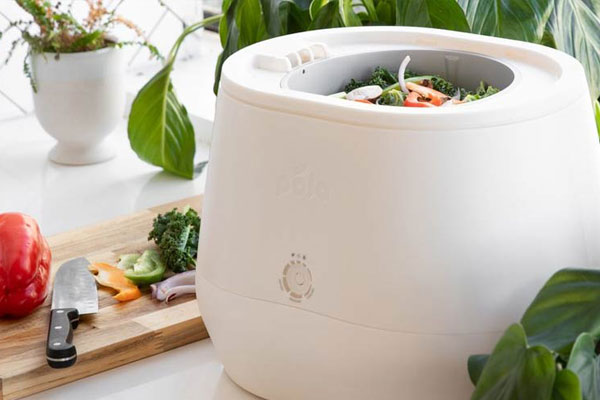 There are several brands of countertop composters and food cyclers that have grown in popularity within the composting community. The Lomi composter by Pela is taking the world of indoor composting by storm as a food cycler that turns waste into compost in just 24 hours.
If your wallet doesn’t allow you to splurge on a fancy cycler, you can easily build a DIY indoor compost bucket or bin for your kitchen counter out of nylon and old Tupperware.
Vermicomposting with worms is another easier method for composting inside than traditional hot composting. Worm bins take up less space and require less maintenance, so they’re a popular compost bin to keep on an apartment balcony, or even in the corner of a kitchen. Just be careful not to make it easy for the earthworms to crawl out of their bin and into your home!
“Look in your area and see if you can compost with an outsourced composter. It’s incredible how many companies like Down to Earth are all across the country. Getting your hands on something like that is a great way to start.” – Oz Kupoglu fromDown To Earth Composting
How Do I Know If My Compost Bin Is Working?

As your scraps decompose in your compost pile, look for the following signs to ensure that your compost is healthy and your microorganisms are efficiently breaking down your organic waste:
- You see steam rising when turning the compost pile
- Your compost has a pleasing, earthy aroma
- The volume of your compost pile is shrinking
- There’s white mold forming in your compost
- Your scraps are degrading into smaller pieces
- Your materials are becoming dark, crumbly soil

Composting 101: Resources For Beginners

There are so many resources out there for composting beginners, but not all of them are trustworthy. With the help of Nick Shaw, we’ve compiled an essential list of books and podcasts to check out if you are starting composting for the first time, or even if you’re an experienced composter looking to learn more:
Your Turn!
- What steps will you take this week to get started with composting?
- What scraps are you going to add to your compost pile?
Leave a Reply