NAVIGATION
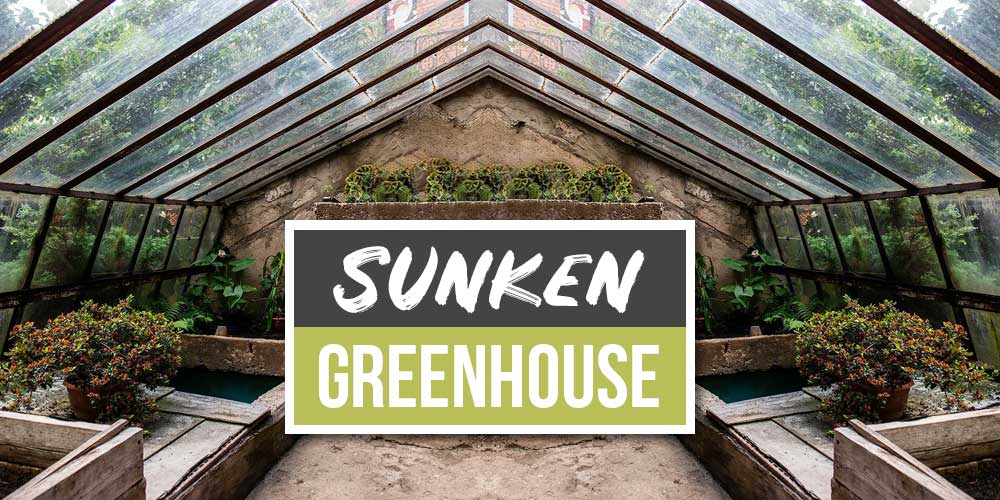
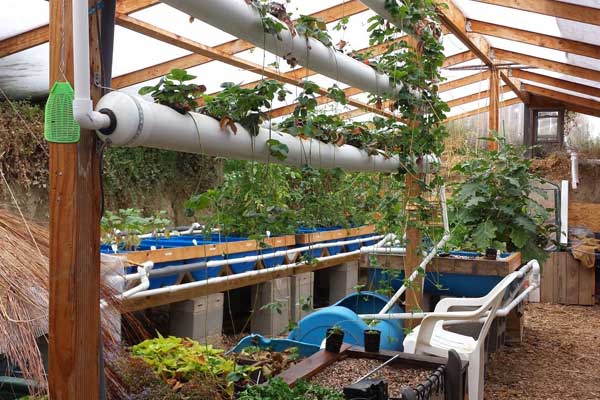
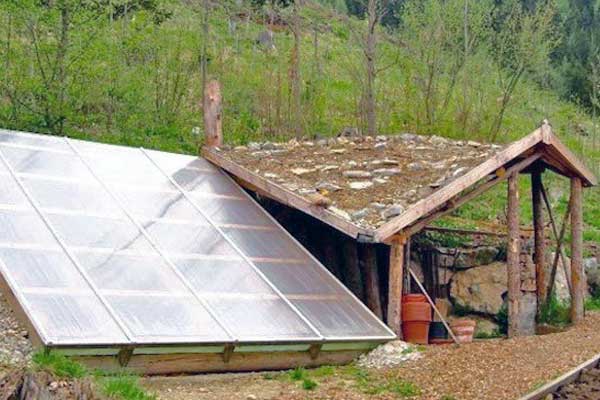
Imagine being able to house your crops in a sunken greenhouse that self insulates and not having to worry about harsh winters or dry summers ruining your garden. Sunken greenhouses are one of the most ideal structures for farmers and gardeners dealing with fluctuating climates.
Hi, I’m Ryan
Over the last few years, I have gotten super into vegetable gardening on my homestead, but I hate it when undesirable weather patterns harm my crops. When I heard about the magic of the year round Wallapini, I knew I had to check it out!

What Is A Wallapini Sunken Greenhouse?

The Wallapini sunken greenhouse is one of the earliest known sheltered greenhouses in the world. They are used all across the globe by farmers and gardeners who hope to harness the sun’s thermal energy and extend their traditional growing season.
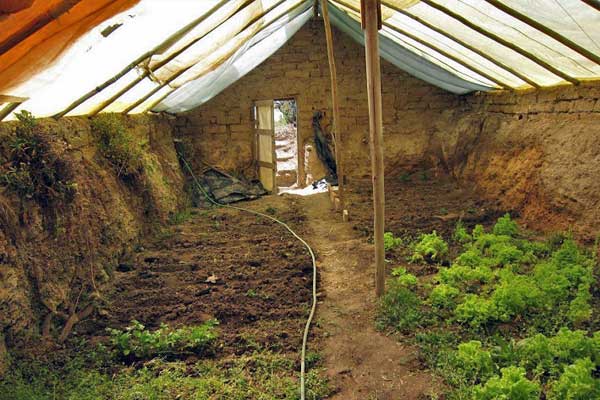
 The unique design of these structures is what sets them apart from traditional greenhouses. Similar to Mike Oehler’s original underground house design, the “sunken” aspect of the sunken greenhouse design means that the greenhouse quite literally sinks down into the earth and uses the earth’s mass to benefit the crops in the greenhouse.
Wallapini greenhouses are intentionally designed to retain both heat and cold air. They bring light and heat into the greenhouse and convert it into energy. This self-sustaining process leads to a greenhouse that can regulate its own temperature levels.
History Of The Underground Greenhouse

The Wallapini greenhouse was officially given its name in 2002 when a group of student volunteers from the Ezra Taft Benson Agriculture and Food Institute went to La Paz, Bolivia, to help local farmers in the area. They departed with the goal of building low-cost pit greenhouses for local farmers to use year-round, and did not fall short of their goal as they created the Wallapini.
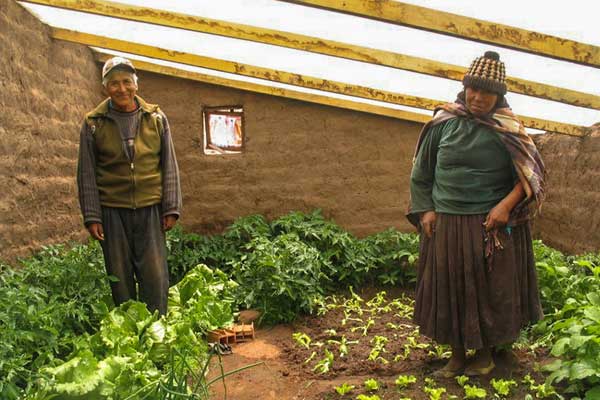 The students were able to design and build a greenhouse structure that helped farmers in La Paz keep their crops warm in the wintertime. They gave their pit greenhouse the name “Wallapini,” as it means “place of warmth” in the indigenous tongue of the people from La Paz.
However, the Wallapini was not the first time that a sheltered greenhouse was used to keep crops warm in all circumstances. One of the earliest recorded examples of an underground greenhouse was built in 1798 at the famous Lyman Estate. The Lyman Estate Greenhouses are some of the oldest surviving sunken greenhouses in the United States.
The design idea caught on all across Massachusetts in the 1800s to protect rare grape and fruit tree varieties from the harsh cold farmers were facing. The first sunken greenhouses were heated with wooden stoves, but many new heating methods have become popularized since then.
Today, many farmers and gardeners choose to embed pit greenhouses into their land to take back control of their growing season and keep the temperature of their crops regulated. There are many different design variations of sun pit greenhouses. However, all sunken greenhouses are designed to regulate temperature in a similar way.
How Does A Wallapini Greenhouse Work?

A traditional greenhouse is built with four glass walls and a glass roof. This basic design may allow a traditional greenhouse to warm up quickly, but it does not give the structure the ability to trap temperature for long periods of time.
On the other hand, pit greenhouses are intentionally designed with one open wall to take in sunlight and one earth bermed wall to insulate thermal energy. Berm greenhouses are ideal for farmers and gardeners who want to strategically extend their growing season longer than their climate at home might allow.
So, how do sunken greenhouses work their magic? The intricate design of the Wallapini greenhouse uses a wide, angled roof to take in sunlight and convert it into solar energy.
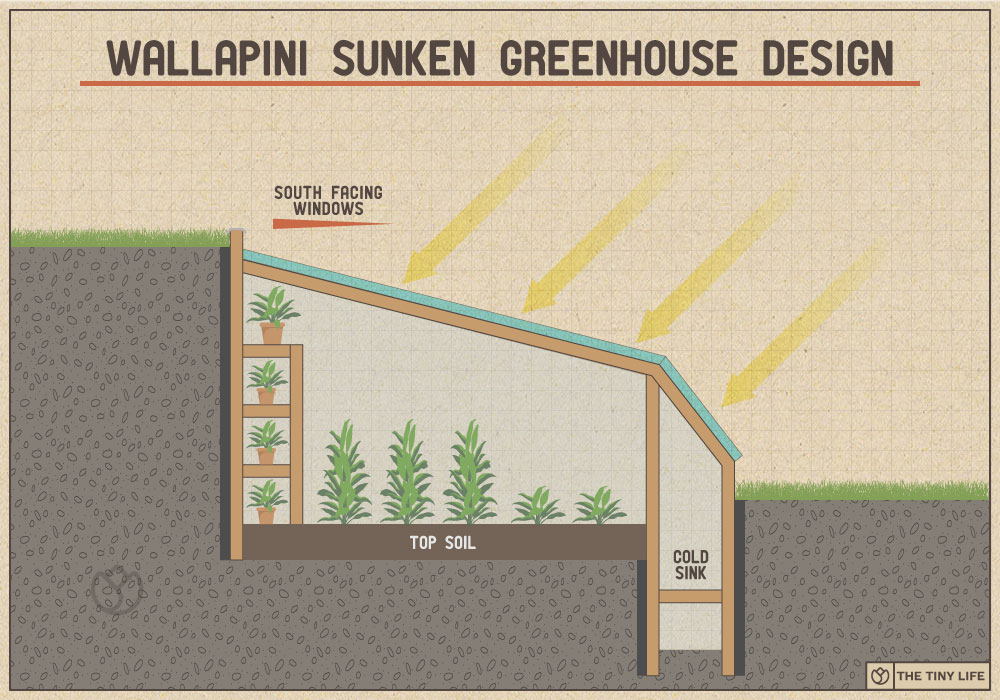
Additionally, its sides are bermed into the earth so that they trap and insulate the thermal heat under the ground. This allows farmers and gardeners to keep crops warm underground even while the above ground climate is bitter and cold.
Not only does the Wallapini keep crops warm in cold weather, but it is also designed to keep plants cool in the dry heat of the summer. The cold sink is dug into the south side of the sunken greenhouse and allows the structure to keep crops cool and moist.
We know that cold air sinks and heat rises. The Wallapini is designed with a deep welled cold sink to trap the cool air that runs through the front wall of the pit greenhouse in the wintertime and become trapped by the layers of soil at the bottom of the cold sink.
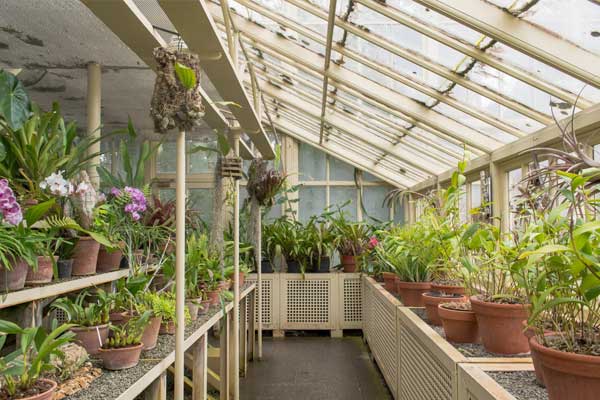
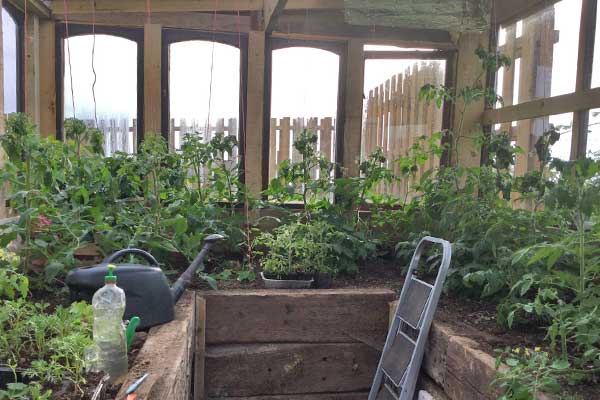
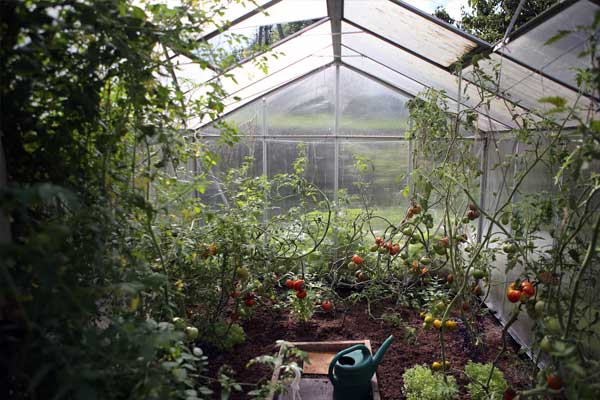
The main interior of the sunken greenhouse is layered with a thin line of gravel that is covered by a growing bed made of topsoil. Each of the crops and plants are either placed in the soil, set on top of raised growing beds, or housed in individual pots.
Sunken Greenhouse Benefits

There are many reasons why building an underground greenhouse rather than a traditional greenhouse can work wonders for your crops and your garden. The Wallapini greenhouse includes several strategic elements that can aid you in getting the absolute most out of every planting season and maintain the best soil health for your vegetable garden.
You Can Use A Wallapini Greenhouse Year Round

The biggest plus that comes from building a sunken greenhouse is that the design keeps the temperature of your crops regulated year-round. With pit greenhouses, you don’t have to worry as much about changes in weather having a negative impact on your crops.
As the Wallapini stores both hot and cold air, it self regulates the temperature of its interior and keeps your crops healthy despite the climate changings outside. This also makes it easier for gardeners to plants crops that may not necessarily be ideal for the climate they live in.
Pit Style Greenhouses Can Be Built Into A Hillside

When it comes to farming, you typically want to make sure your land is totally flat to best serve your crops. It can be much more difficult to grow plants when you live on a hillside or at a higher altitude. However, sunken greenhouses can be built into a hillside with no issues.
A sunken greenhouse is the perfect solution to farming and planting on a hillside because you can design the Wallapini to work with the curve of the hill. Due to the fact that pit greenhouses are embedded into the earth, you can still lay crops flat underneath the ground, even if the structure is built into a hill or elevated piece of land.
An Underground Greenhouse Means Less Weather Damage

Leaving your crops subject to the elements can lead to devastating results. I’ve been into growing my own vegetables for a while, and there have been too many times when a huge storm would blow through Charlotte and I would have to start over with my crops.
Since the Wallapini is underground, plants are much less likely to suffer from weather damage. They are protected by the earth bermed sides of the sunken greenhouse.

A Sunken Greenhouse Is Protected From Critters And Pests

In a similar vein, keeping your crops underground keeps your precious vegetables more protected from hungry nighttime critters and grazers. As an avid gardener, I’ve spent way too much time using wire fencing and fancy repellants to keep animals out of my stash.
With a sunken greenhouse, your vegetable garden is protected from extra hungry visitors. The bermed walls and the roof over the ground keeps your garden out of the way of creatures roaming around day and night.
The Insulation Of A Wallapini Increases Moisture

Underground greenhouses are designed to harbor an especially moist, humid environment to aid the growth of your crops. When planting above ground, crops can easily become dried out by the sun’s heat.
When crops are regulated underneath the ground, your plants are isolated from the elements, so it’s easier to keep moisture from evaporating back into the atmosphere. This is especially conducive to aquaculture plants that thrive in moist conditions.
What To Plant In An All Year Round Greenhouse

The key to making the most of a sun pit greenhouse is to know what to plant and when to plant it. You want your plants to be able to thrive!
Mastering the Wallapini greenhouse means understanding the eb and flow of the weather where you live and how to rotate your crop cycle to achieve the most gardening success. It also means looking to gardening and homesteading books, experts, and other resources to help you understand how to manage your pit greenhouse during all months of the year.

Using A Pit Greenhouse In The Summer

When growing vegetables in the summer, you should keep your greenhouse temperature between 60 and 80 degrees Fahrenheit to grow all of your warm-season crops. To have optimal planting success, you’ll want to make sure to check in on all of the systems in your greenhouse that keep it cool.
Check your waterproofing, draining, and ventilation systems in your sunken greenhouse. Proper ventilation, cooling, and air flow is extremely vital to keep your summer crops alive in your Wallapini.
It’s also super easy to over water, under water, or forget to drain your summer crops properly, which could quickly lead to an unsuccessful harvest. Make sure to check in on all of your watering systems during the dry summer months.
Additionally, it is important to ensure that your greenhouse is effectively taking in solar energy and converting it into heat. It’s vital that this process occurs during the summer months so that you are prepared for frigid winters when they come.
Best Summer Crops To Plant In A Wallapini
- Cucumbers
- Eggplant
- Okra
- Squash
- Tomatoes
- Muskmelon Cantaloupes

How To Use A Wallapini In The Fall

In the autumn months, pay extra attention to the position of your plants on the topsoil grow bed of your sunken greenhouse. Use the waning fall sunlight to your advantage as a gardener by positioning your plants in spots where they receive optimum sunlight.
Another great trick for tackling autumn months is to use deeper containers for fall crops. Deeper containers can provide more water and nutrients to your autumn crops and will give you more gardening success.
Best Fall Crops To Plant In A Sunken Greenhouse
- Baby Carrots
- Lettuce
- Potatoes
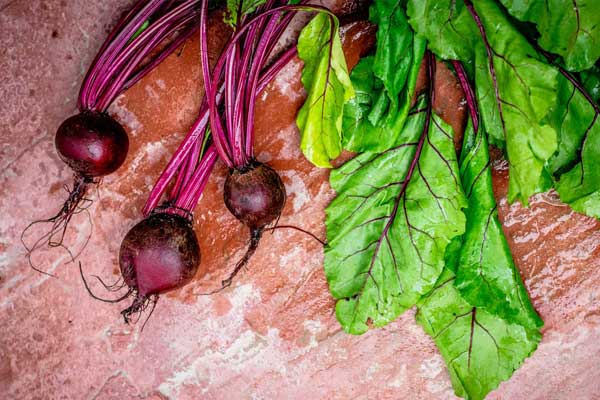
- Beets
- Brussel Sprouts
- Turnips
Using A Sunken Greenhouse In The Winter

For gardeners and farmers, the wintertime is one of the most challenging seasons to navigate. Thankfully, it is the season that best allows a sunken greenhouse to do what it does best.
In the winter months, you’ll want to make sure that you are using the heat stored in the bermed walls of the Wallapini as well as letting cool air sink down into the cold sink to prepare for the return of hot, summer months.
If you happen to be in a climate that is especially cold, you can actually design your sunken greenhouse to work even more effectively in cold climates. Give the interior of your Wallapini an extra layer of stone, earthbags of lava rocks, or any dense material that is able to store heat more effectively than topsoil alone.
Materials like concrete, brick, and tiles require a much higher amount of heat energy to alter their density. Due to their high thermal mass, using these materials in your pit greenhouse walls can act as a thermal battery that keeps crops warm on days with no sun.
Best Winter Crops To Plant In A Wallapini
- Broccoli
- Cauliflower
- Cabbage
- Kale
- Arugula
- Garlic

How To Use A Wallapini In The Spring

Similar to the fall, you’re going to want to take advantage of the way the sunlight falls during springtime by positioning your plants to face the light. This will help your spring crop take in enough light to grow successfully.
Springtime is also the perfect time to get everything in order for a new season of planting. Take time in the early spring to set up new planters and garden beds, clear out weeds, mulch, and debris, and begin pruning your plants.
Best Spring Crops To Plant In A Sunken Greenhouse
- Onions
- Leeks
- Chard
- Radishes
- Spinach
- Sweet Corn

How To Build A Sunken Greenhouse In 10 Steps

When you’re ready to build your own sunken greenhouse, there are several design elements and aspects of the building process to take into account. You want to design and build a sunken greenhouse that works best for your specific type of land, climate, and planting goals.
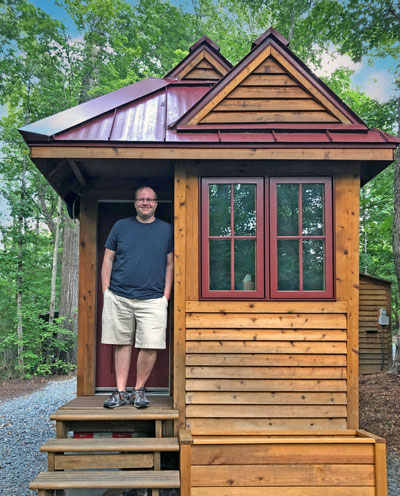
 As a guy who built his own tiny house from scratch, I know that building anything is a huge undertaking. It can be easy to get ahead of yourself with a project like this and end up biting off a lot more than you can chew, leaving you with a half-finished greenhouse and a lot less money than you started with.
I’m not saying you shouldn’t try if you feel ready, or that you need a certain level of experience to build something like this. When I started building my tiny house, I had never built anything before in my life! I’m a firm believer that anyone with the time, funds, and dedication is ready to become a DIYer.
All I’m saying is, from someone who knows the money, time, and effort that building things yourself takes, make sure you know what you’re getting yourself into before diving head first into a huge project like this.
Pit Greenhouse Materials List

This tools and materials list is meant for sunken greenhouse with dimensions of 20’x74’. If you’re building a larger or smaller greenhouse, you’ll need to alter the sizes on this materials list to fit your desired pit greenhouse size.
Sunken Greenhouse Building Materials
- (20) 4” x 16’ poles or PVC pipes to span the roof
- (3) 3’ x 6’ hinged doors (one is for the 3’ x 5’ vent cover)
- (3) 3’ x 5’ door frames (two if rear wall vent is not used)
- (2) 3’ x 6’ door lintels
- 1700 sq. ft. of 200 micron agrofilm (poly UV plastic)
- 640 ft. of 1” wood stripping to secure sheeting to poles
- 30 cubic yds. of gravel for the floor drainage system
- 100 ft. of drain pipe
- 1 cubic yd. of gravel or stone to fill the 2 drain sumps
- 233 cubic yds. of soil will come from the excavation
- 22 cubic yds. of top soil for planting (8” x 66’ x 12’)
- 94 cubic yds. for the rammed earth walls
- 2700 sq. ft. of plastic sheeting to bury for drainage
- 74 ft. of drain gutter for the lower end of roof
- Galvanized Nails or weatherproof deck screws
- 8” x 4” x 12” adobe bricks
Sunken Greenhouse Building Tools
- Hammer
- Shovel
- Picks
- Saw
- Wheelbarrow
- Crowbar
- Measuring Tape
- Level
- Clear Hose
- Cutting Knife
- Hose
- Nozzle
- Hand Compactor
- Adobe Form
- Drill
- Drill Bits
- Grade Stakes
- Nylon String
- Plow
- Tractor

1Evaluate The Land For Sunken Greenhouse
Before building anything for your Wallapini greenhouse, you’re going to want to evaluate the land that you are building it on. Doing this isn’t as much about making sure your land works for your Wallapini, it’s more about learning how to build your Wallapini to work for your land.
 There are several things to consider and check for when it comes to evaluating your sunken greenhouse land. You’ll want to examine the slope of your land, the type of soil that makes up your land, and the climate you live in.
If you are trying to embed your sunken greenhouse into a hill, you’ll want to ensure that the soil in the hill is stable and isn’t under downward pressure. Since the sunken greenhouse is built directly into the earth as opposed to on top of a foundation or solid footing, a wall built in unstable soil or soil under pressure will inevitably collapse.
The last thing you want is to put in all this work building a beautiful greenhouse just for the finished product to fall apart and destroy your land in the process. Check the pressure of your soil beforehand. If the soil is being pressed downward towards the earth, find a different spot to build.
Another thing to check for is the type of soil that you have in your land. If the bottom layer of your soil is made of a wet clay as opposed to dry dirt or sand, your soil is not going to drain water as well.
 The ability to drain water when building a Wallapini is so crucial to the longevity of your sunken greenhouse. If water continues to seep into the walls and floors of your Wallapini without being fully drained, your whole greenhouse will fall apart.
If your soil beds are made of clay, don’t fret! It’s an easy fix. It will be in your best interest to add drains around the perimeter of your greenhouse to allow water to escape from your Wallapini.
I would recommend building French drains to get the best results. French drains are trenches with perforated pipes that are wrapped in landscaping fabric and work wonders to drain water from the interior of an underground greenhouse.
Another extremely vital thing to consider is anything on your land that could get in the way of your greenhouse roof getting sunlight. Make sure that the Wallapini is located so that the sunlight is not being blocked by trees, other buildings, or any other structure. Be sure to observe the sun throughout a full year to understand how the light falls during different seasons.
2Mark The Outline Of Your Underground Greenhouse
Once you’ve evaluated your soil type and taken necessary precautions to protect your Wallapini, go ahead and mark off the land area you plan to use. Measure out a 12.5’ by 66’ growing area, marking it with four corner stakes and your nylon string.
Next, “square off” the area with measuring tape or pre marked rope so you can clearly see the outline of your sunken greenhouse exterior. The string line serves as your visual for the area that will need to be dug out.
3Choose Your Sunken Greenhouse Design
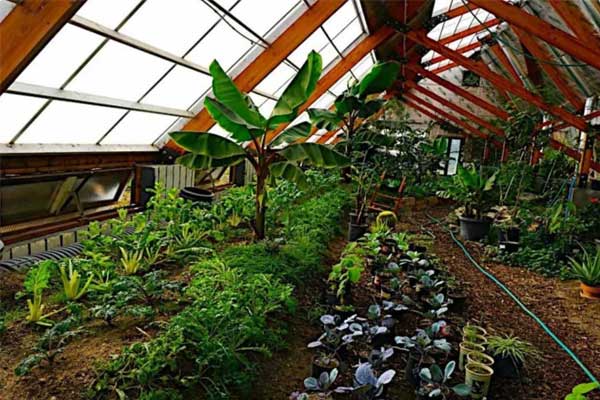
Everything you do from here on out is really going to depend on the type of underground greenhouse you choose to build. The Benson Institute’s traditional Wallapini is built entirely into the earth, with the interior sinking deeply into the subsoil and an angled roof built at ground level.

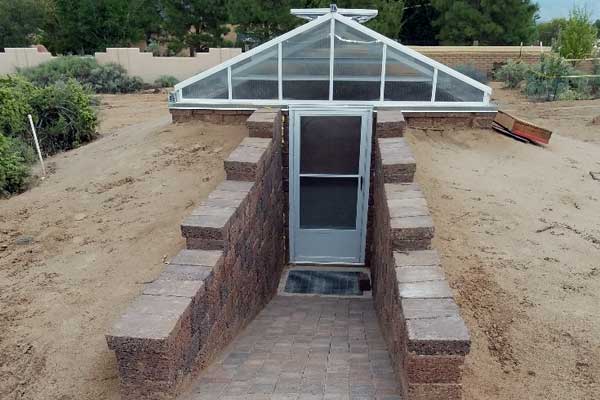
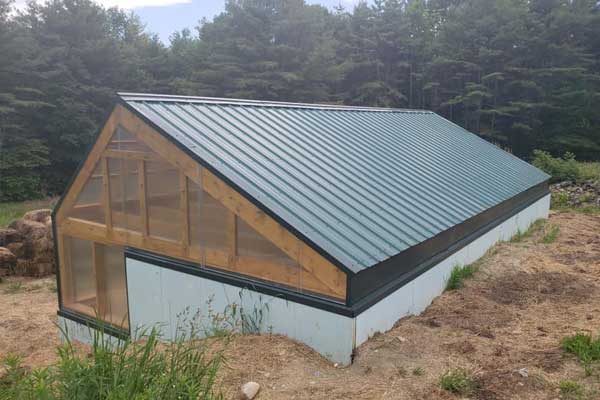
However, you can also choose to build an earth sheltered greenhouse, which originates from Mike Oehler’s book, The Earth Sheltered Greenhouse. An earth sheltered greenhouse has one entirely earth bermed wall with its remaining walls supported by wooden beams that extend aboveground.
Whether you build your sunken greenhouse entirely underground or berm one side while raising the rest of the structure, the most important element to consider is if your roof is built where the sun’s rays will hit at a 90-degree angle. I’ll explain more on this in the coming steps.
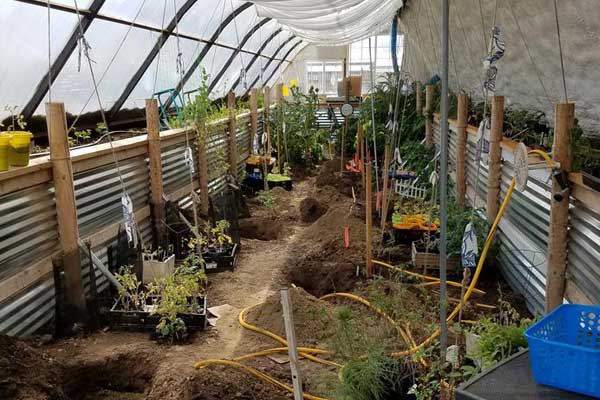
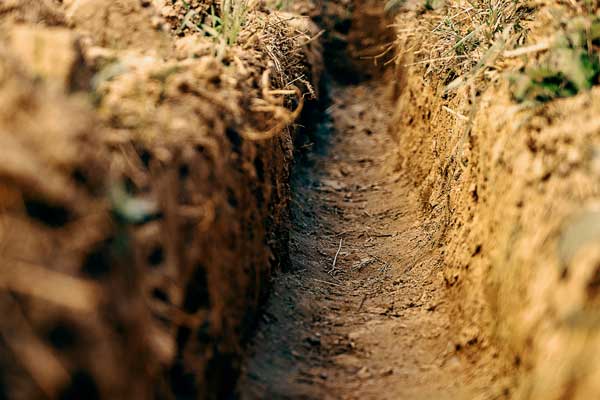
4Excavate The Hole For Your Underground Greenhouse
Now it’s time to start digging out the interior of your Wallapini. Obviously, the depth of your dig is going to depend on your design type.
If you’re building a traditional Wallapini, the main hole of your sunken greenhouse should be dug one to two feet deeper than your growing surface. This is super important because it allows room for rocks and gravel to fill in underneath the topsoil.
 If you are excavating your Wallapini by hand or by shovel, a major tip is to wet your dirt beforehand. This will make your dig easier because the water will make your dirt much more malleable as you dig.
The excavation will go much faster with a tractor or backhoe. However, those tools can be expensive if you don’t own them already, so the method you choose is up to you. If you’re friends with any local farmers, now’s the time to lean on them!
As you dig up endless layers of soil, go ahead and pile that soil onto the side of the hole that you plan to berm into the earth. This will make it way easier on you in the long run because you won’t have to lug huge piles of soil around.
5Create Your Sunken Greenhouse Walls
Again, this comes down to your choice of design. If you’re building a traditional Wallapini, make sure that all four vertical walls of the dig are sloped from the bottom of the hole to the outside at the top.
 A minimum of a 6” slope from bottom to top is what experts suggest for a 6’ high wall. Doing this is going to reduce soil caving in or crumbling off from the walls over time.
Make sure not forget to dig out two channels needed for the door entrances at opposite ends of your Wallapini. If you forget to dig out door holes in your walls, you’ll create a totally insulated greenhouse that you won’t ever be able to enter!
You’ll also need to dig holes for your wall posts. Make the holes for your wall posts about three feet deep. If your holes start to fill with water, add PVC socks to the 6” x 6” pine posts to prevent your wood from taking in moisture and rotting from the inside out.
Use your clear hose to make sure each grade stake is set at the same level. If one or more walls are going to be rammed as the soil is removed, also lay out and mark those spots. After setting the posts, fill in the areas around the holes with cement.
After adding beams to your earth sheltered greenhouse, you’ll build out three wooden walls to surround the sides of the greenhouse that aren’t bermed into the ground. My friends who have built their own underground greenhouses suggest rough red and white oak boards for your exterior walls. Pine or hemlock wood can also work really well for a sunken greenhouse.
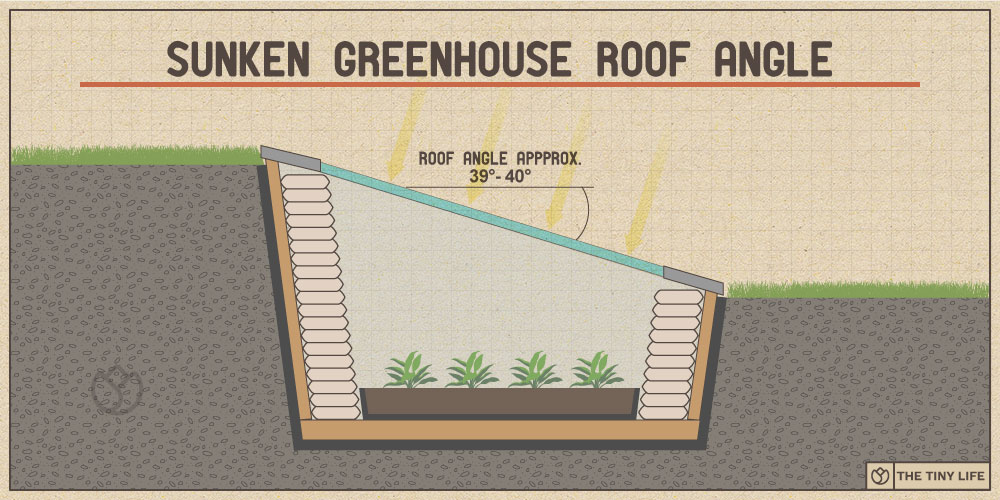
6Add A Roof To Your Underground Greenhouse
The roof is arguably the most important elements of a successful underground greenhouse. The positioning of your roof is so vital in ensuring that your plants stay happy and healthy.
Make sure that the angle of the roof is approximately 39º to 40º so it will be perpendicular to the sun’s rays on the winter solstice. The slope and the longer side of your roof should face toward the winter sun to gain the best light exposure underground. This means you should angle your roof southward if you’re in the northern hemisphere and northward if you’re in the southern hemisphere.
When actually building your rooftop, it is important to use material that will effectively trap light and effectively store it within the Wallapini. There are lots of different material types you can use to give your sunken greenhouse optimal sun exposure from the roof.
Sunken Greenhouse Roofing Options
- Polycarbonate Panels
- Traditional Glass
- Double-Layered Acrylic
- Suntuf Panels
- Fiberglass Panels
- Plastic Sheeting
7Dig Out Your Cold Sink
Digging a cold sink is an integral part of making your sunken greenhouse a success. Because the greenhouse is built under the ground, the cold air will naturally collect at the very bottom of your structure. As the cold air migrates down your Wallapini, it will create an unwanted frost pocket around your vegetables.
This is where your cold sink comes in handy. Raise your garden beds up and dig below the pathways to create a long tube for your cold sink. Wherever your pathways are, dig them deeper and then build a board walk over them.
Doing this will allow the cold air to sink to the lowest point of your structure instead of layering frost on your crop. It will also help you store cold air to assist your crops in the summer heat.
8Add Doors And Floors To Your Sunken Greenhouse
When installing your doors in a traditional Wallapini greenhouse design, build out the door frame to be about 2” of thick board stock with holes drilled at the top, middle and bottom of each side.
Then, drive wooden stakes, dowels, or rebar through these six holes into the bermed wall to make sure the doors are level. Make sure that your doors fit as airtight as possible. Fill in any air cracks found around the door frames with adobe mud, clay, sand, or straw.
When it comes to flooring, there are lots of different options you can choose to use to lay underneath your topsoil and trap heat.
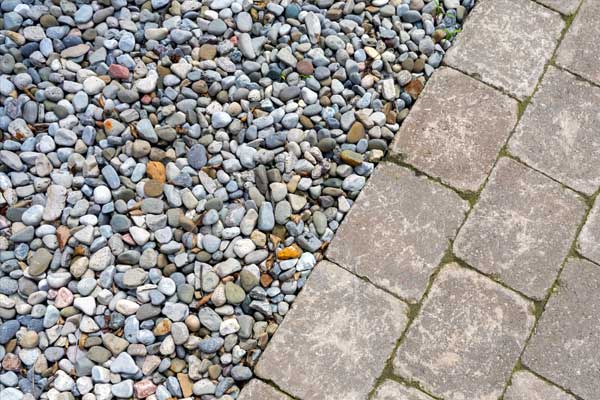
Materials To Use For A Sunken Greenhouse Floor
- Gravel
- Sandstone
- Lava Rocks
- Limestone
- Fieldstone
- Sand
9Make Sure You Have Proper Ventilation In Your Wallapini
Proper ventilation in a sunken greenhouse is a beast of its own. Since the majority of your structure lives underground, you’ll need to take extra precautions to make sure that you are achieving the best air flow possible to keep your veggies alive and thriving.
Best Ventilation Options For An Underground Greenhouse
- Add open doors on the east and west sides
- Install a vent in the top back wall
- Build a hatch door in the upper north corner
- Add a chimney above the apex of the roof
Each option has pros and cons when it comes to the amount of work it takes to build, the cost of materials, and optimal airflow. Achieving the best ventilation in your sunken greenhouse will likely come down to knowing your needs and understanding the best option for your design and land setup.
10Seal Off Holes And Start Planting!
Once the main structure of your greenhouse is finished, you’ll want to reevaluate for any air leaks and seal up spaces with holes and gaps. It will be easy to tell which areas of your greenhouse need patching because you should see steam escaping from the outer holes of your Wallapini.
A great way to seal up walls and trusses is by using tung oil or natural citrus solvent. Neither of these products fume harmful chemicals as your greenhouse begins to heat up.
You can also wrap basic pond liner around the entire greenhouse structure for an extra layer of sealant. If you do this, cover your pond liner with plywood to keep from ripping any holes in the rubber. Once all your holes are sealed up, it’s time to start planting crops in your beautiful sunken greenhouse!
Buy A Sunken Greenhouse Kit

If those 10 steps seemed like an ungodly amount of labor that you aren’t up to, don’t worry! One of the easiest ways to be a proud owner of a sunken greenhouse without having to put in so much work is to invest in a sunken greenhouse kit.
Sunken Greenhouse Kits To Buy:
How Much Does A Sunken Greenhouse Cost To Build?

The overall cost of your sunken greenhouse will depend heavily on the design you choose, the materials you use, and whether or not you choose to hire out for labor costs.
For example, if you only use unlined, inclined, interior earthen walls, your overall cost is going to be much cheaper than if you purchase wooden walls to line your greenhouse. According to experts, the cheapest roofing material for a Wallapini is eucalyptus poles. If you want to use polycarbonate panels, on the other hand, that’s going to raise your price.
As a general estimate, you could probably build an extremely basic, entirely dirt rimmed Wallapini for as low as $200 or $300. On the expensive side, you could create a wood lined, fully glazed, sturdy earth sheltered greenhouse with a polycarbonate roof for around $15,000 or $20,000 dollars.
Additional Resources For An Earth Sheltered Greenhouse

I may know a fair amount about building and gardening, but I’ve yet to build a sunken greenhouse on my own. I thought I’d include some additional resources from experts who have built and managed their own Wallapini greenhouses.
- Red Gate Farm Wallapini Tour and Explanation
- Benson Institute Original Wallapini Construction (PDF)
- Building A Solar Heated Pit Greenhouse By Greg Stone
- The Earth Sheltered Greenhouse By Mike Oehler
Your Turn!
- How would building a sunken greenhouse benefit your garden?
- How will you choose to design and lay out your Wallapini?
We hope to turn our property’s lined pool in-ground excavation into a sunken greenhouse plus root cellar and thermal storage system. Our goal will be to grow food all-year round, store thermal energy (both heat & cold) for heating & cooling HVAC, and store our stocked pantry in a cool root cellar storage room.
We’ll be happy to share our design once it is completed & ready for construction.
People would be wise to prepare for the ever-increasing effects of global climate change, and that will include ways to survive extreme heat & cold weather events, bank rainwater for periods of drought, and survive a fast moving forest fire if living in a rural, heavily forested environment.
Is there a way to get this article able to print? I am so interested in greenhouses. I have a little one. I am obsessed with tiny houses even though this method would not attach to a tiny. At my age I will not build one like this but would like to study this and maybe recommend this method to at least one friend and probably anyone that I would talk to. Thanks for giving us this type on information regularly. I love to read your email information.
So interesting! Passing this along to my new homesteader/kids.
Thank you!!!
Excellent post. While a proper greenhouse is a pipe dream for me at present, I am heavily leaning towards passive designs. These Wallapini greenhouses look absolutely delightful.
Hello, I live in Colorado and I am building an greenhouse. I plan on building it dwell level. the south section is going to be 5′ under ground and and the north is going to be ground level. with plenty of room for two rows of planter boxes. What do you think about this idea?
The cold well could be enlarged and made more access-able and double as a root cellar as well. Also, bouncing off of Alan’s comment, an old abandoned swimming pool could make the excellent beginnings for a sunken greenhouse and root cellar too!
hello,
I would like to build a greenhouse digged in to the soil. my questions is if you help to your followers to make a plan of the greenhouse? how much does it cost?
Thank you so much for this it was very informative and useful
I want to buy sunken greenhouse plans
I have a greenhouse that is 12×16 and has a small vestibule. I would like to built it in the Wallpini style. I see the greenhouse doing well on our land because we have earth that we can dig into and put the green house half sunken into the ground with or without the cold sink, i am not sure about that part yet. I would have to modify the entrance door and come up with a good foundation and walls that are buried in ground.
My main motivation for the Wallpini greenhouse is for energy savings, longer use of the greenhouse and I have several large trees that eventually would outgrow the height of the tradition size greenhouse or get damaged from the elements by being to close to the roof.
Would love to know your advice or thoughts on the matter.
Freeman
Interested in size and prices of your greenhouses