 Coming up with the perfect Skoolie floor plan for your bus conversion involves a lot of big decisions. Trying to figure out a great layout that makes the most of your limited space is something that requires planning and inspiration. So Here are a few tips to design the dream school bus layout for your future Skoolie.
NAVIGATION
 Design Advice
 How To Design
Key Decisions For Your Skoolie Floor Plan

A great place to start is setting some parameters for your build. These are the type of decisions that are difficult or impossible to change, will set the tone of your build and, if done well, can make a design successful.
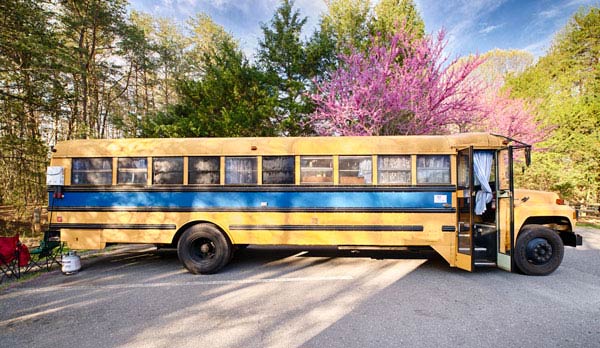
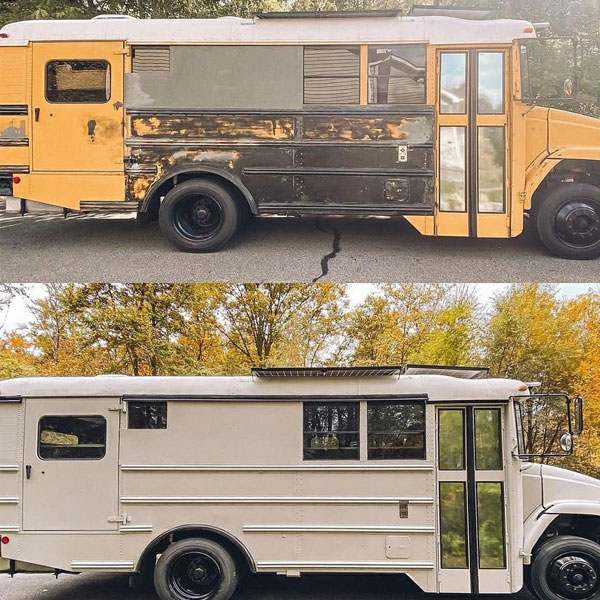
Which Bus Size Is Right For Your Layout

One of the first things you’ll need to determine is what size bus is right for you. It’s not just about how much space you need— you should also consider how comfortable you are driving it down the road, how easy it is to park, and fuel consumption.
 EXPERT TIP: What to consider when choosing a bus size?
One major restriction to keep in mind is for those looking to travel to national parks. The average maximum length allowed into national parks is 27 feet, which would restrict many to a short to mid-sized bus if looking to travel into many national parks. However, some national parks do allow up to a full-sized 40-foot bus.
– Chris & Sarah from Skoolie Livin
A smaller four-window short bus might be right for you if you just want something for a quick weekend getaway — something that you’ll load up after work and head out for a short weekend trip. A smaller bus like this will cost less because fewer materials are needed and it doesn’t need to have all the features of a full-time living bus. When not in use, it will also take up less space in your driveway.
A mid-sized seven-window bus might give you some extra room, without being too difficult to get up back roads as you adventure. I have driven longer vehicles on mountain roads and it’s not for the faint of heart!
If you need as much square footage as you can get, a full-sized bus with 13 windows might be your only option. This works best if you have a family or if you’re planning on living in your Skoolie full time.
| BUS DESCRIPTION | LENGTH | WIDTH | SQUARE FEET |
|---|---|---|---|
| 4-Window | 20′ | 7.5′ | 150 |
| 7-Window | 25′ | 7.5′ | 187.5 |
| 11-Window | 35′ | 7.5′ | 262.5 |
| 13-Window | 40′ | 7.5′ | 300 |
Choosing Locations For Your Bathrooms, Sinks and Drains

If I’ve learned anything about building on a mobile platform, it’s that you need to plan your drain lines carefully! Nothing is worse than going to install your shower basin only to discover the drain hole is smack-dab in the middle of a chassis crossmember or an axle.
You also need to consider where you’re going to run water supply lines. Unlike your drains which have to be in the lowest part of the bus, water lines can be routed more easily.
The one thing to consider is the locations of your sinks. If you centralize your kitchen sink to be on one side of a wall and the bathroom sink to be on the opposite side of the wall, you can simplify your plumbing a lot!
EXPERT TIP: Location of gas appliances.
My #1 most important tip is to keep all the propane appliances together to minimize the amount of propane pipe in a school bus conversion. The more propane pipe you have, the greater the chances of a gas leak. This is why most conversions that choose to have an RV range and an RV propane heater stack them with the range mounted above the propane heater. Then their propane water heater is usually not too far away, either.
– Chris & Sarah from Skoolie Livin
Enclosed Vs. Open Spaces

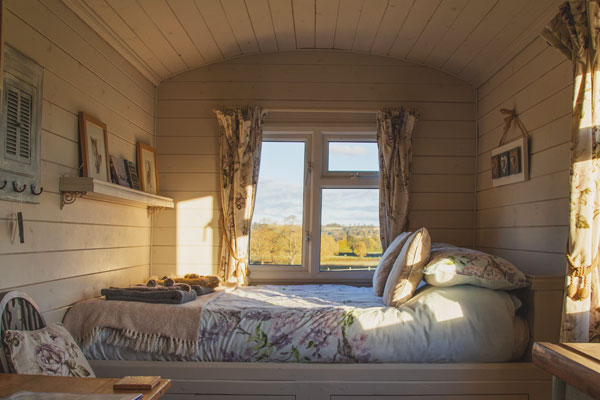
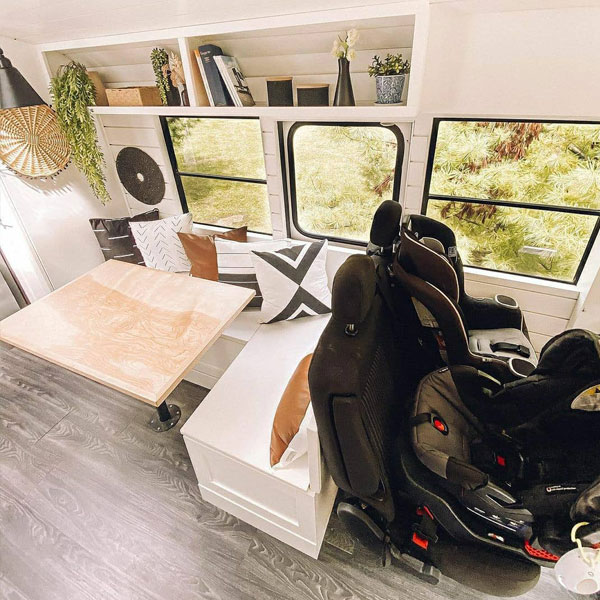
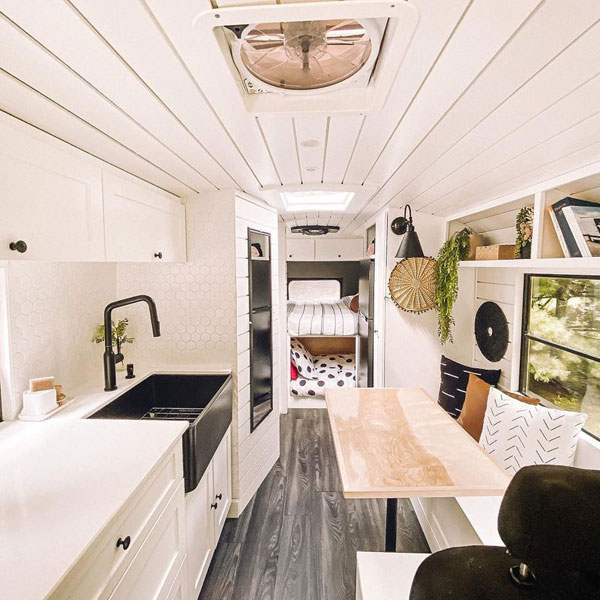
Many older Skoolie floor plans were very closed off, dark, and filled with partitioned rooms, but more and more we’re seeing conversion layouts that are open concept. Gone are the days of dark spaces — now we use as much natural light from the windows as possible to fill the space.
Two spaces that are commonly closed off into their own rooms are bedrooms (especially with a family) and bathrooms. The obvious need for privacy in these spaces is what makes this necessary, but their placement is vitally important.
While you don’t generally want to close off the space in a Skoolie, choosing a layout that clusters these closed off spaces together to maximize the amount of open space is key. Having a solid wall for your bathroom is a must for most, so consider having it at the very back or as part of the partition between the living space and bedroom.
Determine What To Include In Your Layout

After living in only 150 square feet for close to a decade now, there is one thing that I see people get wrong time and time again when they first decide to live small: trying to have their space do everything. You want a space that does a few critical things well and, in a pinch, can do things that come up once in a blue moon just okay.
 People often try to take everything a big house can do and jam it all into a very small space. By its nature, making the transition to a Skoolie, you want to live a more simple life.
People think if they “just live in a skoolie” their lives will become simpler, happier, and more adventurous! This is fundamentally wrong and ironically is the reason you don’t have a simple life now. It has nothing to do with living in a Skoolie and everything to do with your frame of mind.
People can live simply in a large home, in an apartment, or in a Skoolie — the important difference is that people who live simply live that way because they’ve done the mental work to shift their life view to one that cuts out all that ties us down.
Because of this, figuring out what your Skoolie floor plan is going to do for you is as important as figuring out what it’s not going to do. It’s the process of shifting your life so you don’t feel the need for it to have all the trappings of a larger home that will get you the life you desire and lead you to a Skoolie design that works for you.
What Your Skoolie Floor Plan Needs To Do

There are a few core things every house needs to do and some things that are more specific to you and your life. The biggest piece of advice is to focus on the things that you do every single day. The more time in a day you spend doing those things, the more space and attention should be devoted to it.
The rule of thumb here is things you spend the most time doing on a daily (or weekly) basis are things that your design should support. Things that you do once in a while, for a short amount of time, or on a scale of monthly or yearly shouldn’t be a design focus.
I’m going to set aside the fact that there might be some things you do daily that you should simplify out of your routine here. But to build a practical, functional, and livable space, you need to make sure the space supports your life, not try to fit your life to the space.
- A place to sleep
- A place to go to the bathroom
- A place to prepare food
- A place to take care of personal hygiene
- Storage for personal possessions

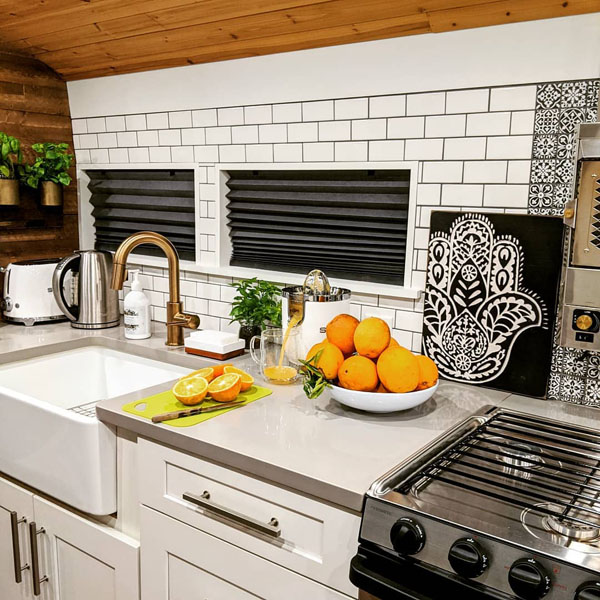
Of course, you are going to want to customize these spaces to suit your life. You need a place to sleep, but if you’re a single person, a full bed might work; if you’re a couple or a family, sleeping arrangements need to be bigger. If you’re a person who doesn’t like to cook, you might only need a small cabinet, a mini fridge, and a hot plate you tuck away. If you love to cook, a bigger kitchen with a full fridge and large stove top might be in order.
Think about what deserves space in your limited square footage.
What You Should Exclude From Your Floor Plan

The biggest factor in a good design is not what is included, but is what is left out. A space should be practical, but if you try to do everything with a single space, it will just end up doing a lot of things poorly.
Choosing what to focus on means the space will do a few things very well. If we can design our floor plan to do the right things for us, we will have a beautiful space that is very livable.
 The biggest culprit of trying to do too much in a space is what I call outlier activities. These are things you do every so often, but not every day. People’s designs often fall down when they jump through hoops to support these outlier activities.
A great example is a guest bedroom. People will have a whole space that they furnish, heat/cool, decorate, and keep clean so that one night a year a guest can stay there. We want to avoid situations in our design like this where possible.
Other areas I commonly see people trying to bake into their design is what I call aspirational spaces. When making a dramatic change like moving into a Skoolie, it can be tempting to think we are going to redefine our whole lives, do things we always wanted to do, or things we convinced ourselves are part of a preconceived notion of the lifestyle we strive for.
If you want to do crafts often and have a dedicated space for crafting, make the change now! If after six months or a year, you are crafting daily, then work it into your design. If you want a dedicated meditation space or yoga space, make it part of your daily practice for a long time, and then and only then should you include it in your design.
 When making the leap to a simpler life, we often aspire to do or be certain things, but it’s difficult to make lasting change. There are two sides to this coin: don’t wait to live simply, do it now! And realize you have so little square footage that you can’t afford to not use every inch daily.
The last area you should watch out for is what I call transition spaces: places that take up square footage as connectors between areas of your Skoolie. Hallways are a great example of this — they’re wasted square footage that is only used for a few seconds as you walk through them. With such a small space, utilizing every inch matters.
School Bus Floor Plan Dimensions

Dimensions can vary between models and brands, so it’s best to figure out a rough plan and then get actual measurements from the bus you buy for conversion. Below are some general guidelines of dimensions so you can have a rough idea of what things might look like for your own Skoolie floor plan.
- Interior – floor to window: 30.5″
- Interior – floor to top of ceiling: Most are 72″ to 78″
- Window width: Short windows are 25″ wide, Long windows are 32″ and 35″
- Window height: 24″
- Window sill height: 30.5″
- Distance between wheel wells: varies based on model
- Average size of wheel wells: 48″ in the front and 39″ in the back.
- Front door width: 29” door with 27” opening
How To Design Your Skoolie Floor Plan

Planning is a big part of your design process. If I’ve learned anything about building, it’s that an hour spent planning often saves me many hours and wasted dollars later.
Laying out your Skoolie floor plan in broad strokes is a great place to start, then once you have a general vision, you can get into all the details and technical bits. So how do you start?
First off, you hopefully have taken some time to figure out what your design needs to do for you, what should be included, and, most importantly, what’s not going to be included. Take some time to distill these things into a checklist and use it to guide your design. As the saying goes: form follows function.
As you start to put pencil to paper or start clicking your mouse (I’ll go more into that soon), start with your design constraints and accurately map those out. These are things that you need to work around because you can’t change them.
- Length of your bus
- Width of your bus
- Location of doors
- Wheel wells
These are realities that you simply can’t change, so start by mapping them onto your floor plan and consider making copies so you don’t have to rewrite them in every iteration of your design later as you experiment with different layouts.
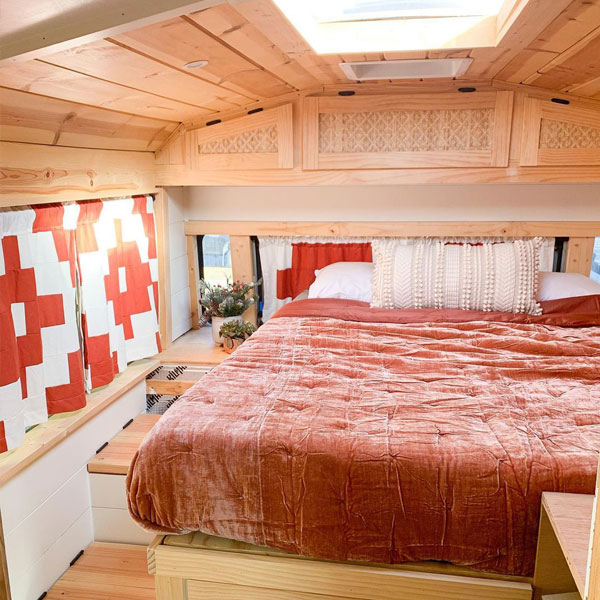
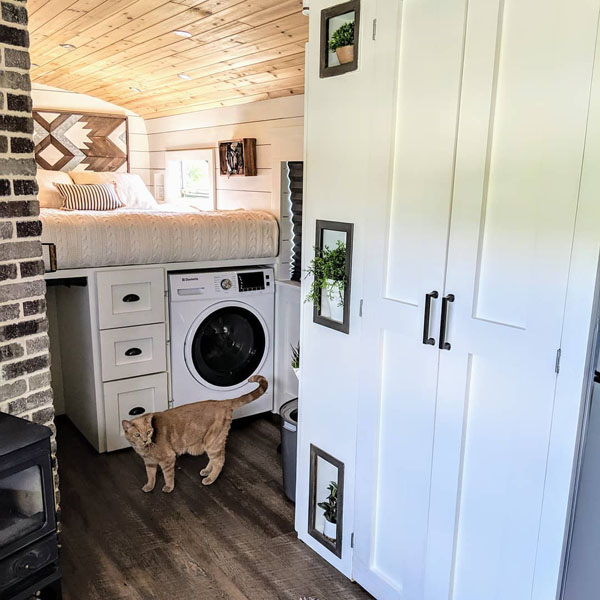
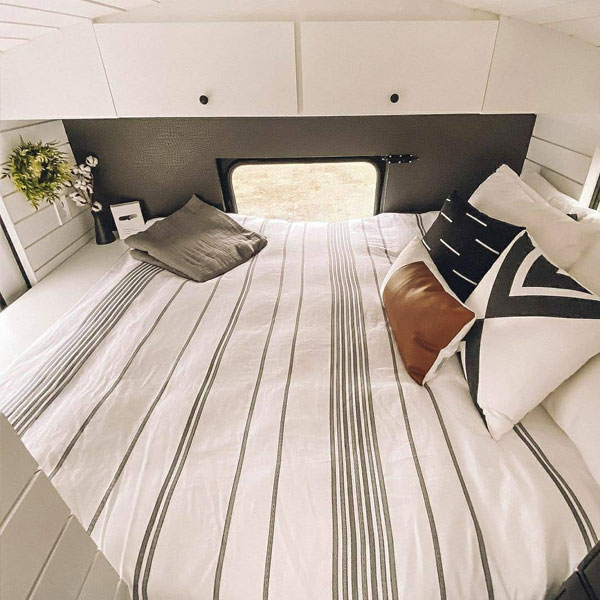
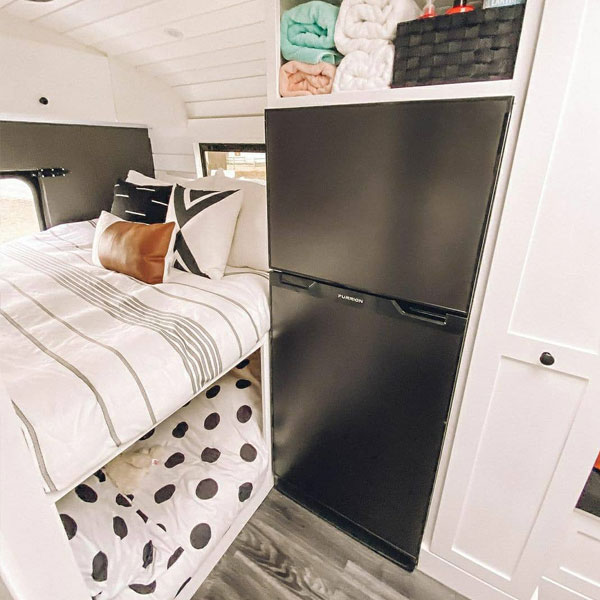
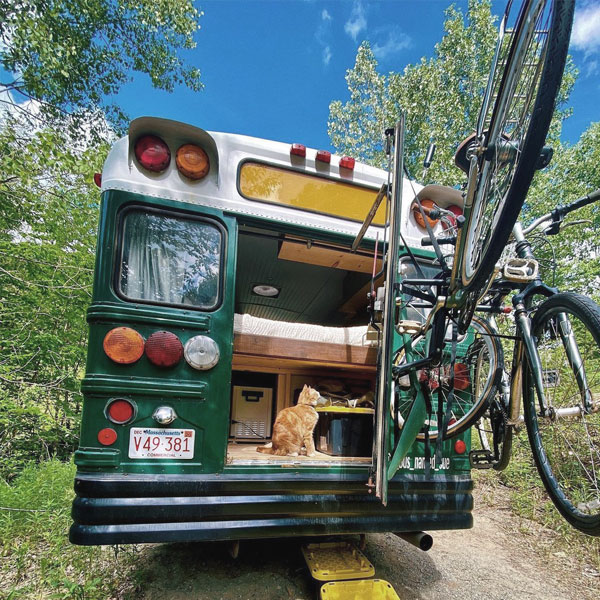
The next big decision is where to place the bedroom, bathroom, and kitchen. Start with general locations, thinking about how your daily life would flow with these areas placed where you have them. Most people place the bedroom at the very back of their bus and build in a large storage space under the bed.
EXPERT TIP: How To Design Your Skoolie Layout.
Imagine using the space and think about the flow of using the storage space. Every spot in a skoolie really should be designed purposely for how you will use the overall space to live, including sleeping, hanging out, cooking, working, playing, etc.
– Chris & Sarah from Skoolie Livin
Once you have a general idea of the location of your three big areas, start to fill in the gaps in between them, keeping in mind the other items on your checklist. You’ll want to make sure you have good storage, a place to relax, and possibly a place to do your work from.
Families and couples should also consider the needs of each person. If you have kids, do you home school? Where will their toys be kept? If you’re a couple, do you need a quiet space to work, do hobbies, etc.? How will each member have privacy if they need some time to themselves?
Another consideration that you should take into account is how the weight of your Skoolie is balanced. You want to consider the weight of the built-in features, furniture, appliances, possessions, and even people. One major area people don’t consider is water tanks — at 8.5 lbs per gallon, even a small fresh water tank or tank hot water heater can add up to a lot.
EXPERT TIP: How You Should Balance Your Weight.
The easiest way to balance a bus is with a center aisle layout, as you can easily balance weight on both sides. Then, make a list of every item you plan on installing into the bus like the fridge, range, water storage tanks when full, and batteries. It is best to try to even these out on each side of the bus as much as possible.
– Chris & Sarah from Skoolie Livin
Take some time to consider several different options. It’s good to spend some time designing your Skoolie and then give it some space for a while so you can come back to it with fresh eyes. If you’re more than one person, make sure you get their feedback too.
The last thing I’ll mention is a few critical things people often forget:
- Trash Can: Where will you put your trash?
- Pantry: Make sure you have enough room to store food.
- Laundry: Where will you keep dirty laundry before washing it?
- Hot Water Heater: Where will you locate the tank or unit?
- Electrical Panel: Where can you place it to be out of sight, but still easily accessible?
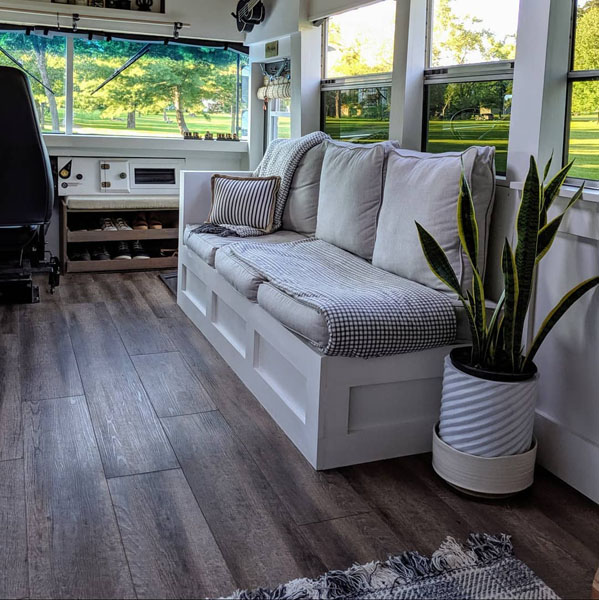
- Shoes: Where will you store shoes that aren’t being worn?
- Tools: Where will you keep items to fix your bus with?
- Large Items: Can your couch, appliances, shower stall, and mattress fit through the main door?
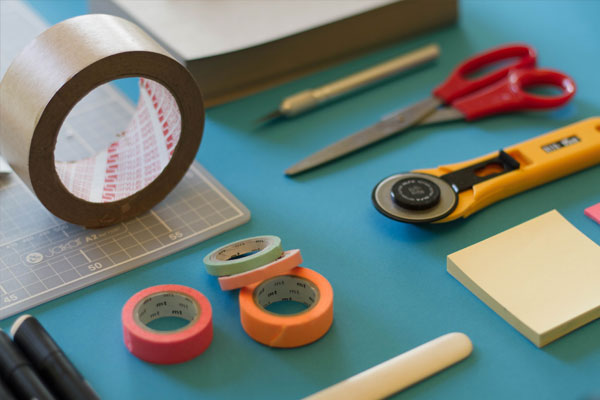
How To Draw Your Skoolie Floor Plan

At some point, you’re going to need to actually sketch your ideas onto paper to finalize your design. There are two main ways people go about this.
Graph Paper And Pencil

Sometimes going old school is the way to go when it comes to designing, especially when you’re making large changes in the beginning of your design process. Using graph paper is a quick way to get started. Start with getting your final dimensions by measuring your bus, then determine the scale you want to use and draw your design out to scale.
Once you’ve finalized a hand-drawn design, I’d suggest taking that and laying it out in a digital design software.
Skoolie Design Software

If you want to go higher tech or want to finalize your drawn plan digitally, using some sort of software is the way to go. While there are many good options out there, Sketchup is a great option that is pretty user friendly, has lots of free online tutorials, and is free to use.
There is a learning curve to Sketchup, but I find it to strike a good balance between simple enough to learn but powerful enough to do what you need it to do. After getting your main dimension mapped out, save the file as a template in case you want to try other designs. I also save my file as I make updates under a versioned file name. That way, if I mess something up, I can roll back to an earlier version more easily.
Sketchup is really nice because there are a ton of free YouTube tutorials, too. If you’ve never used Sketchup before, start with some basic tutorials and then you can search for specific tools or techniques as they come up.
Since the design is digital, you can quickly snap measurement labels between different parts of your design to see if you’ll have enough space to open doors, walk through the space, etc.
Skoolie Floor Plan Design Inspirations

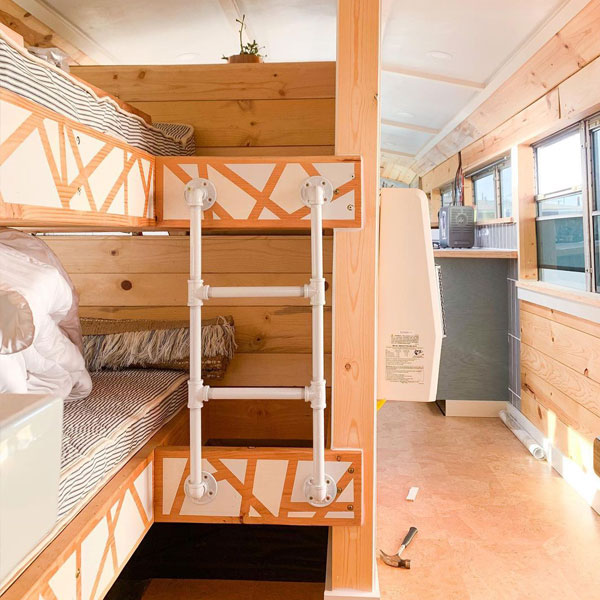
13 window / 40ft (full size) for a family with bunk beds


11 window / 35ft (full size) Skoolie floorplan bench seat


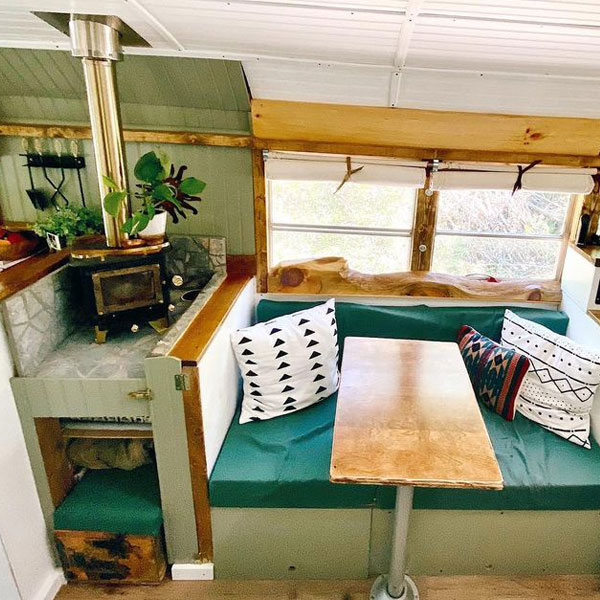
7 window / 25 ft (mid-size) with open floor plan
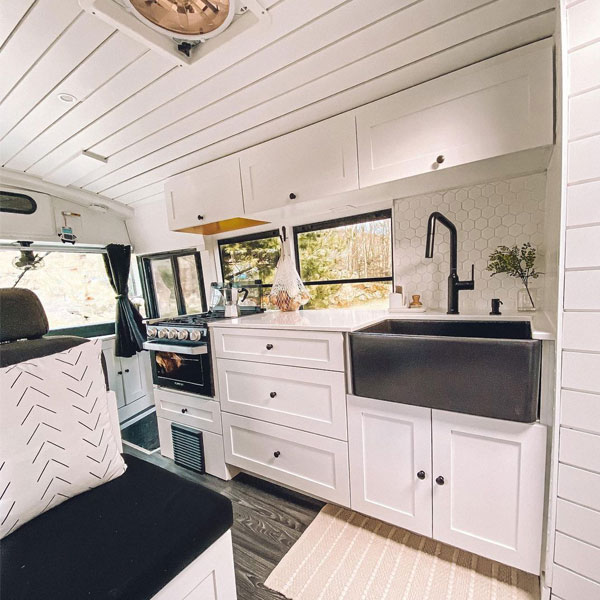
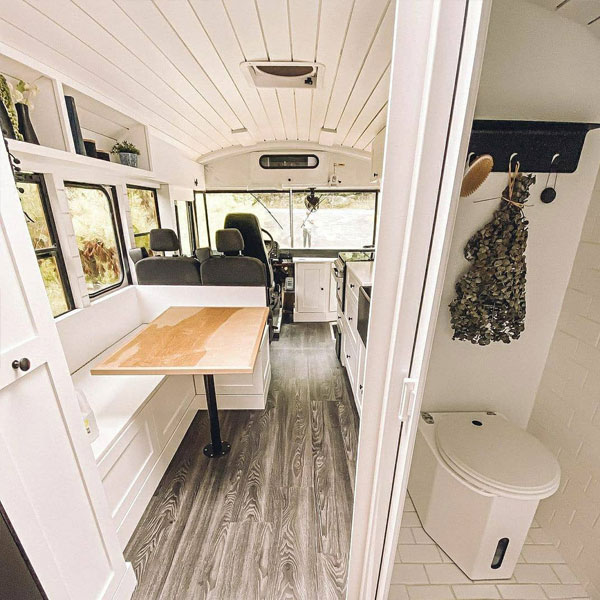

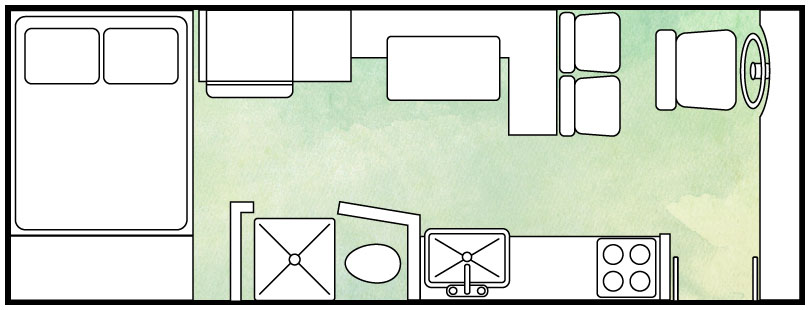
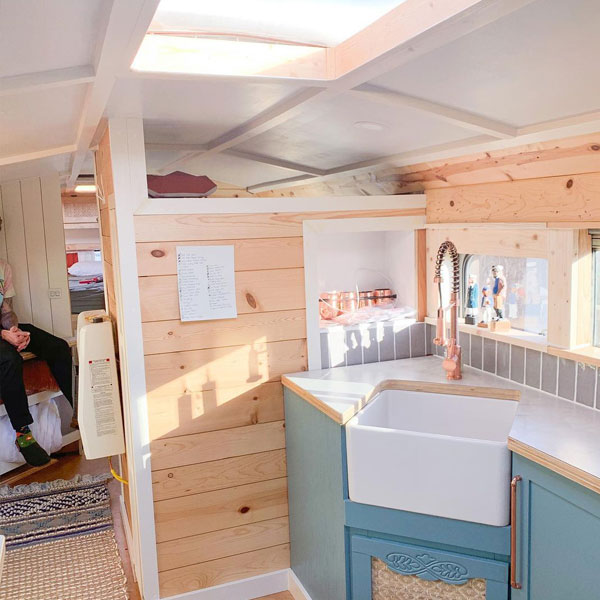
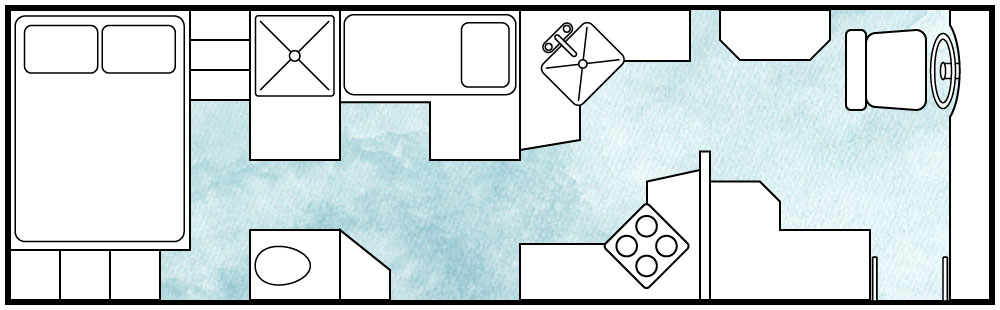
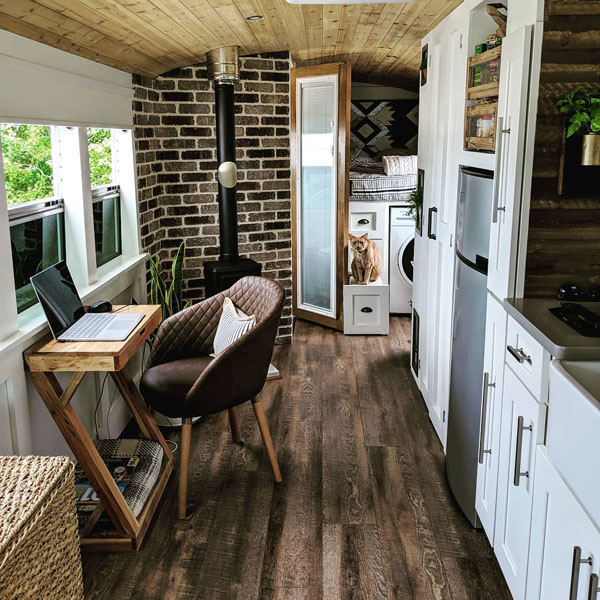
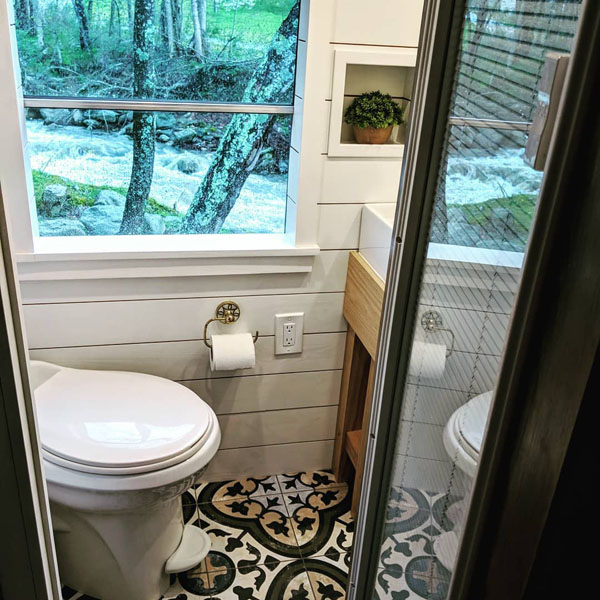
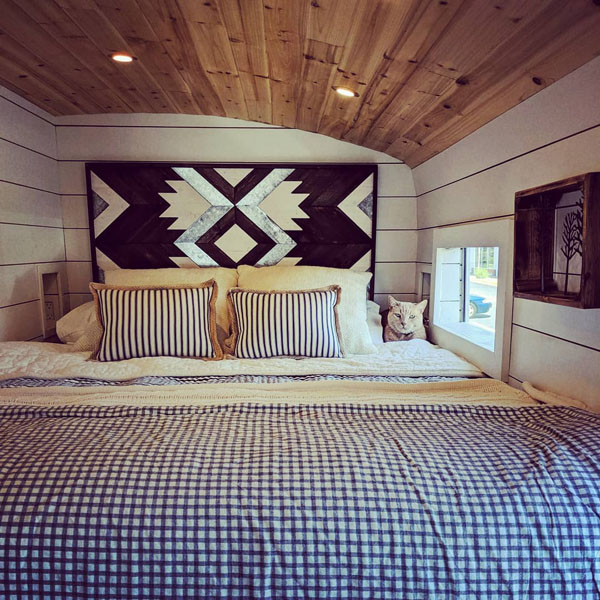
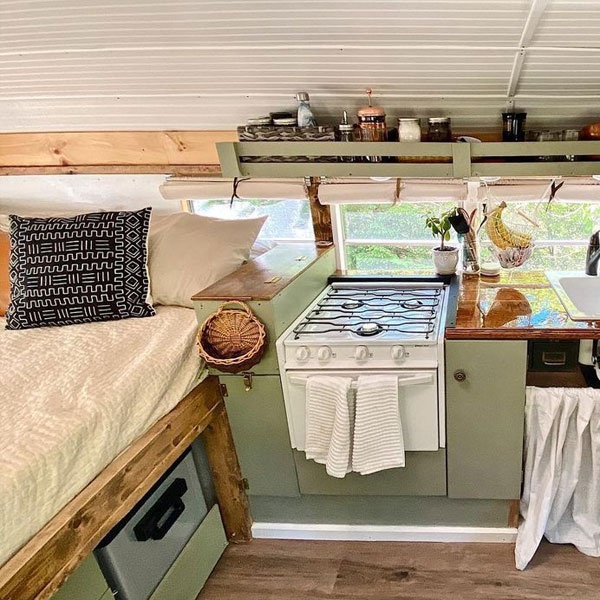
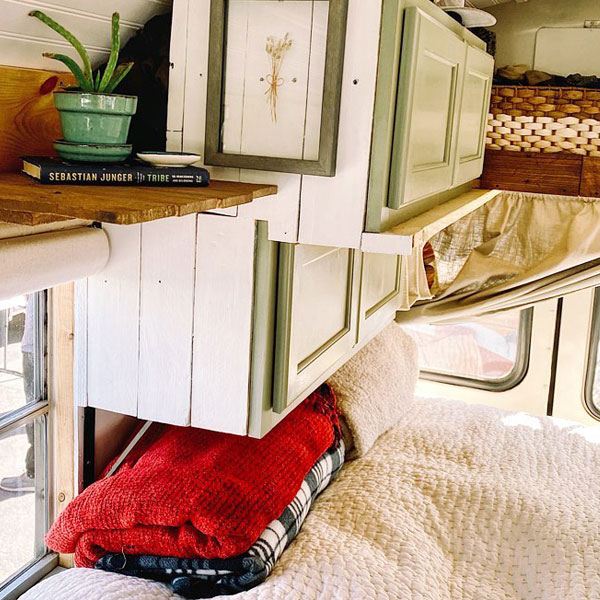
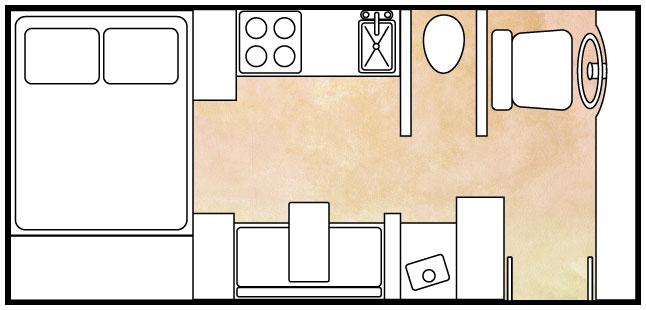
4 window / 20 ft (short bus) with full kitchen

Skoolie Layout Design Tips

Here are some things to think about when it comes to creating a skoolie layout for your bus conversion.
- Wait till you have your bus for real world dimensions
- Consider what areas need to be private vs. semi-private
- Balancing the weight of your bus is crucial for safety
- Consider the locations of things you cannot change about your bus
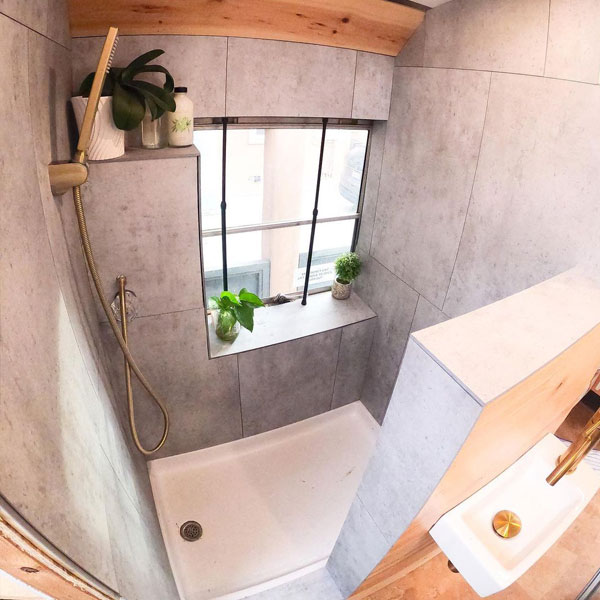
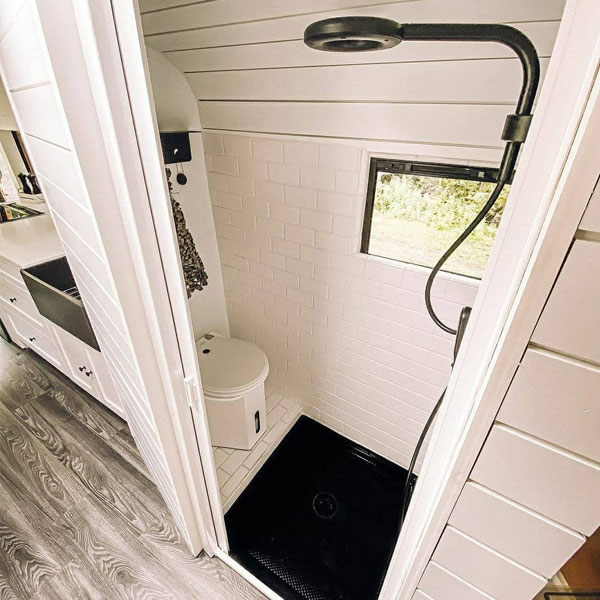
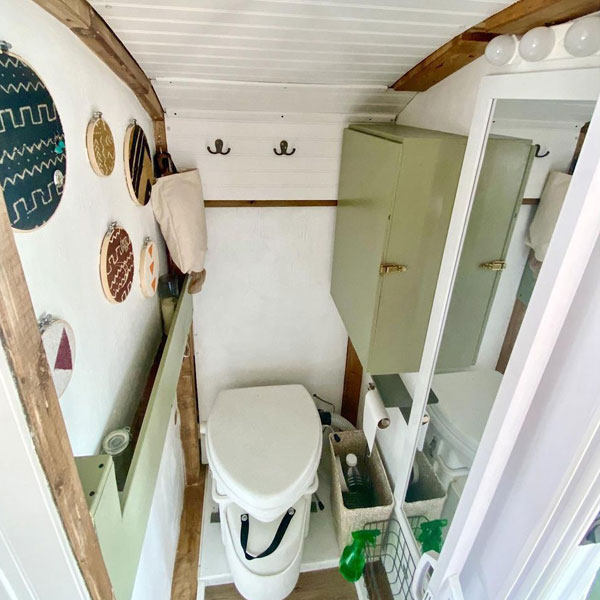
- Don’t forget to consider ventilation in your bathroom
Your Turn!
- What are you going to include in your Skoolie floor plan?
Oh my goodness. This is such a nice organized version of all the stuff that has been knocking around on my head for months. I’ve got tons of notes and somehow couldn’t manage to get all the ideas organized into succinct compartments like you have done here. Thanks for all of it. I think I feel less jumbled now!
Thank you.
I have a basic design that allows for different widths and wheel well placement. However, I have to wait on the actual bus (so many to choose from) for the exact dimensions. I’ve thought over what I need and want, and have some hardshell camping experience (…so I definitely know what I don’t want).
Thank you for putting this information in a very basic, but still comprehensive, manner.
Considering a 5 window build. as a project and an RV for two of us in retirement. Goal to visit state and national parks in our region and ‘day trips.’ Looking for solid, simple advise on this project.
I’m planning on owning a 4 window short bus within the next couple of weeks. I took a look at you floor plan for this size, and while I adore it, I have a few questions. What size is the bed you have in the layout, and is the box in front of it not necessarily a part of the mattress but extra storage? Can I remove that storage to make a “hallway” and move the bathroom to the very back of the bus? a big bathroom that runs the full width of the bus sounds so nice considering that we have big dogs traveling with us. I kind of wanted an experts opinion.
Wow . You folks have really done your homework. Currently in hunting mode for bus. Will keep reading until then . Plan is to move usable items from our older 5th wheel RV to skoolie. Thanks for your inspiration & info. Doug & Nicky
I am so glad I stumbled upon this article. I pick up my bus next week!
I would love to see your drawings/floor plans, but I do not have Instagram.
Is there another location I can go to on the web to see these?