When you’re starting out with chickens you need to have a place to lock them up at night. Building a chicken coop will be one of the first thing you need to do before you order your chicks or pick up some pullets (young hens). I love how chickens just naturally gravitate to their little home when the sun starts to go down, roosting inside all on their own.
The coop is an important part of your plan to keep your birds safe from predators that lurk in the night. So we want it to be a sturdy structure that keeps the bad things out, the chickens in, provides a place for them to nest and lay their eggs. First a few bits of terminology so you can get caught up to speed if you’re new.
- Roost: a bar that chickens sit on and sleep on at night
- Run: the fenced in area that chickens walk around during the day
- Nesting Box: a separate area where hens sit to lay eggs in
- Hardware Cloth: metal mesh that has very small openings
- Bedding: saw dust, wood chips, hay or saw
So those are some of the basic terminology, now let’s get into some of the details.
The Coop
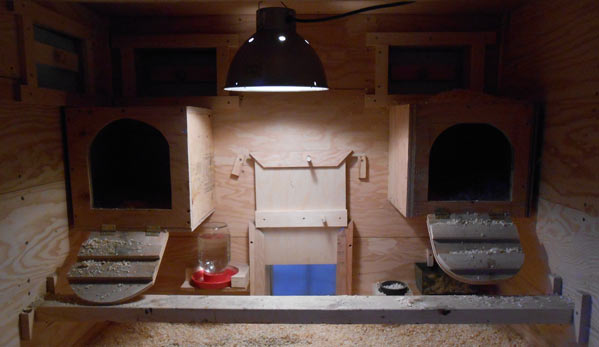
 You can build the coop out of whatever building materials you have on hand or repurpose shelters to suit your needs. When I built my coop I just went and bought a few sheets of plywood, created a box and sealed the entire inside. Whatever you build it out of, the coop needs to be about 2 square feet of floor space for each chicken you have. Much more than 2-3 feet per bird assuming they have more room to range during the day doesn’t do much because they all like to pile on a roost and cuddle up with each other anyway.
Height wise I usually build the coop so that I can easily clean it and room for at least 2 feet above the upper most roost. If I have a lot of chickens I’ll make sure whatever it is, I can stand up straight if I need to go inside.
For the floors of my coop the biggest piece of advice is to make the inside as easy to clean as possible, really think ahead on this part. I design mine so all the corners inside are not 90 degrees and no little nooks. To do this I build my coop, then lay in a 2×2 cut at an angle so when I lay it in with glue all my corners are 45 degrees, which is much easier to clean.
Once I have my coop inside done I always sealed with a super heavy polyurethane. I coat every surface several times, making sure to soak it into the corners. I put several layers on all surfaces then let it dry. Next I focus on adding more layers to floor and the first foot of the walls. You want a super thick layer of poly covering every inch of your floor and sealing every crevice and seam.
I let the whole thing dry and off gas for at least a few weeks. If you build your coop before you even order your chicks, you’ll have a lot of time for all the fumes to escape by the time the chicks are grown up and ready to be put in the coop.
Roost Bars
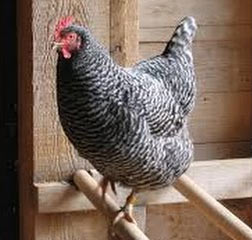 A roost is just a bar that chickens like to sit on, usually about a foot or so off the floor of the coop or ground. I’ve had chickens that all piled onto a single bar leaving several empty and then I’ve had others that didn’t use them at all. I usually add them because it seems like most chickens like to roost because it makes them feel a little safer. The top most roost is often taken up by the alpha hen and the rooster if you have one, but some flocks don’t get too tied up in pecking order.
The roost bars can be branches cut from your woods or a 2×4. You want your roost to be about 2 inches wide and not metal if you can help it. You want a flat level surface around 2 inches wide because chickens like to sleep flat footed. They can grip if they need to though.
Ventilation
Many first time coop builders forget that coops need to breath, even if you live in very cold climates. This is because their droppings put off a lot of moisture and ammonia, so you want a way for that to vent well. You want to make sure that there is at least some ventilation, but make sure it hardware cloth over it so predators can’t get in. The rule of thumb is around 1 square foot of ventilation per 10 square feet of floor space in the coop.
Nesting Boxes
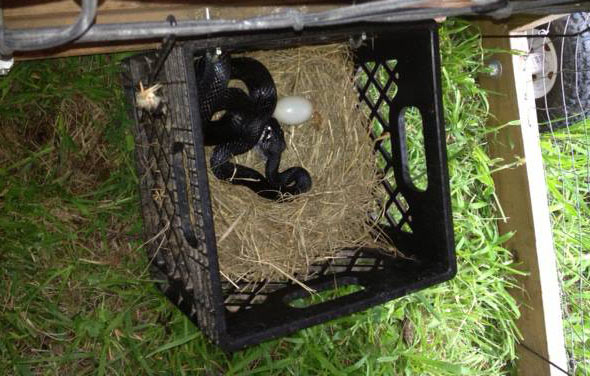
You want one nesting box for every 3-4 hens you have. All a nesting box needs to be is a small more enclosed area roughly 1 cubic foot in size with some hay on the bottom. I’ve done everything from milk crates to 5 gallon buckets on their side. Just make sure you can easily get into the nesting box to grab the eggs as they are laid and they you can clean them easily.
Make sure you can see well into your nesting boxes because sometimes you find things other than hens in them. Here is a black snake that snuck into my nesting box. The joke was on him though, that egg was a plastic egg that we were using to teach the hens to use the nesting box.
A Chicken Door
This door only has to be about a single square foot, maybe a foot and a half tall so that a single chicken can come and go into the coop. The door should be able to be closed up tight at night with a lock that raccoons or other critters can open. Some people build in a sliding door that operates on a motor with a special sensor that closes when the sun goes down.

When I did my permanent coop I had it so the chicken door opened directly into a fenced in chicken run. The run was covered too and the whole thing tied into the coop itself so that I didn’t have to be there each night to lock the door. Even if you have your coop in a protected run like I did, its still good to have a door because sometimes you want to shut them up in coop for you to clean things or if a predator is spotted.
A Light
Many people put lights for some heat in the colder months. Unless you are in a very cold part of the world, I wouldn’t suggest this. Experience has shown me that if you put a light in a coop and then one night it gets broken or burns out, you’ll end up loosing all your chickens. I live in North Carolina and for many parts of the US I wouldn’t worry about it. For colder parts of the US, I’d just build a bigger coop so you can keep them inside for a week if you have to when it’s super cold. Chickens are pretty hearty.
The last parts of a coop are your nesting boxes for the chickens to lay their eggs in (usually one box per 3-4 birds) and some sort of bedding to catch droppings from. Chickens put out a lot of droppings and they tend to concentrate under the roost bars. However you plan to handle droppings, make it bomb proof because it can get messy quickly and if you build your coop to easily clean out, you can make your life a lot easier.
Chicken Tractors
Many people who want to get into chickens want to try a mobile chicken tractor, which is basically a coop with no bottom that you move to fresh grass every few days. I’ve done both a fixed coop and chicken tractors and I think chicken tractors are my favorite because it cuts down on the cleaning (no floors, the chickens just poop on the grass) and it reduces the amount of feed I need to buy.
Here is my old chicken tractor:

There are a few things you need to consider if you decide to go the chicken tractor. Whatever coop you design it should be able to be moved easily by the smallest person in your household, it makes it difficult if only some of the people can actually move it each day. As you can see above there are wheels on this tractor, I later switched them to larger wheels because some of the bumps and lumps in the grass would catch the edge of the coop or the wheels.
Consider where you’re going to store feed and how you’ll get water to them. Where is the closet storage spot? Where is the closet spigot and will your hose reach to the far corner of the yard?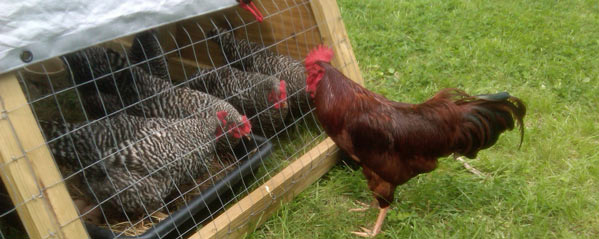
Finally make sure you have enough room, if you have more than a few chickens you’ll need to move that coop most days so that the chickens do remove all the vegetation in that one spot to the point that it can’t bounce back. You want the grass to get roughed up a bit, but no more. This will let the grass bounce back and grow stronger. Having enough space is easier in the summer months because things grow so quickly, but in the winter you may find that a spot where the chickens were takes 30-60 days to heal.
Waters
There are three main types of water devices for chickens: Bell, nipple and standard waterer/fountain. Larger operations tend to use the bell style, I don’t have much experience with those. The older style of waterer or fountains work pretty well, but I’ve found they get dirty pretty easily. That leaves my favorite type of waterer which is the nipple style.
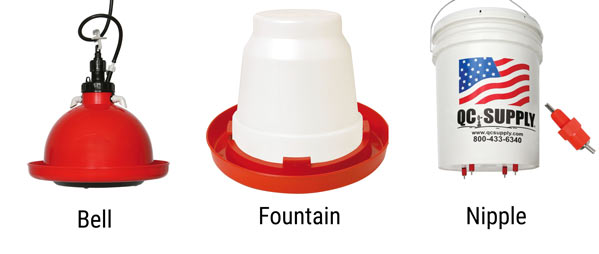
These are just a little valve with a shinny metal tab sticking out that the chickens peck at to get water. Sometimes you need to show your chickens how to use them, I just take one or two of them and hold it right in front of the nipple. Basically chickens see something shinny, peck at it and get wet. Eventually they figure it out and the rest of the flock follows suit.
The nipples are cheap and can be installed into a 5 gallon bucket or into a run of pvc pipe. This means I can do long runs of these that are tied into a water system so I can set it up for several days of water without any extra work. An important side note is that you can’t uses these on chicks.
Feeders
There are several types of these, I still haven’t found a favorite type, so let me know what has worked for you in the comments. I am looking for something that will feed the chickens easily for a few days automatically. Right now the best option is a vertical PVC pipe about 6″ wide with a opening cut at the bottom.
So that’s some of the key things you need to work into your design when you build your own coop. Let me know what you plan to do for yours in the comments!
Your Turn!
- What kind of coop do you hope to build?
- What tricks have you learned?
Good information on chicken coops
Wonderful!
Starting to think about raising a few chickens. This is very helpful, but I’m still at the very beginning of understanding what is needed.
A lot to think about!