NAVIGATION

Hi, I’m Ryan
When I first started worm composting, I remember adding in a whole watermelon’s worth of rinds, thinking it would take weeks or maybe even months to break down. The next week, I couldn’t find them in the bin, my worms broke down them all!
When people think of composting, they usually picture throwing all of their food waste in a pile that they turn every once in a while. But what if I told you there is an entirely different form of composting you can try? Composting with worms!
With vermicomposting, you rely on an abundance of tiny worms to help decompose your scraps, and boy do they know how to get the job done. It’s the same process the worms would perform in the natural world, but when you give these little guys the perfect conditions, they go crazy.
What Is Worm Composting And Why Should I Start?

Composting with worms, also called vermicomposting, is a composting method that uses earthworms to do the bulk of the hard work for you — sounds like a pretty sweet deal right?
 In a general sense, compost turns to soil by taking in water and oxygen and producing carbon dioxide and heat. The decomposition process is caused by various bacteria and microbes breaking down your scraps. Worms can do the same thing, but faster.
When you add worms to your compost bin, the worms expedite the process by helping the bacteria and microbes do their job. The vermicomposting method is regarded by composting pros as the easiest and most successful method for composting, especially if you’re just starting out.
How To Compost With Worms: Pros and Cons of Vermicomposting

I chatted with Nick Shaw about all things worm composting. Nick is a composting enthusiast and owner of Apex Organix Compost, a commercial composting service in Fairfax, Virginia. Throughout our conversation, he gave me insightful advice on why vermicomposting is a wise method for composting newcomers.
 “Vermicomposting is much less work than building a compost bin, making sure it gets hot enough, turning it, and trying to sift out finished compost. And if you’re in a small apartment, it’s something you can still do!” – Nick from Apex Organix
Worm composting has benefits, but it also has its downsides. When choosing a compost method, it’s important to consider where you want to keep your bin, how quickly you want the process to go, and the type of environment you can provide. I’ve created this chart of the pros and cons for composting with worms to help inform your choice of composting method.
PROS
- Easy to manage
- Less prone to odors
- Worm compost has more nutrients
- Faster than traditional composting
CONS
- Worms cannot decompose proteins
- Requires specific worm species
- Easy to overfeed worms
- Smaller volume
PRO: Worm Compost Is Easy To Manage
When it comes to maintaining and keeping up with your compost bin, vermicomposting gets a lot of points for being user friendly.
Composting with worms takes up less space than a traditional compost bin, so you can easily adapt this method to a small studio apartment or the corner of your living room. You do not have to turn a worm compost bin as often as you do other types of compost.
PRO: Vermicompost Is Odorless
Vermicompost is the least likely to give off a smell when compared to other methods. If your nose is bothered by your worm compost bin, something is wrong.
Saying that worm compost is entirely odorless might be a bit of a stretch, as all compost does tend to emit a slightly earthy aroma. However, the odor coming from your worm compost should be pleasing to the senses. More points for the earthworms — especially if you’re composting indoors.
PRO: Worm Compost Has More Nutrients
Vermicompost is richer in nutrients than traditional compost. It is jam packed with more phosphorus, potassium, and nitrogen, all of which are extremely beneficial in aiding the growth of your plants.
Vermicompost also holds nutrients for a longer time than traditional compost, so it can supply these high levels of healthy nutrients to your plants for even longer.
PRO: Vermicomposting Is Faster Than Traditional Composting
Vermicomposting is quick. This is because your earthworms are working overtime to do the bulk of the work it would usually take the bacteria and microorganisms many months to complete.
Traditional composting methods can take anywhere from eight to 15 weeks to produce results, but vermicompost gets the job done at two to five times that rate!
CON: Worms Cannot Decompose Proteins
Proteins, dairy products, meats, and cheeses are compostable when it comes to traditional compost methods. Experts certainly have varied opinions on whether or not you should compost these items though, as they can attract more pests and can also harbor pathogens.
However, when it comes to vermicompost, composting dairy and proteins isn’t an option at all. Earthworms have strong mouths but don’t have teeth, so thick products like meat and cheese are too difficult for them to digest. Stick with fruits and vegetables to keep your wrigglers happy!
CON: You Have To Tend To The Needs Of Your Worm Species
When going the vermicomposting route, it’s wise to tend towards buying species that are tolerant of the climate you’re in. When you add worms to your compost, temperature matters.
Location and climate are important considerations when buying worms. For example, African Nightcrawlers need warmer temperatures to survive while European Nightcrawlers enjoy cooler temperatures.
CON: You Can Easily Overfeed Your Worms
When composting with worms, the quantity of your scraps is vital. While the success of traditional composting methods is dependent on the way you layer your scraps, you can have as many or as few scraps as you like. That’s not the case with vermicompost.
Overfeeding worms can cause many problems with your compost like odors, acidity, excess moisture, pests, and sick worms, which you want to avoid.
CON: Vermicompost Needs A Shallower Container
Vermicompost works best in a fairly shallow container because it makes it easier for the redworms to feed in the upper layers of the bedding. You want the depth of the container to be between 8 and 12 inches.
How Do I Maintain My Worm Bin?

Once you’ve made the decision to go the vermicomposting route, you’re going to need advice on how to maintain your bin. When I first started out, I had tons of questions, from what scraps worms prefer to what to do if my worms were eating too much to how often I should turn my worm bin.
What Should I Compost In My Worm Bin?

You can compost almost anything you would use in traditional compost in your worm bin, including:
- Most fruits
- Most vegetables
- Roots and bulbs
- Husks, skins, or peels
- Eggshells
- Dry leaves
- Green leaves
- Grass clippings
- Pine needles
- Natural fibers
- Non-glossy paper
- Tea leaves or bags
- Coffee grinds
- Coffee filters
- Wood ash
- Sawdust
“They love watermelon. They go crazy for watermelon, cantaloupe, honeydew, and pumpkin. But if you really want to see them process material, give them some watermelon, wait about six hours, and they’ll go to town.” – Nick from Apex Organix
What Shouldn’t I Compost In My Worm Bin?

These materials can be harmful to the worms in your bin and are best to avoid:
- Meat products
- Dairy products
- Citrus fruits
- Onions or garlic
- Cooking spices
- Fats or grease
- Bones
- Breads & crackers
- Pastries
- Coated paper
- Stickers
- Envelope stamps
- Cat or dog feces
- Diseased plants
- Pesticide treated plants
- Treated wood products
Where Beginners Go Wrong Composting With Worms?

When I first started out composting with worms, I didn’t want to make any rookie mistakes with my scraps, my worms, or my compost bin. Here are three example problems that keep composting beginners from reaching their best possible vermicomposting results.
1. Overfeeding Your Worms

I talked about this a little bit already, but this is a common misstep for vermicompost newbies. When you have a ton of kitchen scraps that you’re excited to start composting, it can be tempting to want to just throw them all on top of your pile and let the games begin. This can be harmful or even deadly to your worms.
“When you overfeed, you can run into all kinds of problems that just aren’t good for the worms, especially if you keep the worms inside. The bedding material can become too acidic because, if you add too much food material, you are adding too much nitrogen to the soil, so add more carbon.” – Nick from Apex Organix
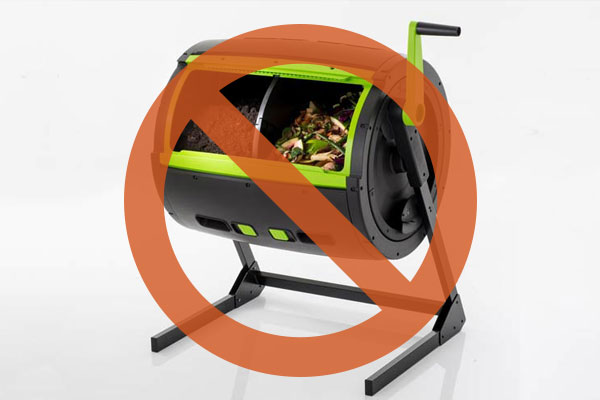
2. Putting Your Worms In A Compost Tumbler

For one thing, tumblers are designed to be rotated, but earthworms need a habitat that’s not being actively disturbed. Another issue is that compost tumblers are designed to heat up, so not only will you stress the worms out with excess movement, but there’s also a decent chance you’d end up killing them in the tumbler due to ammonia release.
3. Trying To Compost Perfectly On Your First Try

Just like with anything else we try for the first time, it’s easy to be discouraged when things go wrong. Composting is a slow process without an exact recipe, and it takes a lot of guess and check to get right. Beginners tend to go wrong by letting their desire to get the perfect pile and soil on the first try keep them from trying vermicomposting out at all.
“People get overwhelmed by the amount of information out there — they let the perfect be the enemy of the good. Just get started.” – Nick from Apex Organix
What Is Wrong With My Worm Compost Bin? Troubleshooting Your Vermicompost

Being a beginner vermicomposter can come with an array of challenges, and it’s easy for these challenges to make it feel like you’re failing.
However, many of these obstacles come with simple fixes. Below, I’ve compiled a list of common problem spots paired with helpful solutions for those starting out.
My Worms Are Sick Or Dying

If you start to notice dead worms in your worm bin, you need to take immediate action to save your remaining sick worms. It doesn’t take much to keep earthworms happy, but sometimes things go wrong.
Here are some ideas of what might be wrong with your bin if you see dead worms, with quick tips on how to fix the problem:
Temperature of worm bin
Worms are not successful in a bin that is extremely hot or extremely cold. Use a thermometer to check that your bin is between 55º and 70ºF.
If your bin is too hot, feed the worms fewer scraps and rely on their natural ability to sustain themselves until your compost pile starts to cool off. If that doesn’t help, you can add ice cubes to the top of your pile.
If you bin is too cold, make sure you keep a lid on the bin to trap in heat. If your bin does not have a lid, use a black tarp to cover your worm bin. You can also try adding hay or straw to insulate your bin.
Moisture in worm bin
Worms don’t like it when the bin is too wet or too dry. To check this, think of the top of your compost pile like a wrung-out sponge. It should feel moist to the touch but it should not be holding water, dripping, or have any standing water.
If your bin is too wet, try soaking up the excess water with cloth or paper, or insert small rolls of newspaper in several holes throughout the bin.
If your bin is too dry, just add some more water to the top of the pile with a watering can or a hose. Be careful not to do this too quickly or you’ll suffocate your living worms.
Air flow in worm compost
Your worms need to be able to breathe! Make sure your bin has good holes for aeration and that the layers of your bin are not so compacted that they restrict air flow between layers and scraps.
Amount of light in vermicompost
Worms are used to living in a severely dark environment. Too much sunlight can be deadly for earthworms. The best way to make sure your worms stay happy is to keep the lid on your worm bin when you aren’t turning, checking on, or managing the pile.
Under or overfeeding your worms
Your worms could be dying off from a lack of food or overfeeding. If your worms do not have enough food, they will begin to eat their own castings. It’s common for composting beginners to be surprised by how quickly their worms eat away at their scraps, so check to see when you need to add more food.
It’s also common for people to make their worms sick by overfeeding them. If you see large amounts of food leftover after one to two weeks, you are probably overfeeding. I recommend you play it safe by feeding your worms an amount they can handle every two or three days.

Amount of space in your worm bin
Make sure your bin isn’t overly full of scraps, bedding, or even earthworms. Your worms prefer a nice full bin of food, but they can feel overcrowded if your scraps and materials are too compact. If you feel like the hatchlings are making the bin too full, you can take out some of the fully grown worms and move them to a new bin so all of your worms have enough space to move freely and feed as they please.
Type of water used in vermicompost
It is crucial that you use dechlorinated water to moisten your worm bin. Tap water often contains chlorine, which can be deadly to your worms. You can buy dechlorinated water at your local grocery or hardware store, or you can dechlorinate your tap water by boiling it.
Check the pH levels of your worm bin
Your worm bin should not be too acidic or too alkaline or it will harm your worms. You can check the pH levels of your bin with a pH probe. The goal is to have a neutral pH of 7.
If your worm bin is too alkaline, add some acidic foods like citrus fruit peels, onions, pineapple, tomatoes, or peppers — but be careful not to add too much and swing the pendulum the other way. Too much acidity can hurt worms more easily than a bin that is too alkaline.
If your worm bin is too acidic, make sure none of those acidic kinds of food are in your pile.
The Worms In My Compost Bin Are Not Having Babies

A healthy vermicompost pile produces hatchlings as your happy earthworms start to mate. It can take a few weeks for worms to hatch, so be sure to account for that time when considering the health of your worms. If there aren’t any mating earthworms, egg capsules, or tiny hatchlings in your worm beds, it is likely due to one of these two reasons:
Your worm compost bedding is unhealthy
It is possible that your worm bedding is too wet, too dry, too acidic, or just needs changing out so the worms have a comfortable environment to reproduce in. After your worms are initially added, your bedding should be kept moist but not too wet. The top 6 to 8 inches of the bedding should be turned every seven to 10 days. About every six to nine months, the old bedding should be replaced with brand new bedding. Use straw or hay, newspaper, coco coir, or shredded cardboard to do this.
Your worm compost bin is too cold
If your bin gets colder than 60 degrees, your earthworms will not breed or produce hatchlings. See above for tips on how to heat up a vermicompost bin that is too cold.
My Worm Compost Is Bringing In Pests And Fruit Flies

Pests and fruit flies in your worm bin are not ideal, especially if you are keeping your bin inside your house. Here are a few suggestions for getting rid of unwanted bugs in your vermicompost bin:
Add newspaper to your worm bin
Layer a sheet of newspaper on top of your worm bedding to help keep flies out of your
bin. If the flies start congregating on the paper, change it more frequently to see if this helps eliminate them. If the flies won’t leave, you may need to change out your worm bedding completely to destroy fruit fly eggs and larvae.
Build a moat in your worm bin
You can keep smaller bugs like ants or mites out of your worm bin by surrounding it with a water moat that the bugs cannot cross. Be careful with this trick though, as you don’t want the moat to leak over into your bin and completely soak your compost.
Use a bread slice to get rid of bugs in vermicompost
Another trick for small insects is to place a slice of bread on the surface of the bedding. Then remove the bread slice when it’s covered in tiny bugs and discard of the bread and the little pests.
My Worms Are Escaping From My Compost Bin

When you first add worms to your compost bin, the little guys may try to escape, as they haven’t yet gotten used to their new environment. They can also react to barometric pressure, causing them to try to escape in the case of a storm.
One tip to control those more free-spirited earthworms is to keep a light on near the bin. Worms avoid bright spaces, so they will not try to crawl out towards the light if they are confined to the darkness of an enclosed bin.
My Worm Compost Bin Smells Bad

One of the most common complaints for composting beginners is odor. However, vermicompost tends to be the most odorless form of compost. Your worm bin should barely smell, or, if it does, the smell should be earthy and satisfying.
If there is a gross smell coming from your worm bin, that’s a very clear warning sign that something is seriously wrong. Here’s what to do if your vermicompost stinks:
Try adding more oxygen to your worm bin
To do this, gently lift up the layers of food waste and bedding, enabling air to enter into your compost pile.
Try to scout out if the odor is coming from one specific source. If you track down the culprit, [BOLD]remove the moldy kitchen scrap from your vermicompost bin.
If you can’t find one specific smelly element in your worm compost bin, [BOLD]add a layer of shredded paper, hay and straw, or cardboard strips to the top of the bin, and gently work some of this bedding into the lower layers. The extra carbon you add will help to balance out any of the extra nitrogen that’s making your worm bin pungent.
Types Of Worms Used For Vermicomposting

You may feel like all earthworms are similar, but different species actually require different climates and can be good for vermicompost for different reasons. Check out the most common worms used in vermicompost and the specific ways to care for each species:
Vermicomposting With Red Wrigglers


Red wrigglers are the most common earthworms used for vermicomposting. The scientific name for red wrigglers is Lumbricus Rubellus. Wrigglers are one of the easiest worm species to take care of with the least number of problems for composters.
They can survive within a wide range of temperatures from 55° to 95°F (13° to 35°C) and are also one of the cheapest species to buy in bulk. You can anticipate receiving about 800 to 1,000 worms per pound when purchasing these red earthworms.
Cost: $30–$35 per pound
Vermicomposting With European Nightcrawlers


Another earthworm species that is fairly easy to manage is the European nightcrawler, also known as Einsenia Hortensis. Think of these guys like the larger cousin of the red wrigglers who are a tad bit higher maintenance. These nightcrawlers like cooler temperatures, so make sure to be considerate of that when going this route.
Another thing to note with European nightcrawlers is they will birth hatchlings at a slower rate than other species, so you won’t have as many worm babies right away. Since these guys are larger, you should expect about 300 to 400 worms per pound when you buy them.
Cost: $35–$40 per pound
Vermicomposting With African Nightcrawlers

African nightcrawlers are high-quality worms to use for vermicompost, as they are known for having better looking worm castings (as good looking as one could call worm poop), but they are also far more difficult to care for.
While their castings make them a popular option, African nightcrawlers require extremely hot temperatures in order to stay alive. They can begin dying off at 60°F (16°C), making them a poor choice for those who live in colder climates. Anticipate about 300 to 400 worms per pound.
Cost: $35 per pound
Vermicomposting With Indian Blue Earthworms

It is highly common for the Indian blue earthworms to be confused for red wrigglers due to how similar the species’ look. The Indian blue worm prefers warmer, tropical climates as opposed to colder, frigid climates.
One downside of using these guys in your compost is that they are highly sensitive to barometric pressure, so they commonly try to (and successfully) escape their worm bin with weather changes like hurricanes or thunderstorms. Indian blues are also harder to find and not as common in the U.S. If you can get your hands on them, expect 800 to 1,000 worms per pound.
Cost: $40–$50 per pound
Where Can I Buy Composting Worms?

So where can you buy composting worms? There are several ways to get your hands on vermicompost worms in bulk. You can order earthworms online or purchase them for a local retailer or worm farm.
Many worm farmers and retailers ship their worms, but you can also purchase them on site. Here are a few sources for purchasing your vermicomposting worms:

Planet Natural – Planetnatural.com
Planet Natural sells red wrigglers in bulk and will ship them directly to you. Your shipment will arrive in a cloth bag ready for you to use in your own worm composting bin. Planet Natural recommends that you use about 1,000 worms for areas up to 250 square feet and sells worms in groups of 250 to 4,000. You can order red wrigglers directly from their website.
Price: $35–$135 depending on quantity
Uncle Jim’s Worm Farm – Unclejimswormfarm.com
Uncle Jim’s Worm Farm sells several packages of vermicompost worms in bulk. They sell red wrigglers, European nightcrawlers, and mixed bags of composting worms in quantities from a mere 100 up to 2,000 worms. Each order is shipped and delivered straight to your door. You can purchase Uncle Jim’s vermicomposting worms on their website.
Price: $25–$70 depending on quantity

Local Pet or Hardware Stores
If you don’t want to order online, you can also purchase vermicomposting worms at your local pet or hardware stores.
You can buy common earthworm species like red wrigglers at these stores, however, it’s likely that they will come in smaller quantities than if you buy the vermicompost worms online and have them shipped to you in bulk.
Pet stores like Petco sell earthworms in groups of 45, while hardware stores like Cabela’s, Home Depot, or the Garden Center of Walmart typically sell them by the ounce.
If you buy your vermicomposting worms from a pet or hardware store as opposed to a worm farm, make sure the species is the right type for composting. These stores sell worms for many other purposes like fishing or feeding rodents, and not all earthworms are great for compost.
Price: $3.50–$5 per ounce
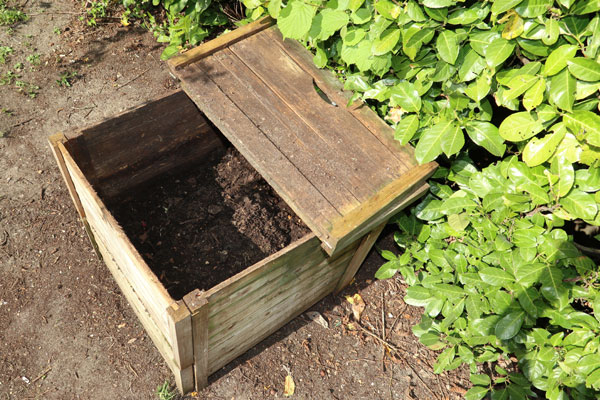
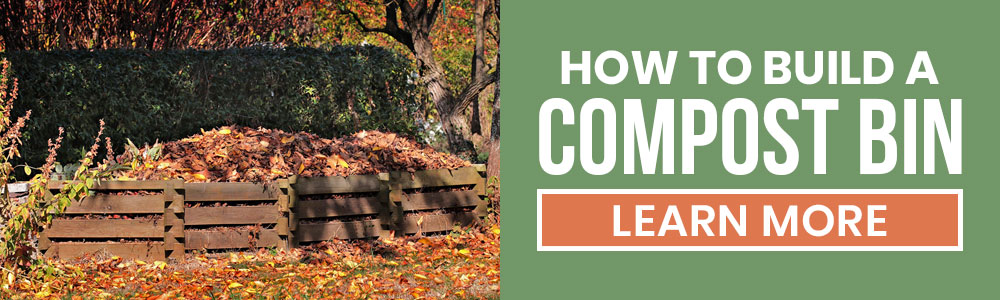
How To Build Your Own Worm Composting Bin

You can use most of the same materials and techniques when building a worm composting bin that you would use to build a traditional compost bin, but there are some specific elements to add when building a worm bin that are better for the health of your earthworms.
Features To Add To A Worm Bin
- Build a 12- to 20-gallon bin
- The bin should be dark
- Give your worm bin a lid
- Build a drainage mechanism
- Give your worm bin aeration holes
- Add 1-inch legs to your worm bin
- Add a tray underneath your worm bin
- Add bedding material
Read detailed instructions on how to assemble your very own DIY compost bin here.
Your Turn!
- How will you build the best environment for your vermicompost?
- What type of earthworms will you add to your compost bin?
Leave a Reply